MACRO: Get Screen Rectangle v1.1
Purpose:
To make it easy to grab the coordinates of a rectangle on the screen, optionally including the image inside the rectangle, and even saving the image to disk. A couple of utility macros can help you paste the results into a KM "Found Image" type of action.
Click to expand
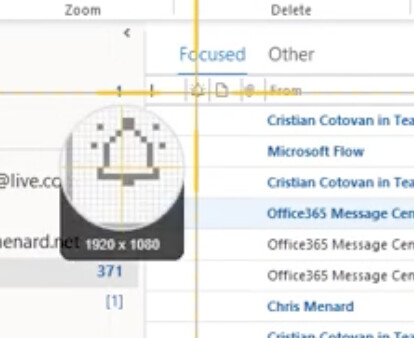
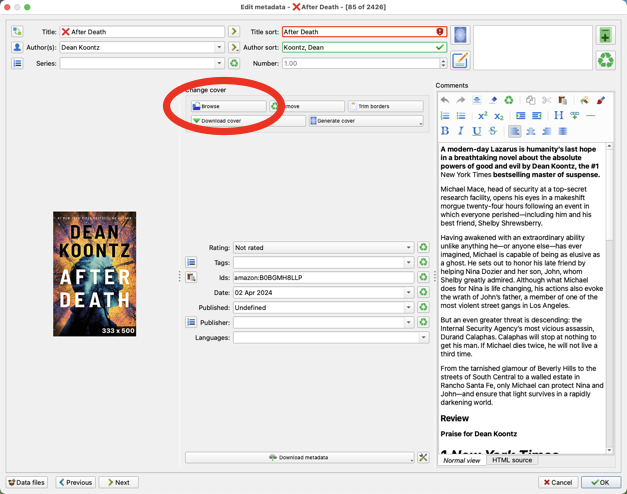
Let's say that you want to capture the screen location of this button, and maybe an image of the button also:
Launch my macro, then drag a rubber-band selection rectangle around the button. Release the mouse, and a a semi-transparent window appears (you can change the colors):

You can move and resize the window:

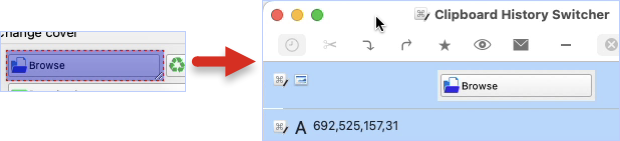
When you're ready, press the Return key, and the coordinates are copied to the clipboard. Optionally, the image is also copied to the clipboard (and you can even save the image to a file):
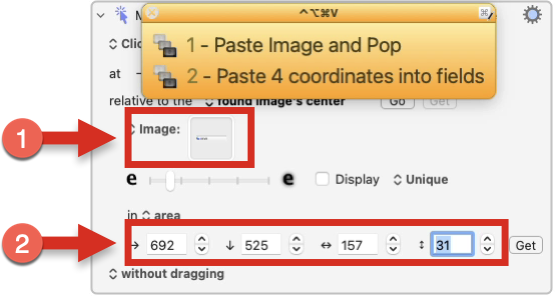
It's easy to paste the image and location into a KM action, especially with a couple of helper macros I supply:
There's other features too, including a timer to delay the start of the macro, so be sure to check the "Documentation" section below.
VERSION HISTORY
1.1 - Added parameters "RelativeToFrontWindow" and "AbortIfNotInFrontWindow".
1.0 - Initial Release
INSTALLATION
Click to expand
UPGRADE INSTRUCTIONS:
- Delete the old macros, or just delete the entire group.
- NOTE: If you modified the defaults in the "Get Screen Rectangle" macro, make sure to copy them somewhere, and paste them back into the new macro.
- Install the new macros.
- There should be no breaking changes.
Get Screen Rectangle.v1.1.kmmacros.zip (23.1 KB)
Download the macros, unzip them, and double-click the .kmmacros file. It will import these macros:
-
Get Screen Rectangle, which is the main macro. You can run it by itself, or as a subroutine so you can set the parameters.
-
Get Screen Rectangle Helper SubMacro, which is used internally.
-
1 - Paste Image and Pop and 2 - Paste 4 Coordinates Into Area Fields, which you should assign the same hotkey to so you can get them together in a conflict palette.
-
Show Palettes and View the Clipboard are simple helper macros, which you can delete if you don't want them.
DOCUMENTATION
I'm trying something new here. I normally include the documentation in a large Comments action in the macro. But it turns out that can significantly increase the size of the macros.
So for the macros with large documentation comments, I'm putting the documentation here, and the comments in the macros include a link to this page.
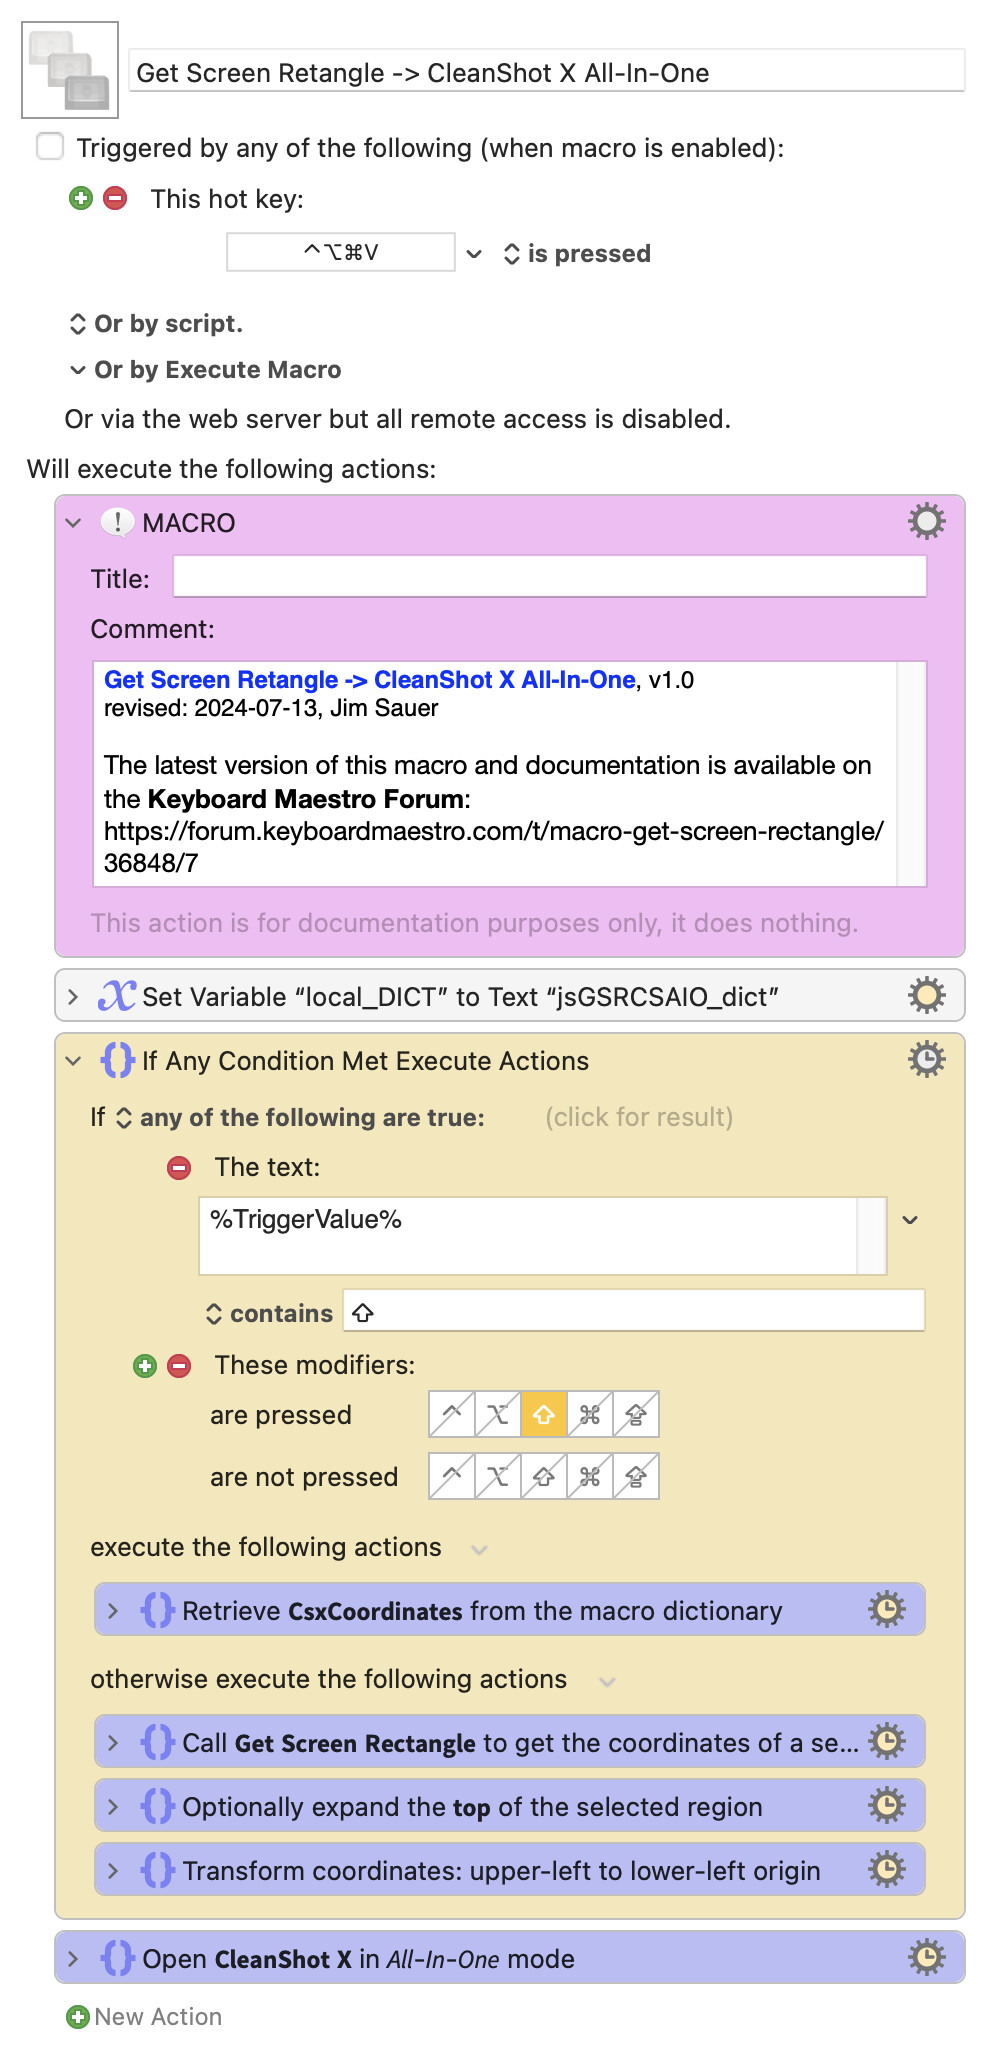
Get Screen Rectangle
Name: Get Screen Rectangle
Version: 1.1
Updated: 2024/07/09 05:55 PT
By: Dan Thomas
PURPOSE:
To make it easy to get the x, y, width, and height of a rectangle on the screen by displaying a semi-transparent window on the screen that you can drag around and resize.
NOTES:
-
You can run this macro directly if you want to use the default values. Or you can run this as a Subroutine if you want different values.
-
You can customize things like the window colors in the magenta "Defaults" action.
-
When the window is focused, it has a dashed border. If it's not focused, it has a solid border. So if you press Return or Escape (as explained below) and they don't do anything, click on the window to focus it.
-
If you're trying to capture the "front window", don't worry if the front window loses focus while setting up the rectangle - it will regain focus before the screenshot is taken.
USAGE:
-
Run this macro, and by default it will allow you to drag a rubber-band selection box on the screen. Release the mouse button, and a semi-transparent window will appear.
-
Drag the window around and resize it (resizing is easiest using the bottom-right corner) until you're at the place you want on the screen, then press the Return key.
-
When you press Return, "x,y,width,height" will be copied to the clipboard. Optionally the image can also be copied to the clipboard, and you can even save it to a file.
-
If you hover your mouse over the top-right corner of the window, an "X,Y" button will appear, and if you click it, the current coordinates and size will be displayed in the window. Click it again to hide the text.
-
You can press Escape to exit out of the window.
-
After pressing Return, you can use the "Paste 4 Coordinates Into Area Fields" or "Paste Image and Pop" macros, if you want. See them for more details.
RETURN VALUE:
Depending on the parameters (described below), if the image is saved to a file, the return value is the file path. Otherwise the return value is the rectangle coordinates (x,y,width,height).
PARAMETERS:
If you right-click this macro and select "Copy as Subroutine", you can paste it into another macro, and you can set these parameters:
| Parameter | Description |
|---|---|
| CopyImageToClipboard | Set this to 1 if you want the image under the window to be copied to the clipboard. It will be copied after the coordinates and size. |
| SaveImageToFile | Set this to 1 if you want to save the image under the window to a file. |
| DefaultSaveImageToFileName | If "SaveImageToFile" is 1, you can specify the default file name here. |
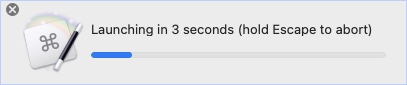
| StartTimeInSeconds | If this is > 0, the macro will delay this many seconds before starting. This gives you a chance to setup the screen beforehand. |
| CountdownWindow | If "StartTimeInSeconds" is > 0, set this to 1 if you want a progress window to be displayed ticking down the seconds. |
| CountdownWindowPosition | If "StartTimeInSeconds" is > 0 and "CountdownWindow" is 1, you can use this to indicate where the countdown window should appear on screen. This should be in the format "x,y" (without the quotes), and each value can be any valid KM calculation. The default is: SCREENVISIBLE(Main, MidX),SCREENVISIBLE(Main, Top) |
| HideKMPalettes | Set this to 1 if you want to hide your KM palettes before selecting the window rectangle. The palettes will automatically be un-hidden when you're done - even if you cancel out, or there's an error. |
| RelativeToFrontWindow | Set this to 1 if you want the coordinates to be relative to the front window. Just be aware that the "front window" isn't necessarily the window under your cursor, so make sure to activate the correct window before launching this macro. Which is why I added the AbortIfNotInFrontWindow parameter |
| AbortIfNotInFrontWindow | If RelativeToFrontWindow is 1, then set this to 1 if you want the macro to abort if your rectangle wasn't over the front window. This is just a failsafe to help you make sure you had the correct window focused when you ran the macro. |
VERSION HISTORY:
1.1 - Added parameters "RelativeToFrontWindow" and "AbortIfNotInFrontWindow".
1.0 - Initial version.
1 - Paste Image and Pop
Name: Paste Image and Pop
Version: 1.1
Updated: 2024/07/09 05:55 PT
By: Dan Thomas
PURPOSE:
A simple helper macro to paste what's on the top of the Clipboard stack, then delete it from the clipboard.
Although this macro says "Image" in its name, it can actually paste anything.
USAGE:
Click where you want the image pasted, then launch this macro.
NOTES:
-
This macro does NOT verify that the destination can take an Image, so make sure you're in the right place to paste the image. Especially since the image gets deleted from the clipboard, regardless of whether the paste succeeds or not.
-
I like to use the same hotkey trigger for this macro and "2 - Paste 4 Coordinates Into Area Fields", so when you use the hotkey, you get a palette that lets you choose either macro.
VERSION HISTORY:
1.1 - No Changes.
1.0 - Initial version.
2 - Paste 4 Coordinates Into Area Fields
Name: Paste 4 coordinates into fields
Version: 1.1
Updated: 2024/07/09 05:55 PT
By: Dan Thomas
PURPOSE:
A helper macro that takes a clipboard string like this "1196,229,158,30" and pastes it into the 4 "Area" fields in any KM Actions that use area fields.
USAGE:
Click in the first "Area" field, then launch this macro.
NOTES:
-
This macro does a "Select All" at the start, then verifies that what's selected is a number. This is to help make sure you ran this macro when the cursor is in an "Area" field.
Since that's not foolproof, you can press "Escape" to abort the macro, if you do it quickly enough.
And because of possibilities like the above, this macro does NOT delete the coordinates from the clipboard. -
I like to use the same hotkey trigger for this macro and "1 - Paste Image and Pop", so when you use the hotkey, you get a palette that lets you choose either macro.
VERSION HISTORY:
1.1 - No Changes
1.0 - Initial version.