@xsmk, glad you like it. Thanks for the comment.
Thanks for pointing that out. When I repost this with a few refinements, I'll add that comment.
@xsmk, glad you like it. Thanks for the comment.
Thanks for pointing that out. When I repost this with a few refinements, I'll add that comment.
For the sake of argument, let's say that the shortcuts that you have me set my mission control shortcuts to are taken (these guys):
Switch to Desktop 1 .. 9 ⌃⌥⌘1 .. ⌃⌥⌘9
Switch to Desktop 10 .. 16 ⌃⌥⇧⌘0 .. ⌃⌥⇧⌘6
Digging around the various macros in the bundle of 9.... I found *Switch of Text “%Variable%local__dnTarget%” sections to be the only thing referencing those short cuts. Assuming I go update that section, in each of the 9 macros, are there any other places that I need to go update to make match the shortcuts that I did set my "Switch Desktop" commands to?
i.e.
If it is “1”, Execute the Following Actions:
- [image]Type the ⌃⌥⌘1 Keystroke[image]
If it is “2”, Execute the Following Actions:
- [image]Type the ⌃⌥⌘2 Keystroke[image]
If it is “3”, Execute the Following Actions:
- [image]Type the ⌃⌥⌘3 Keystroke[image]
If it is “4”, Execute the Following Actions:
- [image]Type the ⌃⌥⌘4 Keystroke[image]
If it is “5”, Execute the Following Actions:
- [image]Type the ⌃⌥⌘5 Keystroke[image]
If it is “6”, Execute the Following Actions:
- [image]Type the ⌃⌥⌘6 Keystroke[image]
If it is “7”, Execute the Following Actions:
- [image]Type the ⌃⌥⌘7 Keystroke[image]
If it is “8”, Execute the Following Actions:
- [image]Type the ⌃⌥⌘8 Keystroke[image]
If it is “9”, Execute the Following Actions:
- [image]Type the ⌃⌥⌘9 Keystroke[image]
If it is “10”, Execute the Following Actions:
- [image]Type the ⌃⌥⇧⌘0 Keystroke[image]
If it is “11”, Execute the Following Actions:
- [image]Type the ⌃⌥⇧⌘1 Keystroke[image]
If it is “12”, Execute the Following Actions:
- [image]Type the ⌃⌥⇧⌘2 Keystroke[image]
If it is “13”, Execute the Following Actions:
- [image]Type the ⌃⌥⇧⌘3 Keystroke[image]
If it is “14”, Execute the Following Actions:
- [image]Type the ⌃⌥⇧⌘4 Keystroke[image]
If it is “15”, Execute the Following Actions:
- [image]Type the ⌃⌥⇧⌘5 Keystroke[image]
If it is “16”, Execute the Following Actions:
- [image]Type the ⌃⌥⇧⌘6 Keystroke[image]
Thanks!
Geoff
@Geoffrey_Blotter, no guarantees, but I think you have identified the only change required. I'm sure you noticed that this Switch/Case macro action is distringuished by the purple color. So if you modify the keystrokes within one macro, you can copy that modified Switch/Case action and paste it in the other eight macros (of course also discarding the original Switch/Case actions in each of the eight target macros). The copy-and-paste technique will greatly minimize the work and reduce the probability of an improper modification.
You're a gem for pointing that out, thanks!
I'll make that change and try and report back if that was the only place or not, for documentation purposes. Thanks @_jims!
Out of curiosity, and a fear of making unintended downstream impacts... Can I ask why the first step is to go remap default keyboard shortcuts for switching to different Desktops? i.e. why not use the default values?
Thanks again for making this killer set of macros 
Yes, this seems like a bit of a pain, but there is a good reason.
These macros track the current and previous desktop space number (1 to 16). This, however, can only be done reliably if desktop navigation is done exclusively using one of the nine macros. That is, if one were to change spaces using one of the macOS native Switch to Desktop N (1 to 16) shortcuts (or a trackpad gesture), the current and previous values would be temporarily incorrect. That's why users should use the Go to Desktop N macro rather than the native macOS Switch to Desktop N shortcuts to change desktop spaces. The key remapping suggested in the Quick Start (more complex key combinations), and the macro hot keys used in the nine macros (more intuitive key combinations) encourage this behavior.
Here's some related information...
Within Keyboard Maestro, macro-initiated desktop space changes can only be accomplished with the Type a Keystroke action. That is, Keyboard Maestro does not provide change desktop actions. This is for good reason: Apple does not provide a corresponding public API. Due to the missing API, desktop space changes also cannot be done with an AppleScript or a shell script.
Finally, Keyboard Maestro does not provide a token or action to determine the current desktop space. Same reason: no API. Thus, a third-party tool named WhichSpace is used in the macros (via AppleScript) to determine the current desktop space.
@seishonagon, I was never able to reproduce the issue you identified; nevertheless, I implemented your change into v1.1 of the macros.
Thanks again!
@xsmk, I added this comment into a Read Me First file that is downloaded with v1.1 of the macros.
Thanks again for your feedback!
I've updated the Desktop Spaces • Macros for Navigation and Window Management macros to v1.1. I've also simplified the installation process.
The macro changes are somewhat minor; if you have previously installed the macros and they are working as expected, you can ignore the updates.
See the Version History for more information.
Makes complete sense. Thank you for the thoughtful reply.
When I attempted to install the macros, for simplicity I decide to only do Step 5.a. and omit the optional steps 5.b and 5.c.
Nothing worked. Nada.
I started poring over the macros, trying to trace out the problem and got nowhere. Then I noticed that the .sys Desktops folder was greyed out in the KBM editor. Huh? I distinctly remembered the instructions saying that it was installed in an "ENABLED" state.
Oh! The text says that each of the macros will be enabled. And Lo! And Behold! There's Step 6 as a single line, hiding under the palette screenshot, camouflaged as an image caption. Clearly the instructions are correct, but subject to misinterpretation (at least for one data point).
May I suggest that in Step 5a, where you say,
that you also say, "The .sys Desktops groups is initially disabled and will be enabled in Step 6."
Thanks.
@August, thanks for the feedback. I've removed Step 6 and modified Step 5a:
[ Required Step ] Open subfolder 1 - Required. Double-click 9 Primary Macros.kmmacros to install the primary macros. Note that the macros will individually ENABLED; but the macro group .sys Desktops will be DISABLED. When ready to use the macros, enable this group.
If you encounter any issues, I strongly suggest you do Step 5b—WhichSpace is really a handy tool even if you aren't using these macros.
Also, for single-hand operation, the Conflict Palette (Step 5c) will really be helpful. As you become more familiar with the mechanics, you might choose to operate some (or all) of the underlying macro directly (i.e., without the Conflict Palette).
Thanks. I've already installed them.
I'm confused about how many different hotkeys there are for each Desktop/Workspace and why, and what might happen if I change them.
In System Preferences > Keyboard > Shortcuts > Mission Control there is a hotkey set for Desktop 14. Following the above installation instructions, I changed that to Control+Option+Shift+Command+4. I didn't think that would be a problem.
But it turns out that Control+Shift+Command+4 is used to move a window to Desktop 14. Feh!
Shift+Command+4 is the system hotkey to grab a screenshot of either an area on the screen or a whole window, that choice toggled by the spacebar. It gets saved on the desktop. However, if you add Control to the hotkey, Control+Shift+Command+4 saves the captured image to the system clipboard instead. That's very useful. I now use that version more that the saved file version.
But these desktop spaces macros break that. There is not any menu option to any standard app that does the function that Control+Shift+Command+4 does.
My original idea was to simply remove the hotkey macros and rely on the Conflict Palette instead. But the way the macros are organized, the conflict palette uses the hotkeys to execute the action. The various hotkeys all trigger the same macro and the macro decides which window to go to depending on the trigger value. The various Conflict Palette options simple each generate the corresponding hotkey which then runs the actual macro. So to use only the Conflict Palette would require a complete reorganization of that, which seems prohibitively complicated.
Has anyone else encountered this, and if so, what did you do about it?
Hi @August. As for the why, please refer to one of my above comments.
After reading the above comment, you probably understand why that change, made along, caused a problem. If you made the necessary changes within the macros to accommodate your change, then everything would work. That would be some work, but if you want to try, I'd be happy to help.
I have a suggestion:
(As you can see, I don't use the default screenshot shortcuts. That's because I use another tool called CleanShot X. It's part of Setapp.)
Then use and evaluate the macros for a day or two and decide:
they are not worth the trouble; discard them and restore your screenshot settings, or
if you decide they are helpful, then you have two choices: a) retrain your muscle memory for screenshots and leave the macros as is, or b) make the necessary changes to the macros as I mentioned above.
Yes, the optional palette leverages the underlying macros, it does not replace them. But it also helps as you are learning the hot keys that trigger them. It is intended for beginners and occasional users.
Maybe, but no one before you has mentioned it to me.
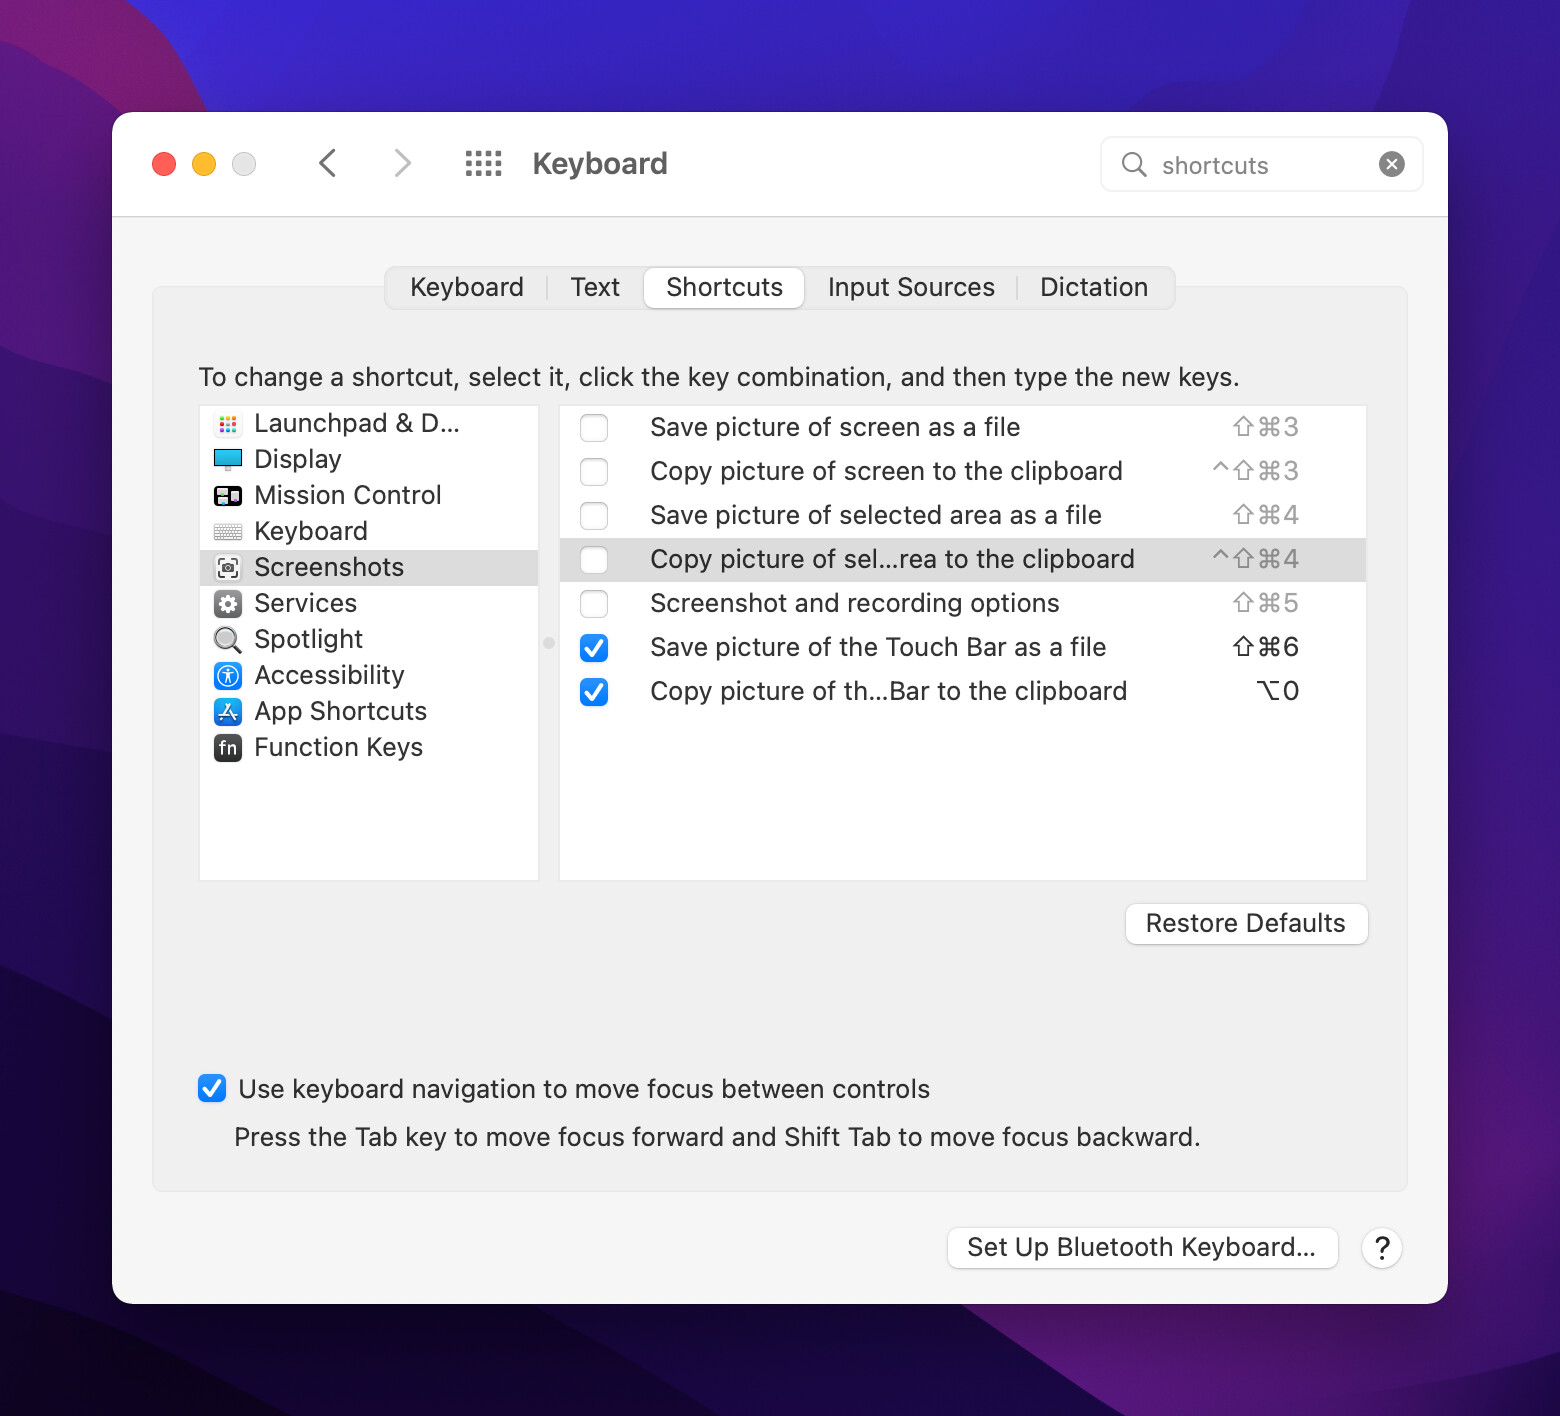
Thanks! I had not seen the Screen Shot shortcuts list before. The whole Shortcuts menu has been reorganized; it used to be all one list and now it's several.
As for getting used to your system, I'm contemplating what it will take to use these ideas/principles/structures to switch desktops using my CurrentKey naming instead of the OSX Mission Control numbers. The useful thing to me that with the named "Rooms" (as distinct from Desktops because of the extra level of abstraction), I can rearrange the order of the desktop to put the ones I'm working with right next to each other so that I can go back and forth with Ctrl+[Left|Right]Arrow.
Using CurrentKey Naming also lets me use hotkeys or Conflict Palette entries that are mnemonic, V for Video, T for To Dos, Q for Queued Tasks, F for Facebook, K for KBM, etc. And those letters have nothing to do with the order of the desktops within Mission Control.
If you only have four or five desktops, it's easy to memorize what you have where by position. But with more than seven or maybe nine, you're very likely going to need mnemonics to keep track of them. With 16 it's a certainty.
I tried the Screenshot and Recording Options hotkey, by default Shift+Command+5, thinking it might be a one-stop shop that could have one hotkey for all the different screencapture options. No luck. In fact, it broke my computer!
See Screenshot highlighted box doesn't go awa… - Apple Community for details. I'm going to try the recommended Safe Boot fix now. Feh!
Wow, that sounds like an odd macOS bug. Seems like a Safe Boot would be a good step to take. If for some reason you can’t use the System Preference, you might be able to use a Terminal command to change the setting.
What version of macOS are you using? What Mac model?
I don't know that I have the same bug as reported in that Apple Support item. It sounded exactly the same, except that I didn't try rebooting, so I don't know that a normal reboot would not make it go away. I was on the verge of trying that, but I was slow to do that -- I hate having to reboot because all my open windows from all my desktops, except TextEdit, Finder, and Terminal, end up being restarted in Desktop1. I was finally able to make it go away without rebooting by opening the ScreenShot control panel with Shift+Command+5 and noticing that there was a button that said "Stop Recording". I had not knowingly started a recording, but when I clicked that button, the highlighted box went away. I also found a .mov file on my desktop that was nearly 2 gigabytes with over four hours of screen recording of the contents of that box, as various app windows came and went, as I changed desktop workspaces, etc. So it's fixed.