Drag/Drop using KM is easy to do with Move Mouse action (drag/drop). The challenge is usually the locations for the mouse movement. This can be done using Find Image on Screen action, which is an option on the Move Mouse action.
However, it would be much better if you could perform the operation by other means -- using menus for example. If you can use menus, then the KM Select or Show a Menu Item action would be the way to go.
For more info, please post the app (and its version), and screen shots of the region of the screen that shows where you need to drop the files. Also, find out if you can copy the file, then click on the target area in the app and do a paste. This would be much easier to script.
Thanks for the input. I will try to read up and make sense of your suggestions.
Meanwhile, to answer your questions.
The application to drag to is Logic Pro X.
Dropping would be from finder items.
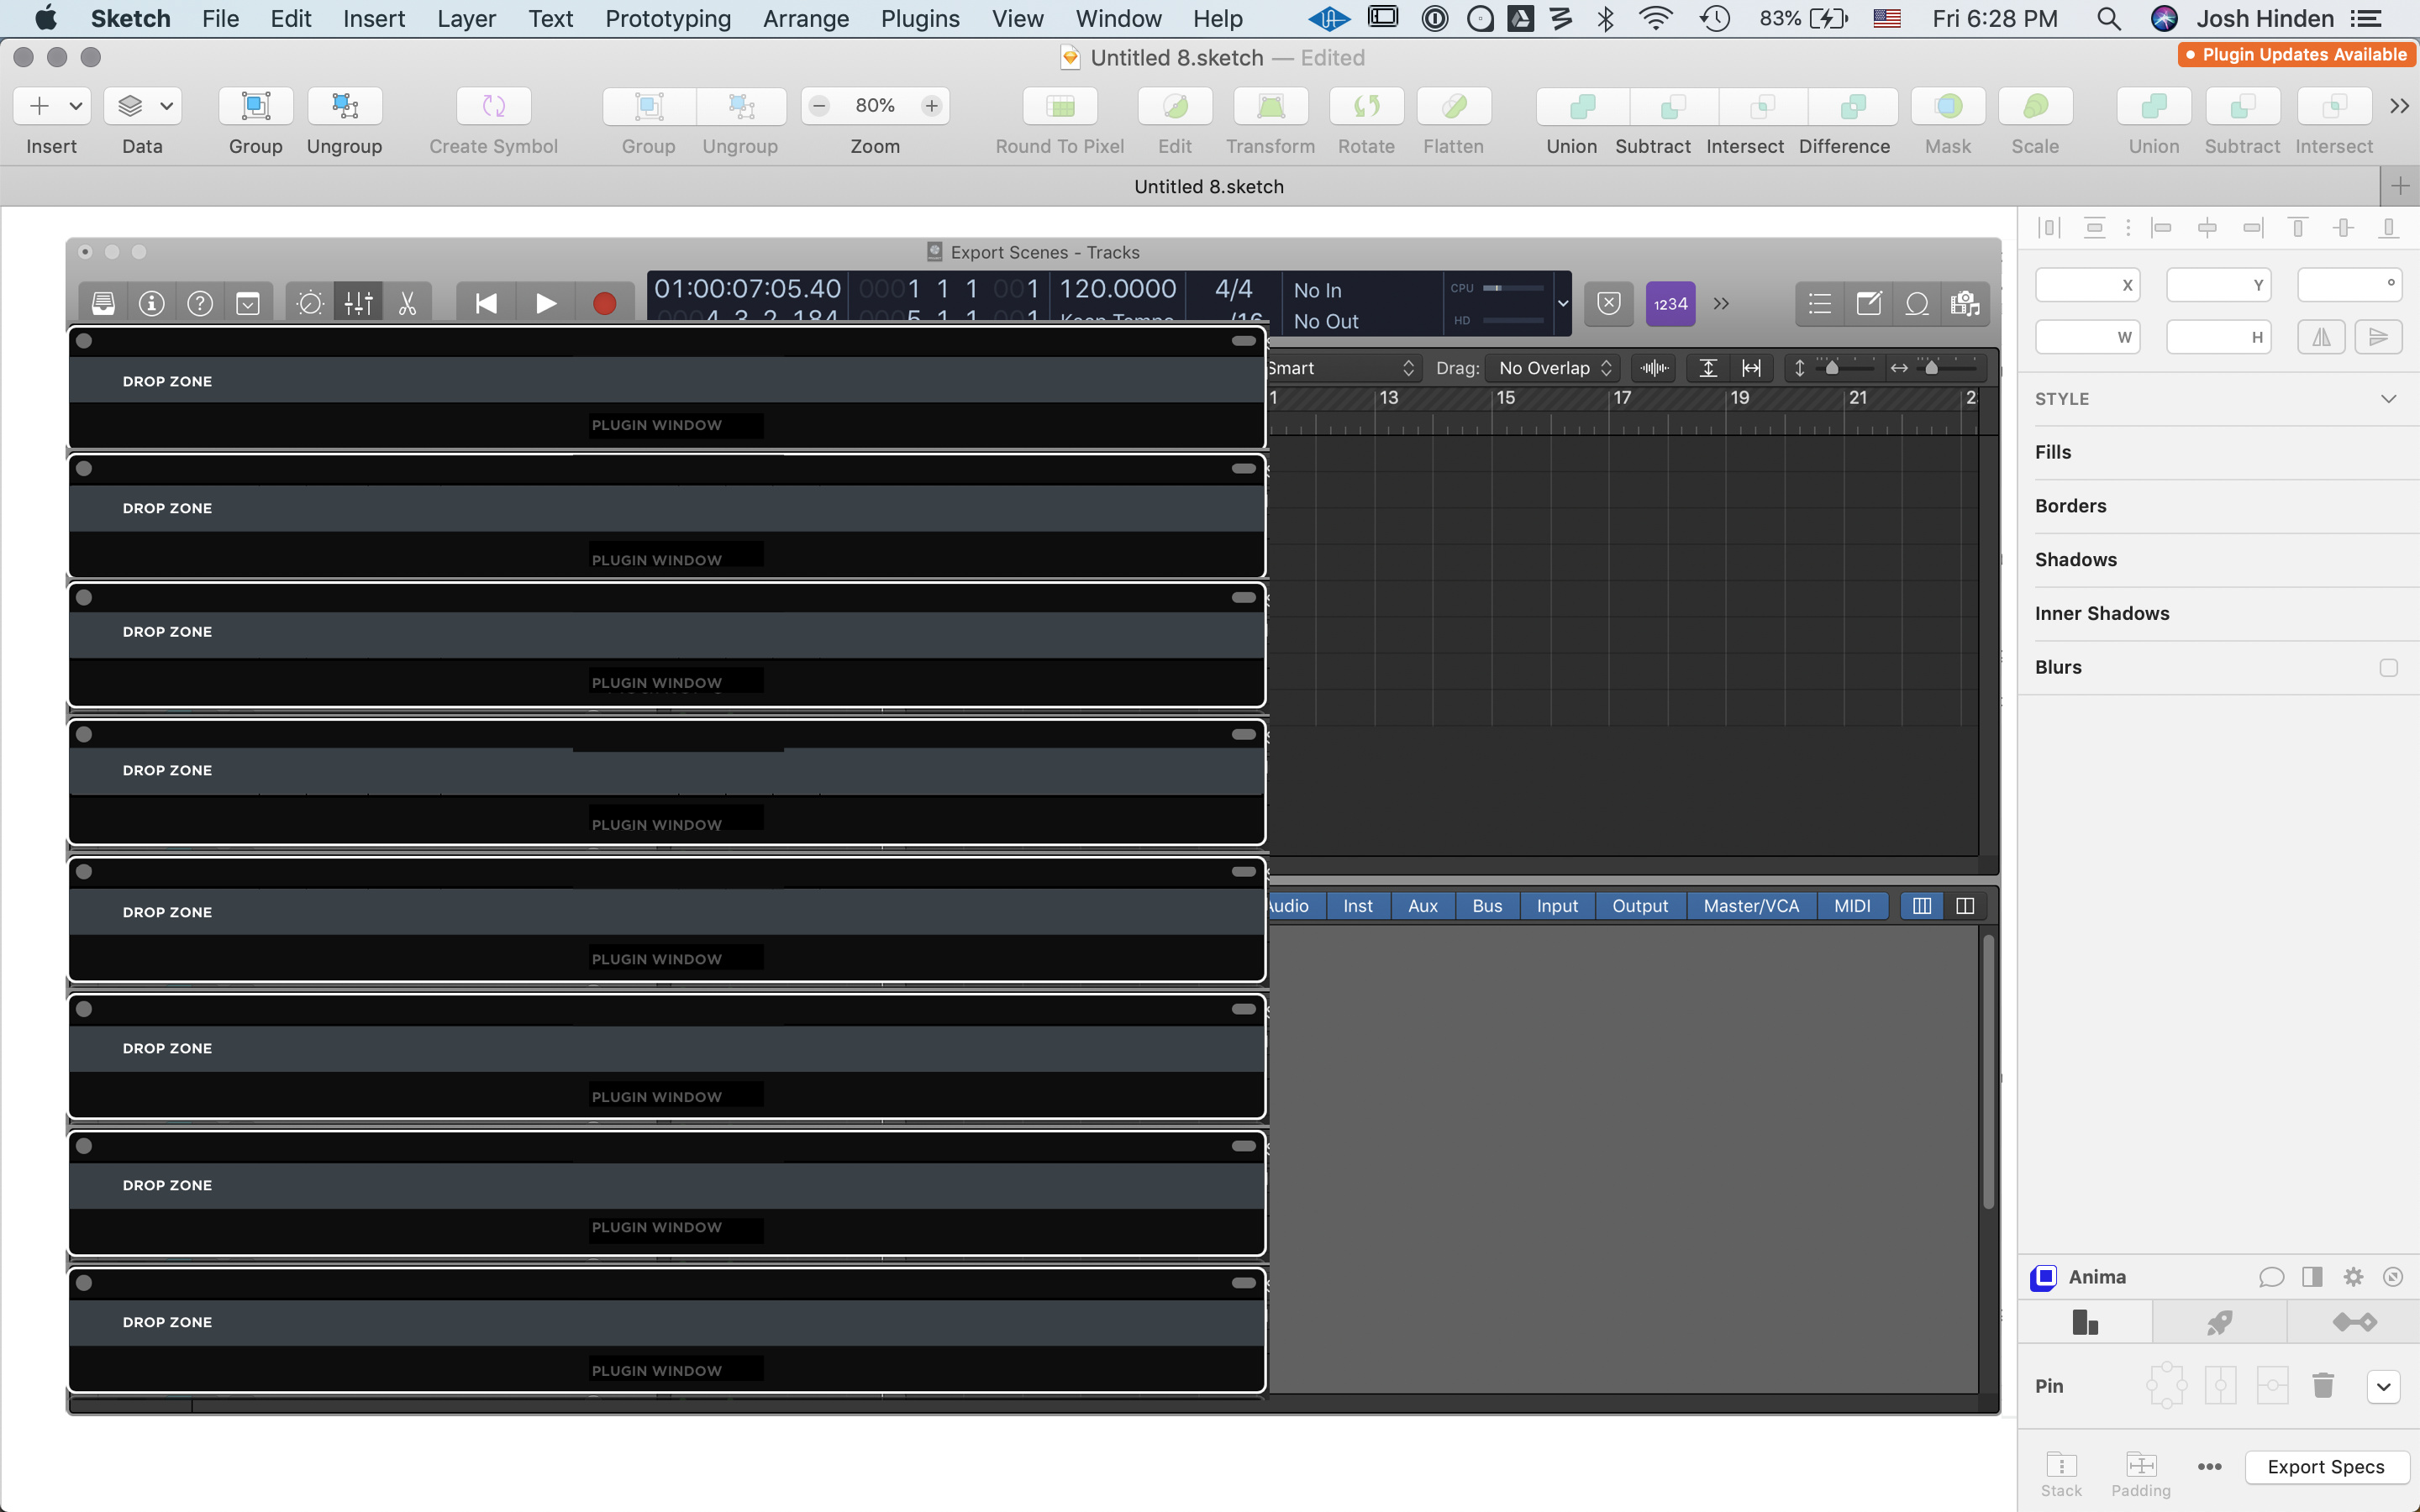
The file would need to be dragged to 8 identical instances of a plugin window within Logic X, stacked vertically like in the attached picture (so only the y-axis needs to change)
Unfortunately, I don't believe there is a way to access the menus as they don't belong to Logic X.
I also don't believe copy/paste is an option, but will try it.
Here is a mockup (I can't post the actual screenshot picture).
Well, that's a challenge. Here's an untested idea. It is not complete, and may (probably) contain design flaws. It is intended just as a guide to help you develop the actual workflow/macro. Please feel free to ask questions about anything you don't understand, or believe is wrong.
Setup (do once)
set FinderHeight (use the KM Set Variable to Text action) to the height of each Finder Item. (you can use the macOS screen capture tool to measure this).
set dropZoneVert to comma separated list of the vertical distance from the LogicProX top left window to the middle of each drop zone.
This should be in this format: 100,200,300,400,500,600,700,800
set dropZoneHoriz to horizontal distance from Window TL to a point well within the drop zone (should be the same for all DZ)
Workflow Process
Select manually with the mouse the first Finder Item, and Trigger the below macro.
set NumItems to number of Finder files to drop (could get from AppleScript or may KM filter action)
Set mousePos to current Mouse position using MOUSEX function and MOUSEY function.
Use a KM For Each action from 1 to NumItems, with a loop variable of "i"
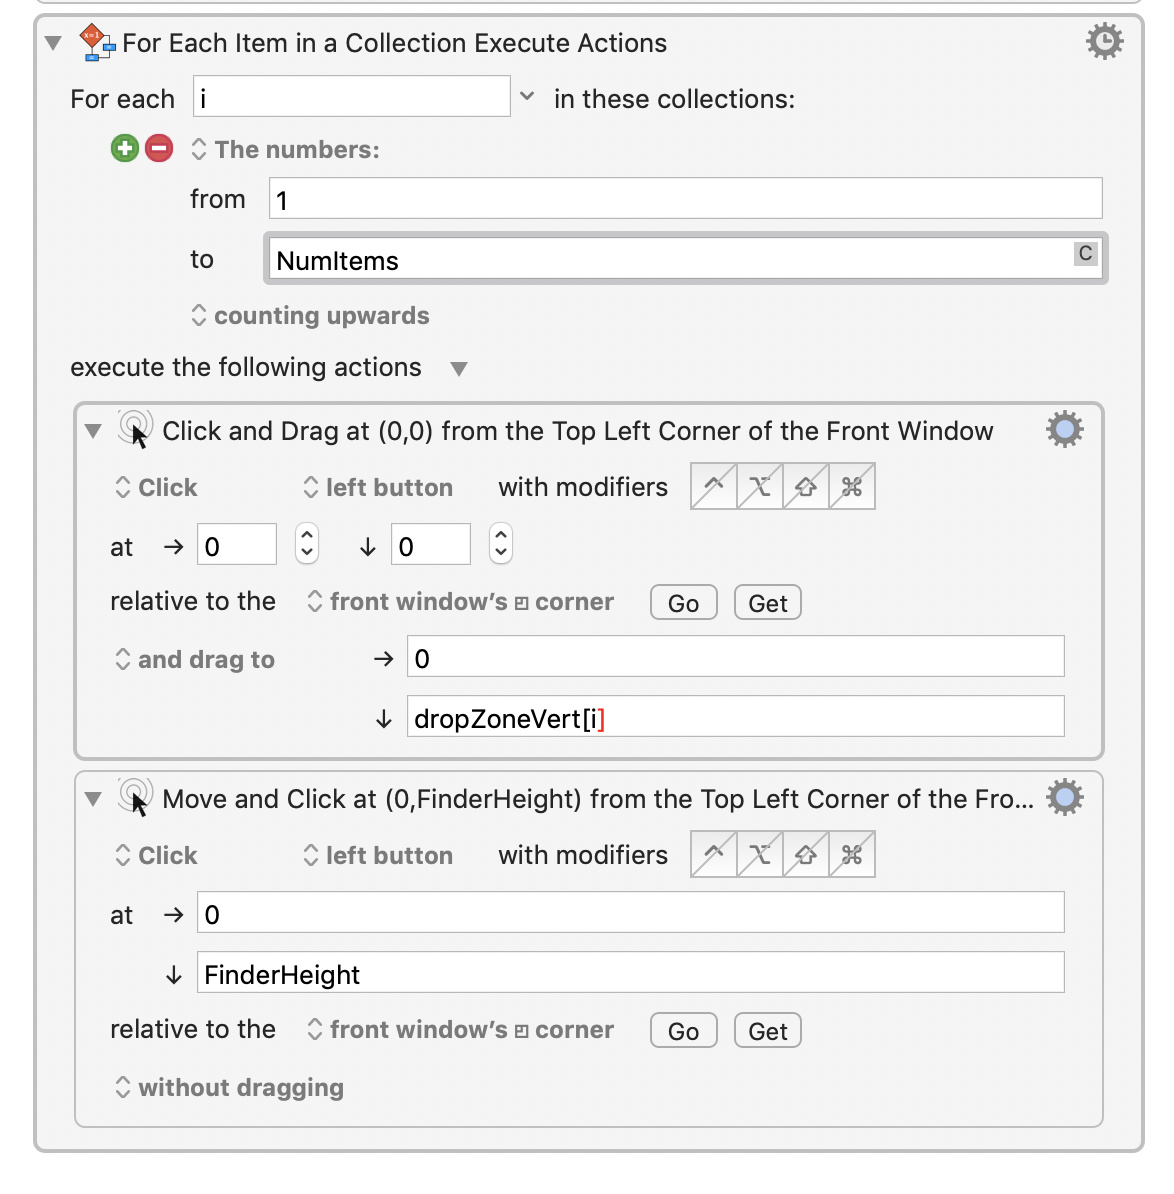
Thank you. I've tried to follow along, and I got a bit lost at setting the For Each action with loop variable i:
Would you let me know what I've done wrong? Thanks.
Use a KM For Each action from 1 to NumItems , with a loop variable of " i "
You did a good job -- very close.
Here's my revised macro, tested using Finder and an Evernote Window with just 3 files. It seems to work fine.
I changed/added the Actions in yellow.
I made dups of the Actions in magenta and change the values for my test case.
I'd suggest that you test with only a few files (like 3) and a few Drop Zones (like 3) to see how it works.
Let us know if this works for your and/or if you have more questions.
MACRO: Drag finder items to location in logic pro
#### DOWNLOAD:
<a class="attachment" href="/uploads/default/original/3X/1/7/176e522cade878aa98cf06f76af6c09dc27c3fad.kmmacros">Drag finder items to location in logic pro.kmmacros</a> (8.8 KB)
**Note: This Macro was uploaded in a DISABLED state. You must enable before it can be triggered.**
---

I just realized a flaw in my design.
Inside of the For Each I on the number of files, you need another For Each on the number of drops zones.
I’m away from my Mac right now, but when I get back I’ll fix it.
OK, here's my revised macro that fixes that flaw, but it still is just an example.
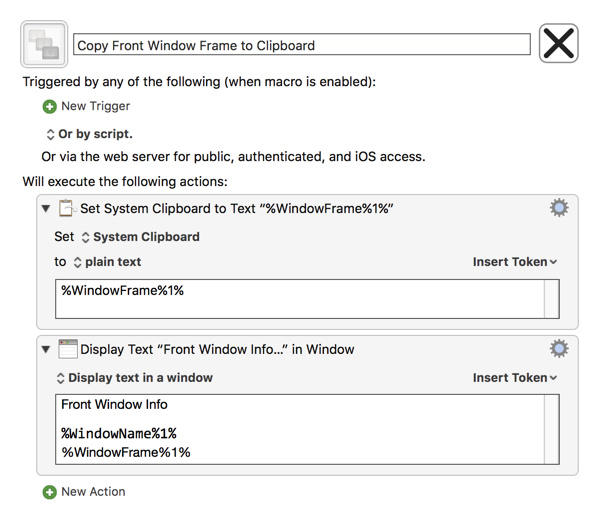
I have also automated getting the LogicPro window frame coordinates.
It is now much more complicated, and thus more opportunities for design flaws and bugs.
==Please TEST thoroughly on a few files before you use in production.==
As always, please feel free to post questions, issues, suggestions about this macro.
MACRO: Drag finder items to location in logic pro [Example]
#### DOWNLOAD:
<a class="attachment" href="/uploads/default/original/3X/2/e/2e74fa4e278afb32a2ce843d74ed96ff61c7250b.kmmacros">Drag finder items to location in logic pro [Example].kmmacros</a> (28 KB)
**Note: This Macro was uploaded in a DISABLED state. You must enable before it can be triggered.**
---
### ReleaseNotes
Author.@JMichaelTX
**PURPOSE:**
* **Drag/Drop Finder Files to Another App**
**REQUIRES:**
1. **KM 8.2+**
.
2. **macOS 10.12.6 (El Capitan)**
* Will probably run in Mojave, but I make no guarantees. :wink:
**NOTICE: This macro/script is just an _Example_**
* It has had very limited testing.
* You need to test further before using in a production environment.
* ==It does not have extensive error checking/handling.==
* ==It may not be complete. It is provided as an example to show you one approach to solving a problem.==
**How To Use**
1. Open Finder Window so that all files to be drag/dropped are visible
2. Open Receiving App so that all Drop Zones are visible
3. Make sure all setup is complete as listed below.
4. Trigger this macro.
* It will then bring the window of the Receiving App FrontMost so that the Window Frame can be recorded.
* The Finder Window will be made FrontMost
* A Prompt is displayed for you to click in the First Finder File
* and the Press OPT-RETURN to continue
* The macro will then drag each File to each of the Drop Zones
* You must have added KM Actions to process each file after all of it's Drag/Drops have been completed.
**MACRO SETUP**
* **Carefully review the Release Notes and the Macro Actions**
* Make sure you understand what the Macro will do.
* You are responsible for running the Macro, not me. ??
.
1. Assign a Trigger to this maro..
2. Move this macro to a Macro Group that is only Active when you need this Macro.
3. ENABLE this Macro.
.
* **==REVIEW/CHANGE THE FOLLOWING MACRO ACTIONS:==**
(all shown in the magenta color)
* Set the data for all of these:
* FinderHeight, Number of Finder Items,
* Vertical distance from Top Left of App Window to Each Drop Zone, in a comma separated list
* Horizontal distance from Window to the Drop Zones (one value)
* Text that will be in name of Receiving App Window
* The Receiving App to be Activated
TAGS: @Drag/Drop @Finder
USER SETTINGS:
* Any Action in _magenta color_ is designed to be changed by end-user
ACTION COLOR CODES
* To facilitate the reading, customizing, and maintenance of this macro,
key Actions are colored as follows:
* GREEN -- Key Comments designed to highlight main sections of macro
* MAGENTA -- Actions designed to be customized by user
* YELLOW -- Primary Actions (usually the main purpose of the macro)
* ORANGE -- Actions that permanently destroy Variables or Clipboards,
OR IF/THEN and PAUSE Actions
**USE AT YOUR OWN RISK**
* While I have given this limited testing, and to the best of my knowledge will do no harm, I cannot guarantee it.
* If you have any doubts or questions:
* **Ask first**
* Turn on the KM Debugger from the KM Status Menu, and step through the macro, making sure you understand what it is doing with each Action.
---

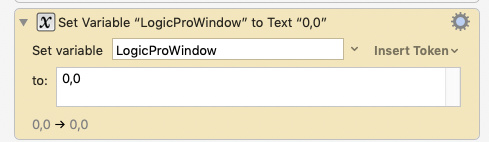
Hi there, I just wanted to follow up. The 'Get Window Frame action seemed to not be working properly, so I simply set it that variable to 0,0 and put the window up against the top always in the same spot and things seem to work!
I removed the extra stuff that was specific to my task and uploaded from within the app. Hope i did that right! I will paste it here in case if I can sort out how :. Thanks again for all your help. Going to buy now and start doing some work with it! ) Drag finder items to location in logic pro [forum Example].kmmacros (29.9 KB)