When a HEIC image file lands in my downloads folder, is it possible to get Keyboard Maestro to automatically convert the file to a jpeg?
Hey Ross,
Yes.
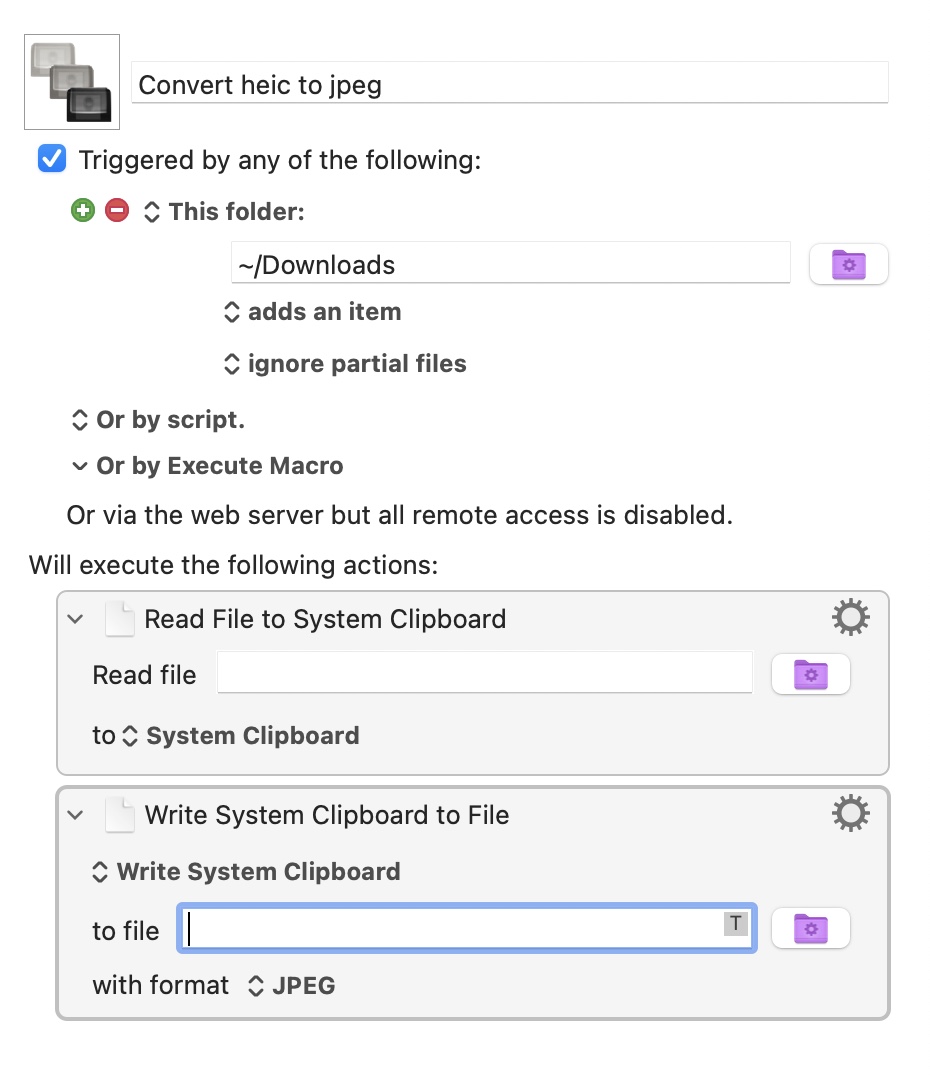
- Folder trigger.
- Read a File action.
- Write to a File action
Keyboard Maestro can't directly convert the file, but you can read it to the clipboard and write it back out as a jpeg.
If you want more control you can always install a command line utility like ImageMagick.
-Chris
1 Like
Many thanks for reply. I've got as far as attached – but how can I read any HEIC file that lands in downloads?
“The %TriggerValue% text token contains the path of the file that was added or removed (prior to 7.1 this was only the file name, not the full path).”
Use %TriggerValue% in the read file path field.
1 Like
And also remember to add some logic, so the process of saving as jpeg only happens for heic files.
Otherwise you could download a 1 GB dmg-file, which is read to the clipboard and tried to save as a jpeg.
2 Likes
Below shortcut works if I drag and drop a HEIC file into Downloads from elsewhere on my Mac. But if I airdrop a file from iPhone into Downloads, it fails with error in below screenshot. Is there a way for it to work with files that have landed in Downloads via airdrop from iPhone?
Also, it only works on single files. How can I get it to work on multiple HEIC files?
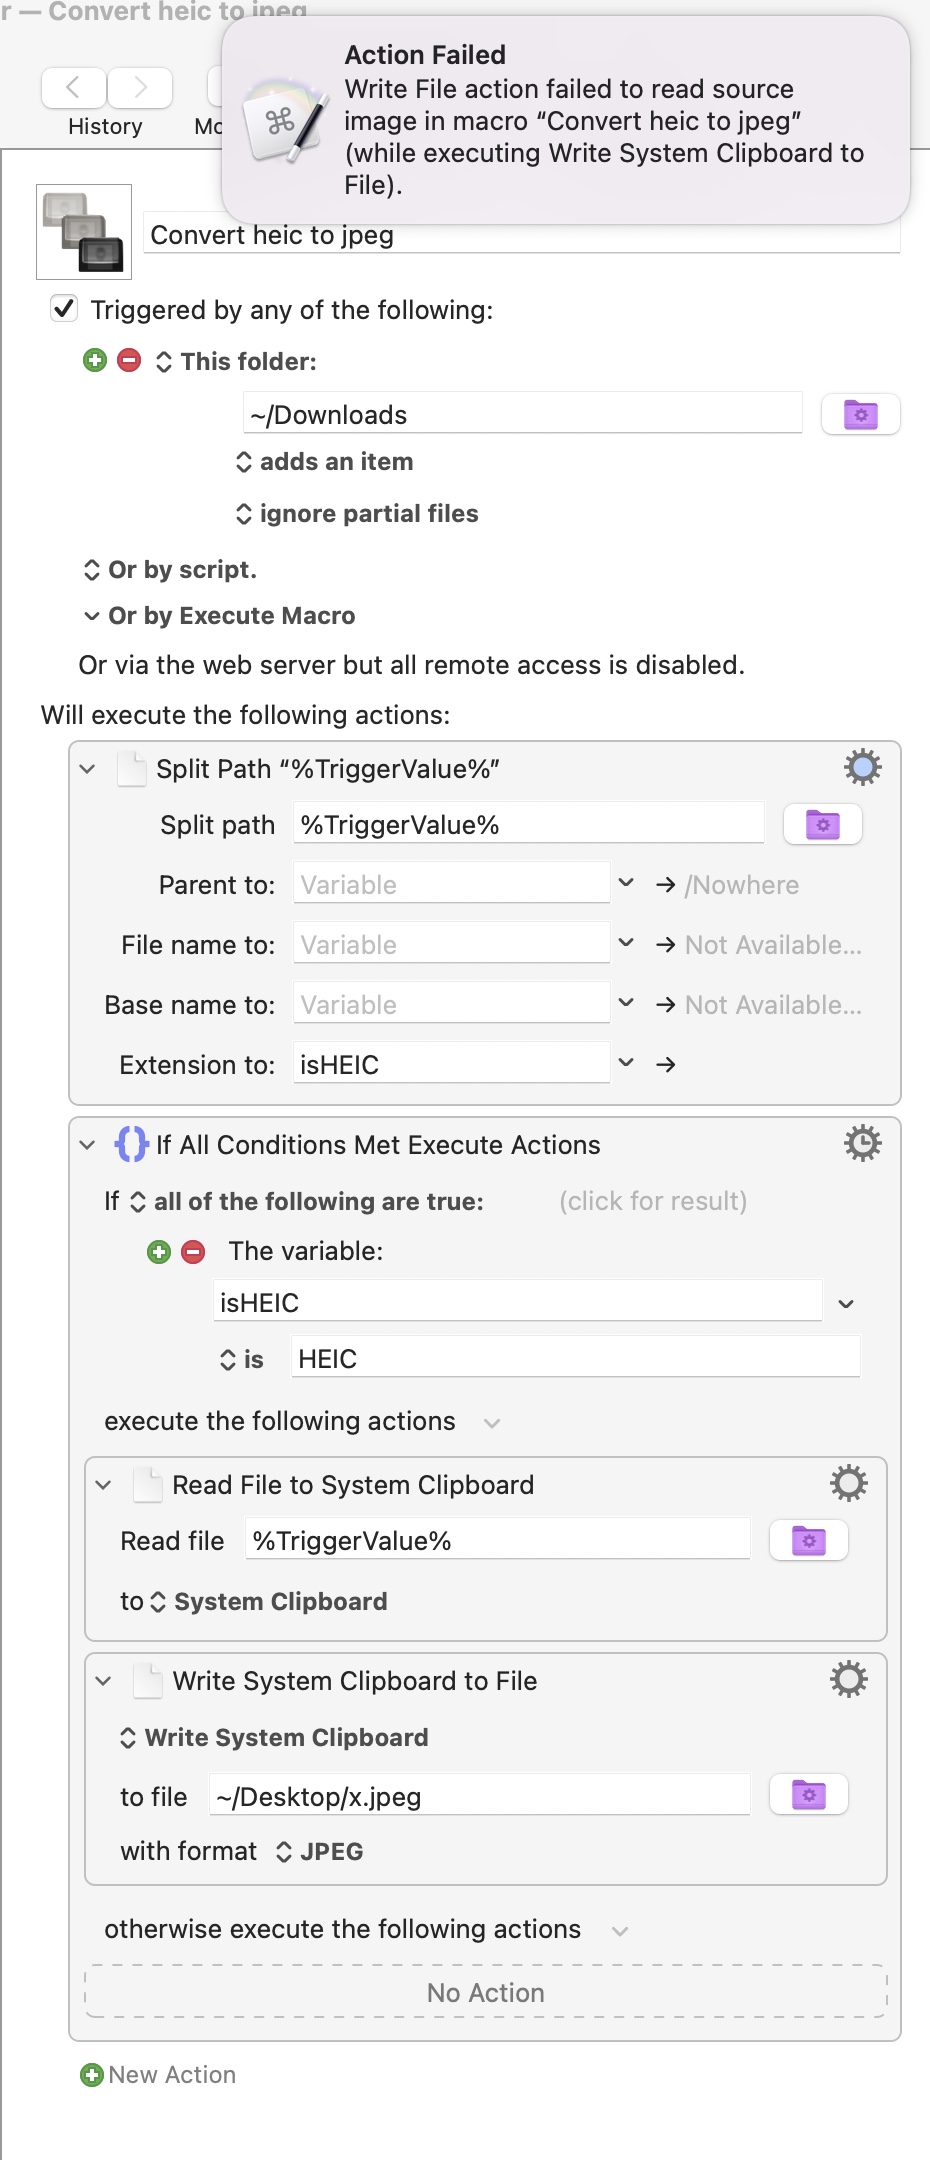
Try to display the triggervalue in a window. I have sometimes experienced a temp-file when recieving files which was called the extension, but not fully written yet.
And if for some reason KM thinks the file is done (even though "ignore partial files" is checked), then this could be the problem.
1 Like
Adding a 1 second pause seems to have fixed it.
How can I get it to work on multiple HEIC files? Assume a For Each action is needed?
1 Like
As I see it, then it should work on since every new file should trigger the macro to run each time.
So I can not see why it does not trigger on each file.
Only the last file to be uploaded is saved as a jpeg. Think this is because the 'Write System Clipboard to File' action only outputs a single file path
Ahh. Of course.
In the Split Path set a variable name in Base Name:
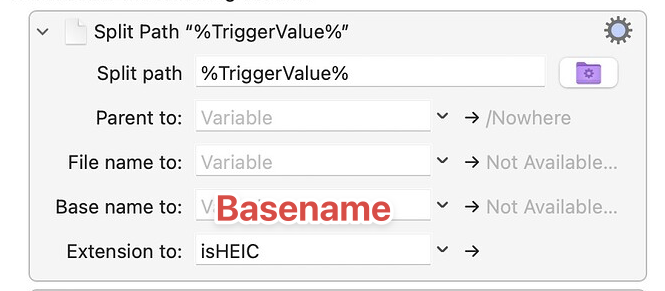
And then set the path in Write System Clipboard to:
~/Desktop/%Basename%.jpeg
That still only outputs a single jpeg. Do I need a For Each action?
What is the name of the output file?
The two files transferred to Downloads folder are these:
IMG_2663.HEIC
IMG_2664.HEIC
The first file to be added to Downloads folder is converted to a jpeg, and so this is the output file:
IMG_2663.jpeg
I think I know why it fails. The reading of files add happens very fast. And the macro puts each input file into the clipboard. But file two overwrites the clipboard before it is done with file one.
So I have made a macro which uses a built in command line tool called sips.
So this will trigger for each file added to the download folder.
I use the convention of making the variables only to exist in the scope of each run of the macro, so when adding multiple files, the macro can run multiple times at the same time. That is why they are prefixed with Local__
If you want you can enable the last action, which will move the inputfile to the trash.
HEIC from Download to JPG on Desktop Macro (v10.0.1)

Not sure how I've been using a Mac this long and not encountered sips before. Thanks for posting that. Doesn't look quite as capable as imagemagick, but it's built-in so no worrying about installing new stuff.
For anybody else that's interested:
It looks like you all are on the path to completion.
Just another simple solution, if it applies.
I know the OP specifically asked for a Keyboard Maestro solution but I've been using Hazel and Automator, with this conversion, for a few years. I was actually searching in my KM Editor because I thought I had a macro for it (I was wrong).
I'm sure you can replace the Hazel rule, with Keyboard Maestro, to call the Automator workflow but here is what the two activities look like:
Hazel Rule:
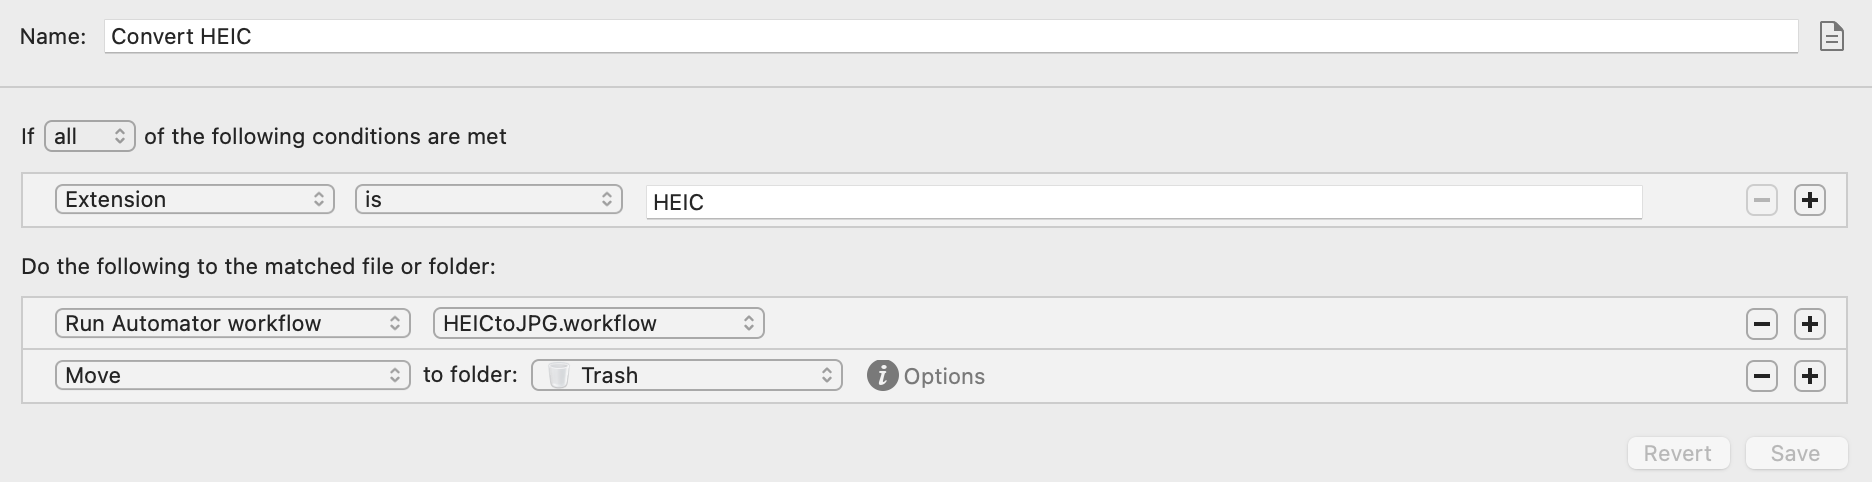
Automator workflow:

Very quick and simple.
I'm sure your solutions will work fine so disregard this if your way is satisfactory.
KC
4 Likes
I use the Automator Workflow with Hazel too. Works really well
Does it make any sense to use the built-in Quick Action "Convert Image"? I like being able to select from the four output sizes (S, M, L, original). I have the additional complication of running Path Finder, which still doesn't support Quick Actions. (I don't use Hazel.)
It looks like some solutions were offered, but I don't think anyone mentioned that Monterey macOS has new built-in image conversion through an action in shortcuts which you can access from KM.
2 Likes