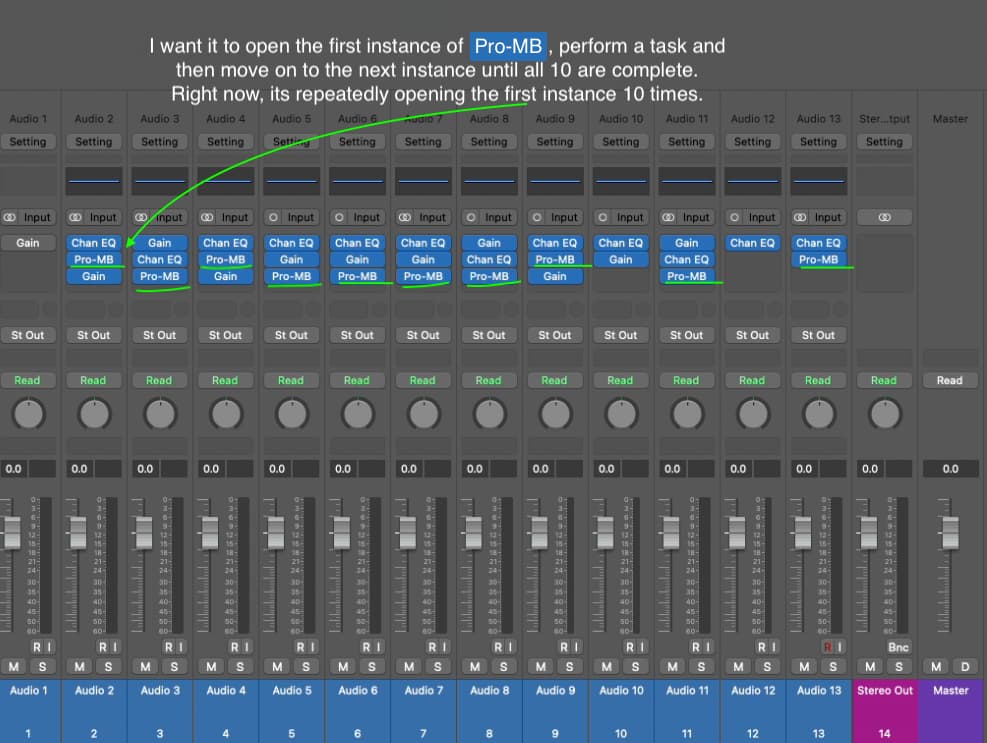
Hello, newbie question. Basically, my screen in Logic Pro (music production software) contains many instances of the same small icon (audio plugin). I made a macro that clicks the plugin icon (via found image), performs a task when the plugin window opens, then closes the plugin window. But, what I really want it to do, is go across the screen left to right and perform this task on each individual instance of the plugin icon on the screen. I can see that KBM can identify all instances, but will only perform the task on one singular instance.
I tried using the Engroup function to make it work "For Each", and all that did was perform the task 10 times on the same instance (because there were 10 total instances). I feel like I'm on the right track, but I'm missing an important detail that must relate to variables and how they work in conjunction with Found Images.
What am I missing here?
Hi and welcome to the forum!
Before we get into it, what are you trying to do? Is it specific to Pro-MB?
Hey, thanks! Right now, this macro is specific to Pro-MB, yes. It opens the plugin, changes one parameter (Oversampling) to one of 3 possible settings (off, 2x and 4x). I'm having it select 4x and then close the plugin window. It works perfectly on a single instance of Pro-MB.
ProMB is one of many plugins I frequently use that has optional Oversampling or High Quality modes. I keep these settings Off or as low as possible while I'm working on a project to maximize CPU efficiency, at the small cost of lower quality audio processing. However, when I go to bounce / export the project, I like to turn many (if not all) of these high quality options in various plugins On or to the maximum setting, which will yield the highest quality exported file. This isn't every time I bounce a song, but fairly often. Its extremely tedious to go through each individual plugin window and manually select these settings before bouncing a song, and the end goal here is to have a macro or set of macros that know which plugins to look for, then go through them each 1 by 1 and engage these specific settings.
This will do it with one caveat: It will set oversampling for all Pro-MB instances visible in the Mixer, then scroll right and repeat. When it gets to the far-right of the Mixer, it will do this for all visible instances even if the last scroll was quite short. In other words, it will set oversampling again for any visible instances even if they were already set in the previous repeat.
Does this matter? Not really. It will just take slightly longer than strictly necessary, but still be a lot quicker than manual clickery.
Could I account for this in the macro? Probably, but it's gone midnight and I think I've made a good enough start for the time-being.
Oversampling - Pro-MB.kmmacros (88 KB)
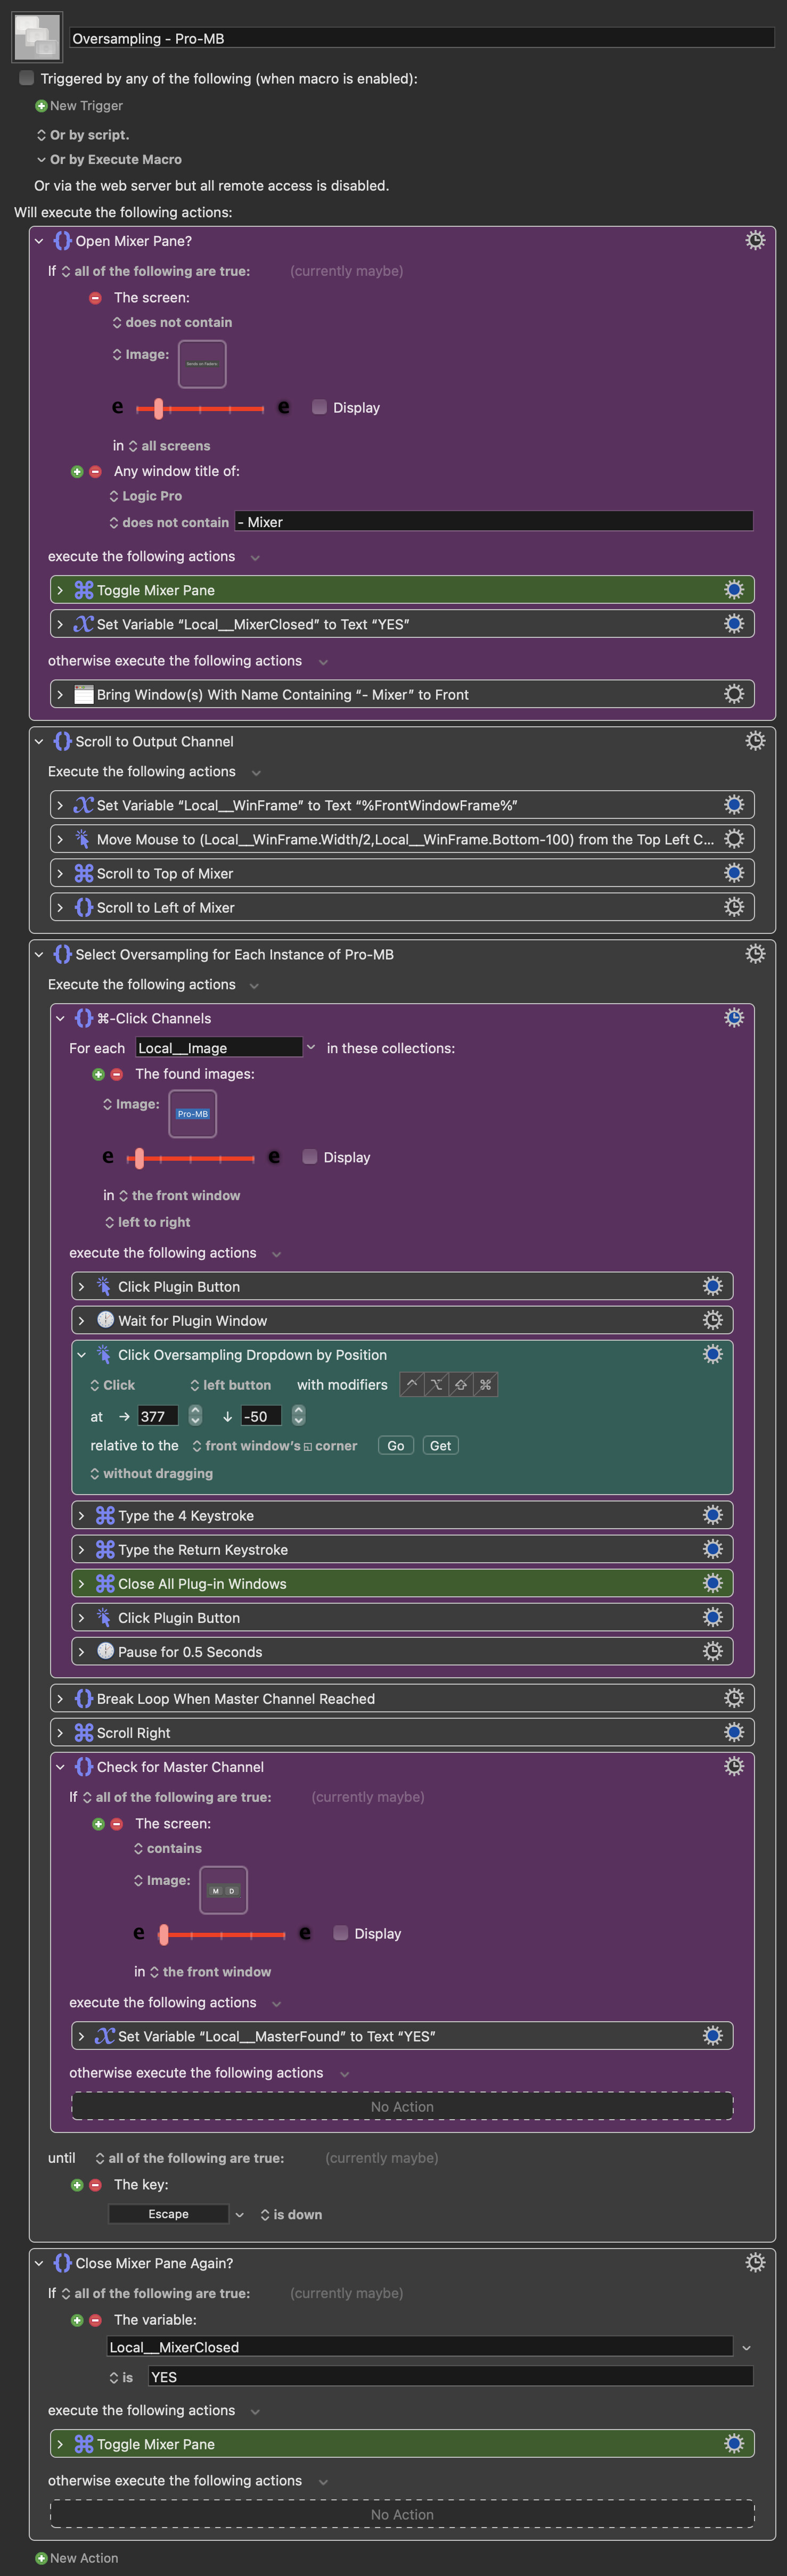
Pay attention to the coloured actions:
Magenta: If your screen resolution differs to mine, you may need to replace the found images with your own.
Green: These are Logic Key Commands. If yours are set differently, adjust the simulated keystroke actions to match.
Aqua: This clicks the Oversampling dropdown menu by position relative to the plugin window's corner. You may need to click the Get button and recapture this position.
Wow thank you so much, this is way more helpful than I expected anyone to be. I'll try it out and let you know how it goes. Much appreciated!
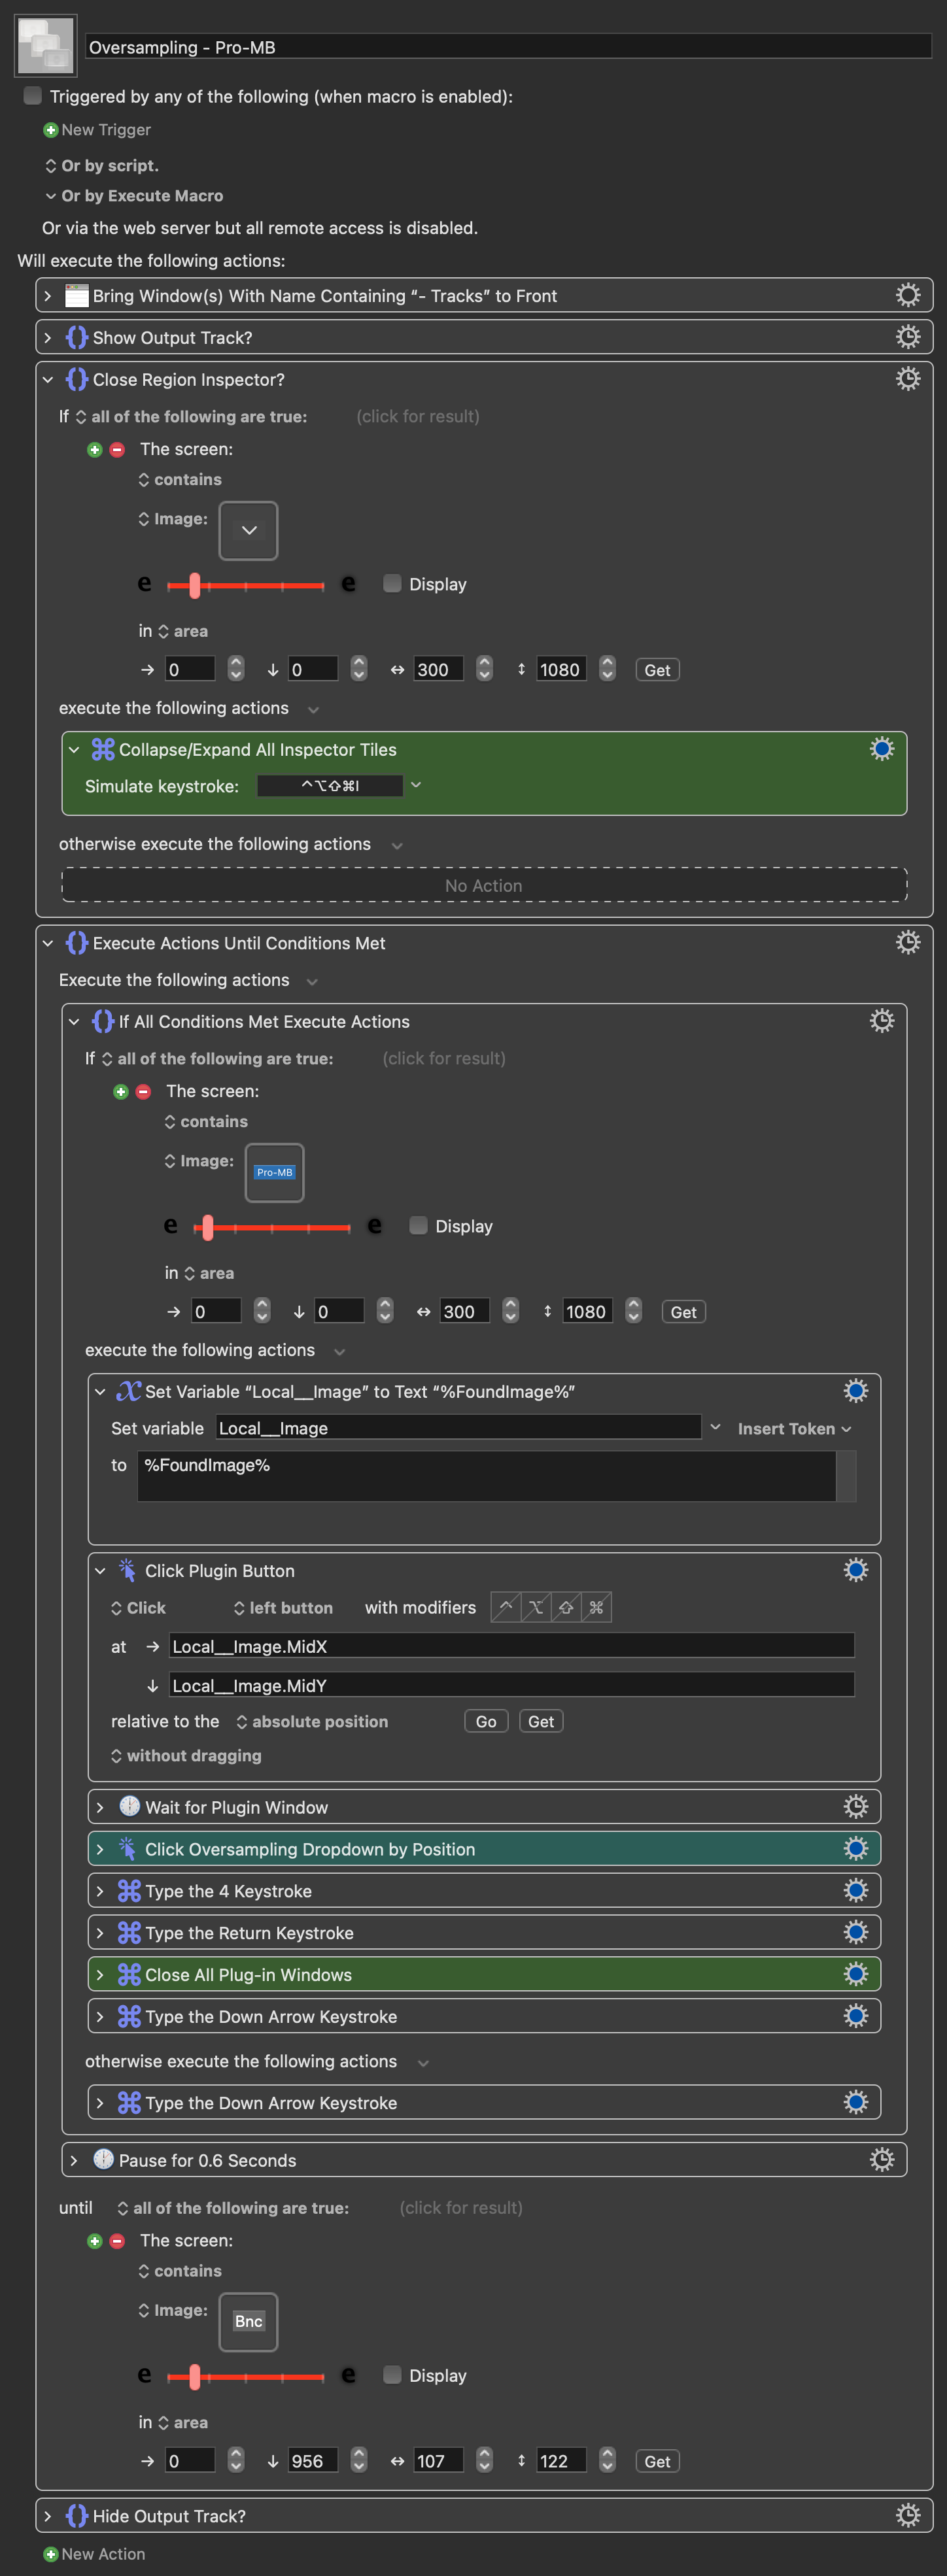
Update: Took some more finagling but you definitely gave me exactly the missing links I needed to make it work. It works perfectly now, and I've starting expanding it to include more plugins which are also working perfectly, as well as an inverse macro to set everything back to low quality if needed. I'll attach both if you're curious about them. Thanks again so much, really do appreciate it!
Oversample all Pro-MBs in Mixer window:
Pro-MB Oversampling.kmmacros (182.9 KB)
Master Oversample / HQ macro:
Master HQ Enable.kmmacros (700.0 KB)
Awesome! So I guess you're doing it just for all visible instances, rather than scrolling to repeat the process. Probably simpler that way. 
No I am scrolling to account for the non-visible part of the screen - at the end it scrolls hard right and repeats the main procedure.
Yesterday I realized a problem with that though; If there's not a lot of tracks and the mixer all fits into 1 visible window, it still "scrolls" and repeats the process, which in some cases actually reverses the action that it just did, which is no bueno.
Seems odd that KBM can't perform actions on an entire window, including the areas out of initial view - or maybe thats just for found-image-specific things? Or maybe it can and I'm just unaware...
I'll figure something out lol
Why does that seem odd?
If you can't see it then Keyboard Maestro can't see it.
Video has to be rendered and available to be seen. You might as well ask that KM be able to know what's in a text file without reading it first...
Did you manage to figure out how to avoid double processing? That was the bit I didn't get around to, but I did figure it out in theory. I'm away until Monday but can knock something together when I'm back if you still haven't figured it out.
I get what you mean, but I’m a human and it’s a computer so I was hoping that it would have a wider scope of the contents of a window that isn’t limited to the visible area. Like when you use the Find function in a browser, it’s able to find all instances of the word regardless of how far out of immediate view they might be.
Here's another way of doing it. Match the green action to the corresponding Logic key command and pay attention to the found image search areas.
Oversampling - Pro-MB.kmmacros (72 KB)
When an app is properly scriptable this often true -- but when you are reduced to scripting the UI it's the opposite. Most of those things you notice and do without thinking because of your years of UI interaction in many disparate apps plus your ability to infer -- all that needs to be explicitly handled in your macro.
So you need to think like a very naive user. From your screenshot above -- if both "Audio 1" and "Master" are visible near the bottom of the window, everything is shown. Otherwise you'll need to scroll left until "Audio 1" is visible. You could then slice the screen vertically on channel "column" width, then move through those slices left to right testing for the "Pro-MB" button. If you get to the right edge of your screen and "Master" isn't visible you know you have to scroll column-width pixels right, test for the button again in those final column coordinates, and test for "Master" again.
Which is probably pretty close to describing what you normally do -- if you were to describe simply what to do for someone who'd never seen the app before and had no idea of the context nor what any of the UI widgets mean or do.
It's much easier to use the track header (in the Tracks window), as per my second suggestion above. That way you're dealing with individual tracks. And there's no possibility of double-processing.
Yes, but I'd only know about that if I used Logic!
Mine wasn't a definitive solution, more a "computers are pretty dumb really, but here's how you might break down the process you describe in the UI you show to something they could possibly understand".
I think I see what the intention is with this. But "Show output track" makes the output track / Stereo Out appear in the main Arrange/Tracks window as any other track appears, but it does not necessarily highlight or focus on the output track. My output track is always on my screen / never hidden. Or I'm misinterpreting what that stage of the macro does... more likely. Either way, I'm fi
nding much more success with this macro when running it strictly in the designated / standalone Mixer window, where everything is much more uniform and isn't subject to change in the way that my Tracks window is. (I use 2 monitors, one of them always has a full screen Mixer window, which is where the macro does its thing). But I think you're definitely onto something with utilizing the Bnc icon, which will always appear at the 2nd-farthest-right track (output track) in the mixer window. I'll attach a screenshot that probably would have been helpful earlier.
I don't know enough to try to inject that part of your sequence into mine.
All that being said, the double processing issue is not really all that bad - it would definitely be cool for it to do the whole thing in one smooth pass but its not the end of the world if it spends an extra handful of seconds repeating itself.
Yes that makes sense thank you for clarifying. Logic is definitely frustratingly non-scriptable but partially makes up for it with its UI actually being pretty great when you wrangle the hundreds of key command options. The challenge with scripting anything for it has been dealing with the multitude of potential inconsistencies with the UI depending on what kinds of tasks I am performing. Haven't really found anything that can't be scripted in Logic yet... aside from, you know, the music making part
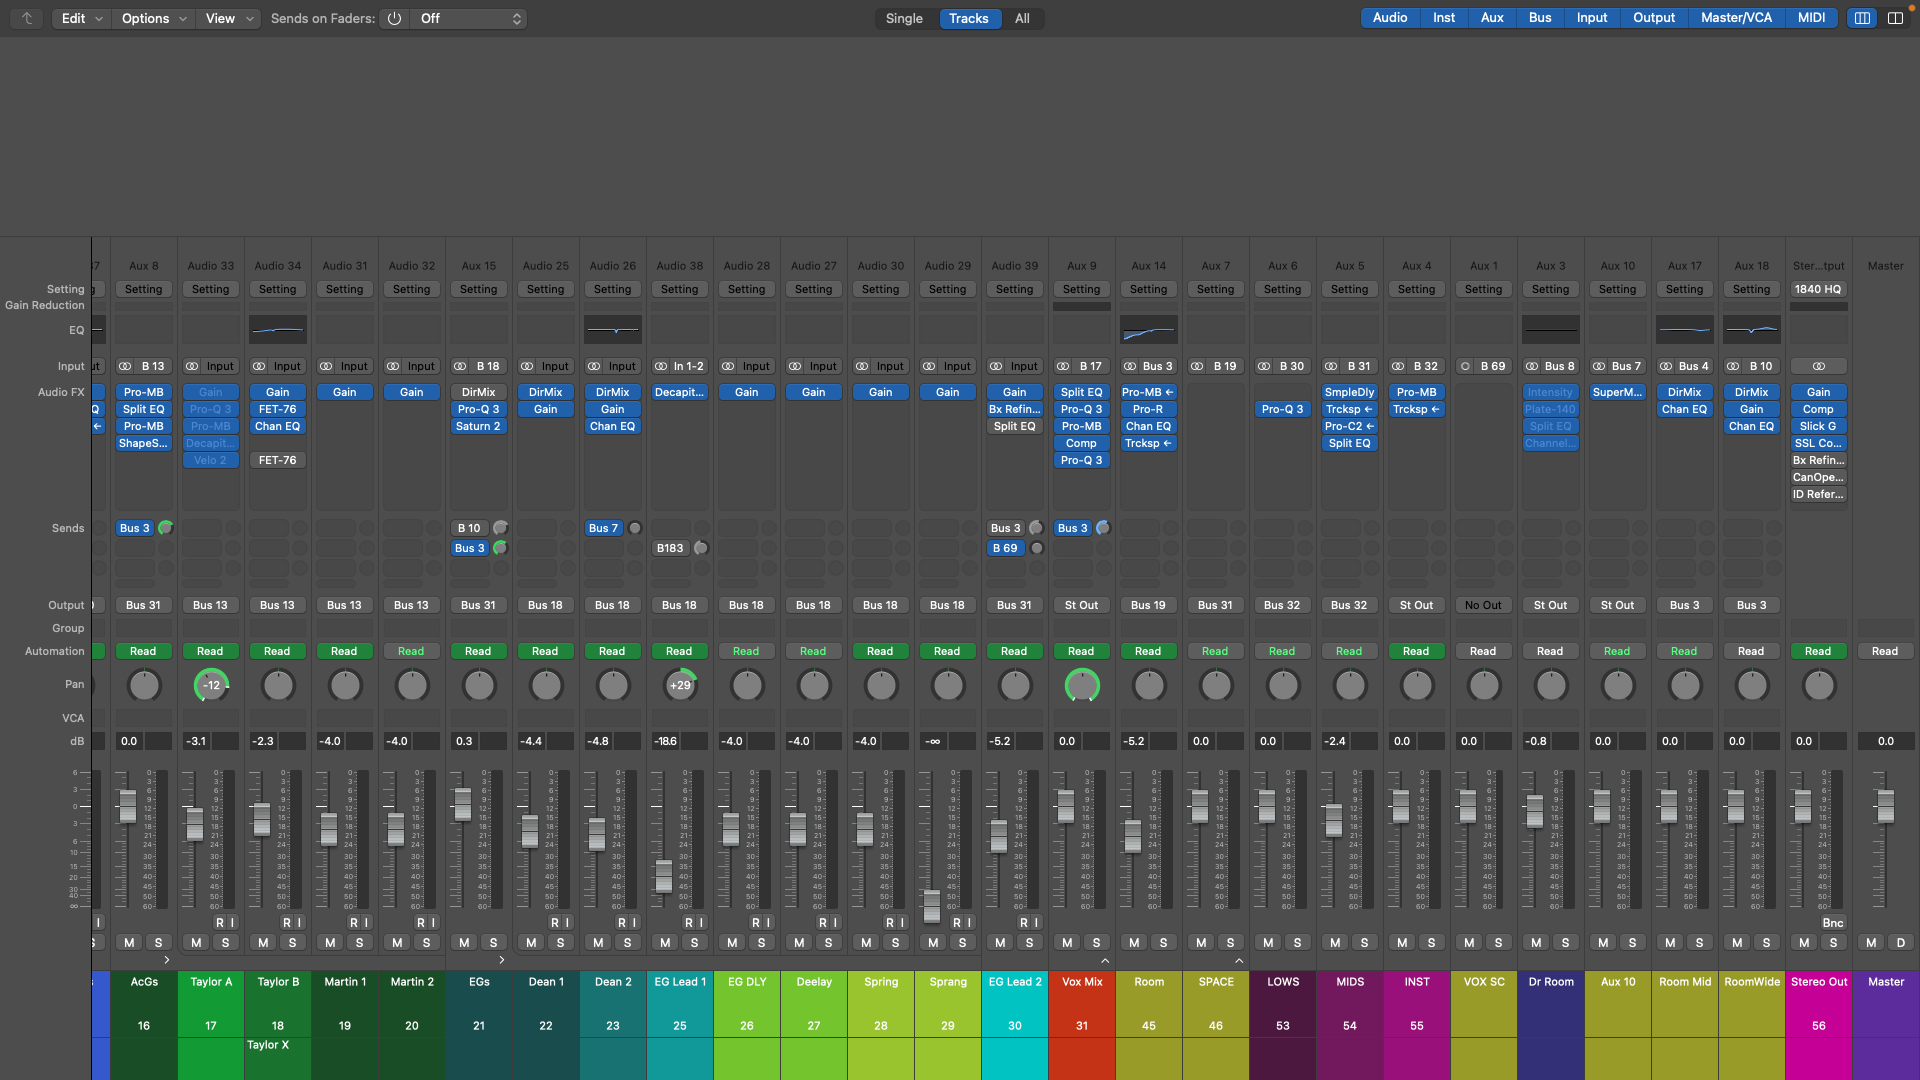
Also in case you're interested, this is the current state of my "Master HQ" macro in action. Adding more plugins to it one by one but each one is easier to figure out the more I do this. Some of them are great because they accept midi CCs to enable their oversampling modes (channel EQ for example) so all it has to do is click on the track itself and send a midi CC to logic without even opening the plugin window. This is already a massive timesaver though so thank you again for the help in getting it going!
https://drive.google.com/file/d/1REDY9AfYpg4P9O-2kZBVkvnHP8l7OFvg/view?usp=sharing
It shows the output track (if not already shown) for the duration of the macro. The only purpose is to provide a means of knowing when to stop. It works nicely for me, but if you prefer the mixer window version, that's cool. Nice to have options.