The following instructions assume that you want to make a Retina Display compatible Icon. But if you want to make a LowResolution only Icon, just skip the 32x32 Pixel Images. 
Steps to follow:
- Standard Resolution Displays need 16x16 Pixel Images
- Retina Displays need additional 32x32 Pixel Images
- Images need to be 72 DPI
- Images need to be Named StatusItem. tiff, StatusItem1. tiff, StatusItem2. tiff, StatusItem3. tiff and so on...
- Alternatively you can name them StatusItemTemplate. tiff, StatusItemTemplate1. tiff and so on...
- If you make Retina Status Items, combined the 16x16px and 32x32px Images with with the Terminal Command:
tiffutil - Syntax:
tiffutil -cathidpicheck StatusItem.tiff StatusItem@2x.tiff -out StatusItem.tiff - Do this for each 16x16px and 32x32px Image Set separately
- Place all Images in 1 Folder and name the Folder as you would like to see the Status Icon named in Keyboard Maestro.
- Right Click the Folder in Finder and select 'compress folder'.
- Launch the Keyboard Maestro Editor
- Drag and Drop the Archive onto the Keyboard Maestro Icon in your OS X Dock
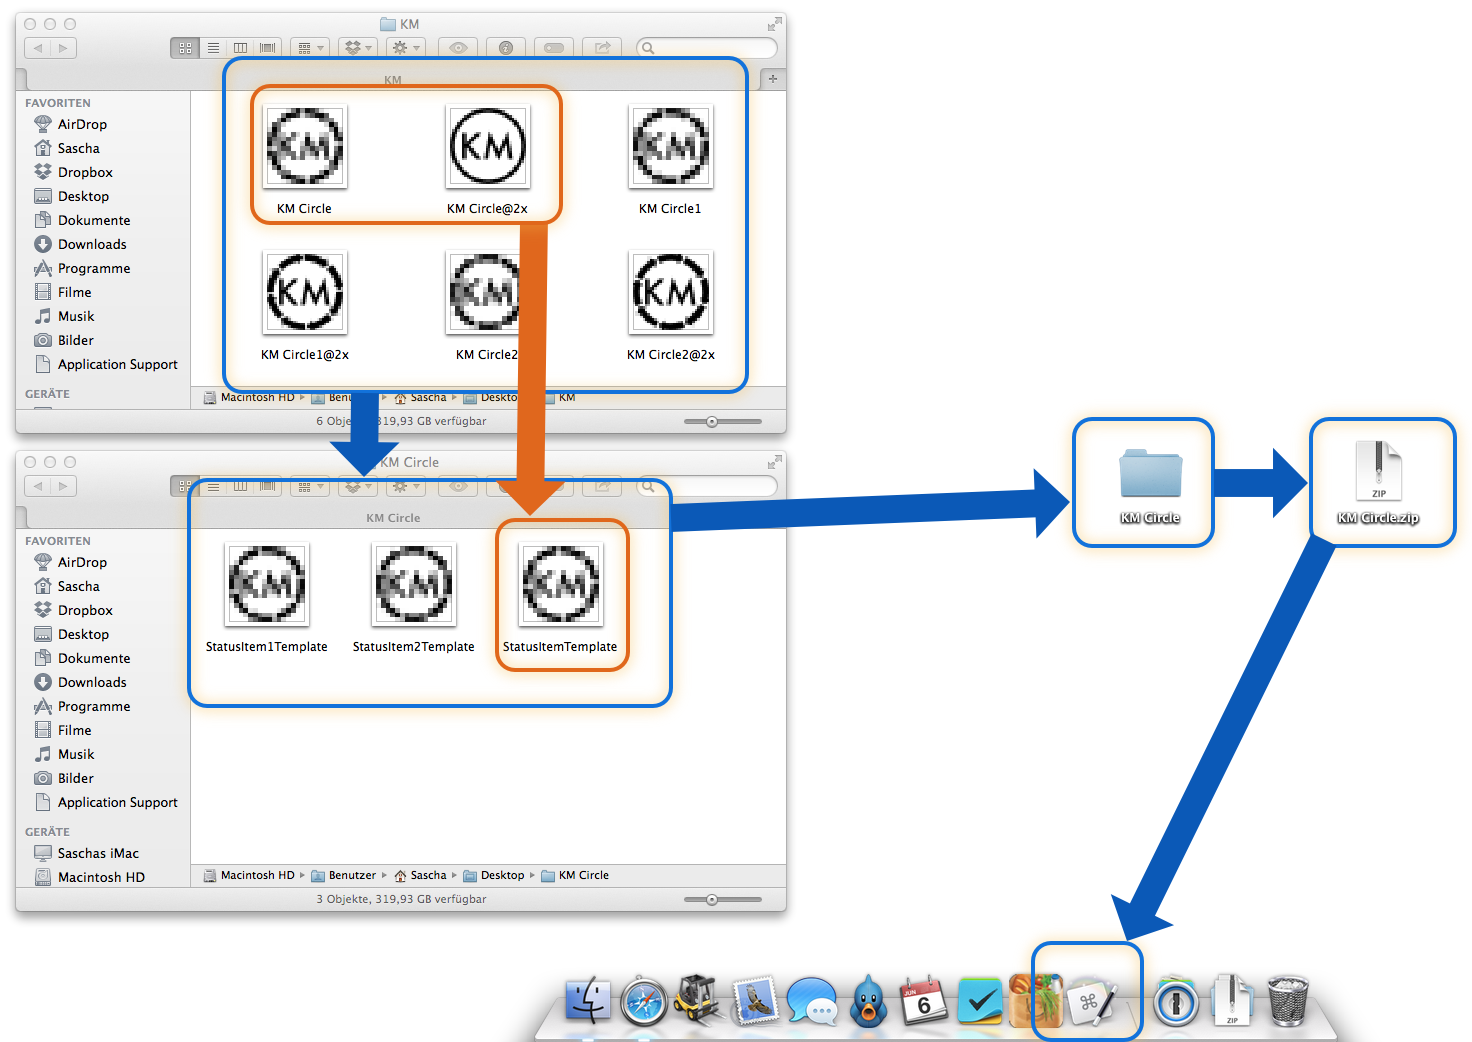
Here is a quick (and dirty) graphical explanation of the above steps: