Is the any way to get WINDOW(Bottom) for a dialog box?

One of my macros displays a user input dialog box at a fixed position onscreen—horizontally centered, just above vertical center. I need to display another window immediately below the dialog box, but here's the problem: The location of the bottom varies based on screen resolution (and even macOS version—the dialog box is six pixels taller in Monterey than in Mojave.

I figured I'd just use the WINDOW(Bottom) function to get the location of the bottom of the dialog, but that doesn't work. If I put it inline after the user input command, it won't run until the user dismisses the dialog, so then it's worthless.

I had a thought to put the dialog in another macro, then call it asynchronously from the first…but no, that still doesn't work—the WINDOW(Bottom) command I have immediately after the asynch macro call returns the location of one of my Finder windows.

For now, the best I can do is display the additional window at some percentage below vertical, such that it's anywhere from really close to pretty far away, depending on your screen resolution.

Is there any way to reliably identify the bottom of an onscreen input box?

thanks;
-rob.

This should be doable using AppleScript. Give me a bit and I'll see if I can come up with something for you.

-Chris

Thanks—the only workaround I've found is a kludge using Find Image on Screen. Which may work, but it's so inelegant :).

-rob.

Okay here's a basic way to do it. Run this macro asynchronously just before your user prompt action.

Basically the AppleScript it waits until the user prompt input window appears, gets it's frame and saves it to a variable. The search variable action extracts the bottom coordinate and saves it to another variable which is then displayed (and can be used for whatever else you need).

I have a handful of macros that do something similar to this that I have in a macro group called Subroutines because I need to have them run asynchronously with their calling macro(s).

Let me know if it works for you. There's likely a way to do it using only AppleScript so I'll keep tinkering with it and let you know if I come up with a better way.

Pause until user prompt window appears and get bottom coordinate.kmmacros (4.1 KB)

Macro screenshot (click to expand/collapse)

@griffman Just a heads up, the version below (which also contains the original method) uses only AppleScript to accomplish the same thing. You will still need to run it asynchronously as a separate macro, but it will give you the bottom coordinates of the user prompt window just like the original macro does.

Pause until user prompt window appears and get bottom coordinate.kmmacros (7.2 KB)

Macro screenshot (click to expand/collapse)

Also, a copy of the AppleScript itself is here if you want to see it before downloading the macro:

----------------------------------------------------------
# Author:				Chris Thomerson
#
# Current Version:		1.1
# Version History:			1.1 (Uses delimiters to return just the bottom coordinate
#						1.0 (Initial script)
#
# Created:				Friday, December 24, 2021
# Modified:				Friday, December 24, 2021
# macOS:				11.6.2 (Big Sur)
#
# DISCLAIMER
# Permission to use, copy, modify, and/or distribute this
# software for any purpose with or without fee is hereby granted.
#
# THE SOFTWARE IS PROVIDED "AS IS" AND THE AUTHOR DISCLAIMS ALL
# WARRANTIES WITH REGARD TO THIS SOFTWARE INCLUDING ALL IMPLIED
# WARRANTIES OF MERCHANTABILITY AND FITNESS. IN NO EVENT SHALL
# THE AUTHOR BE LIABLE FOR ANY SPECIAL, DIRECT, INDIRECT, OR
# CONSEQUENTIAL DAMAGES OR ANY DAMAGES WHATSOEVER RESULTING FROM
# LOSS OF USE, DATA OR PROFITS, WHETHER IN AN ACTION OF CONTRACT,
# NEGLIGENCE OR OTHER TORTIOUS ACTION, ARISING OUT OF OR IN
# CONNECTION WITH THE USE OR PERFORMANCE OF THIS SOFTWARE.
----------------------------------------------------------

tell application "System Events"
	tell application process "Keyboard Maestro Engine"
		
		--checks for user prompt existence
		repeat until window "Keyboard Maestro User Input" exists
			delay 0.1
		end repeat
		
		--gets all coordinates for user prompt
		tell window "Keyboard Maestro User Input"
			set uipCoords to value of attribute "AXFrame"
		end tell
		
		set {myTID, AppleScript's text item delimiters} to {AppleScript's text item delimiters, {","}} --sets delimiters to a comma
		set uipList to text items of uipCoords --sets the coordinates to a list format
		set AppleScript's text item delimiters to myTID --resets the delimiters
		
	end tell
end tell

--loops through the list to get the 4th item, the bottom coordinate
repeat with indCoords from 1 to length of uipList
	set uipBot to item indCoords of uipList
end repeat

--returns the bottom coordinate
uipBot
1 Like

Wow, that's great, thanks! And I can actually help you out a bit, I think—splitting a returned list of values in AppleScript can be done like this:

set {fromLeft, fromTop, width, height} to uipCoords

That will create the four variables using the four values in uipCoords. So I modified your macro by adding this at the end (and removing the other steps):

set kmInst to system attribute "KMINSTANCE"
tell application "Keyboard Maestro Engine"
  setvariable "instanceDialogFromTop" instance kmInst to fromTop
  setvariable "instanceDialogHeight" instance kmInst to height
end tell

This works great; here's the returned values in a display briefly window:

(Sorry, I haven't installed your AppleScript code post macro yet!)

Those are the only two data points I need, but I can easily modify it to get the others if I want. Now I just need to do a bit of work to get the menu bar height, and I'll be there—thanks!

-rob.

2 Likes

Correction: Height isn't height but window bottom—even better!

thanks again;
-rob.

Outstanding! I rarely work with delimiters so I wasn’t aware of the method you posted. I’ll be making note of it and implementing it now. Thank you!

Glad you got it figured out now!

I was running into a problem with the macro running asynchronously and before I put the dialog onscreen: No matter what I did, my macro wouldn't use the value returned by the AppleScript. Even though I could see it held the right value in the Variables section of preferences, my macro would not use the value at all.

I think the problem was the combination of running asynchronously and having the input dialog onscreen. Luckily, it seems to work fine when I switched the mode to non-asynch, and put it after the code that displays the input dialog (and then removed the delay step, too).

-rob.

I'm concluding that asynch mode, though powerful, can also be very frustrating. First there was the problem with the variable not getting passed. That one was relatively easy to work around by running your macro in normal mode.

However, to even get a text window to appear while there's an input dialog box onscreen, that input box has to be loaded asynchronously—if it's not, the display text bits won't do anything at all. And the AppleScript to get the bottom location won't run either.

But if you load an input box asynchronously, it's no longer a real input box, i.e. you can't take action on user response, so I can't control the macro (it acts like the user already clicked a button, when they haven't done anything).

What I wound up having to do is annoying, but the only fix I could find: I display the window asynchronously, run the AppleScript to get my location, then send an Escape to close the window. I can then put my windows onscreen, and display the input box again, this time synchronously.

It flashes on/off/on, but I don't see any way around this issue. (I tried using an HTML prompt, but it too won't show if the input box is onscreen.)

So, working solution, not ideal, but good enough for a free macro that's a spare time project :).

thanks again;
-rob.

Rethinking your situation makes me realize that my initial approach likely won't work without a lot of extra hassle (though it was a fun script to write and I learned some new things, so not a wasted effort for me).

Let's take a different approach. Please correct me if I'm wrong, but from what I understand you want to accomplish the following:

  1. Position the UIP window to horizontal center, and just above vertical center.
  2. Position another window (not sure what kind of window, but I'll call it "test window" for clarity) just below the UIP.

Obviously the UIP does not allow any subsequent actions to be executed until it itself is acted upon. This means that a potential solution would be to position the "test window" first, horizontally centered, and just below vertical center, and then have the UIP positioned above the "test window" according to it's coordinates.

Is that the gist of what you need to do?

Yea, I guess I'd never thought about it that way—I can take a shot at that, no help needed (yet! :)), but thanks for the "duh, do it the other way around!" idea.

-rob.

Well too bad because I'm off today and don't have anything else to work on :laughing:

Keep me posted and I'll tool around with it over here too.

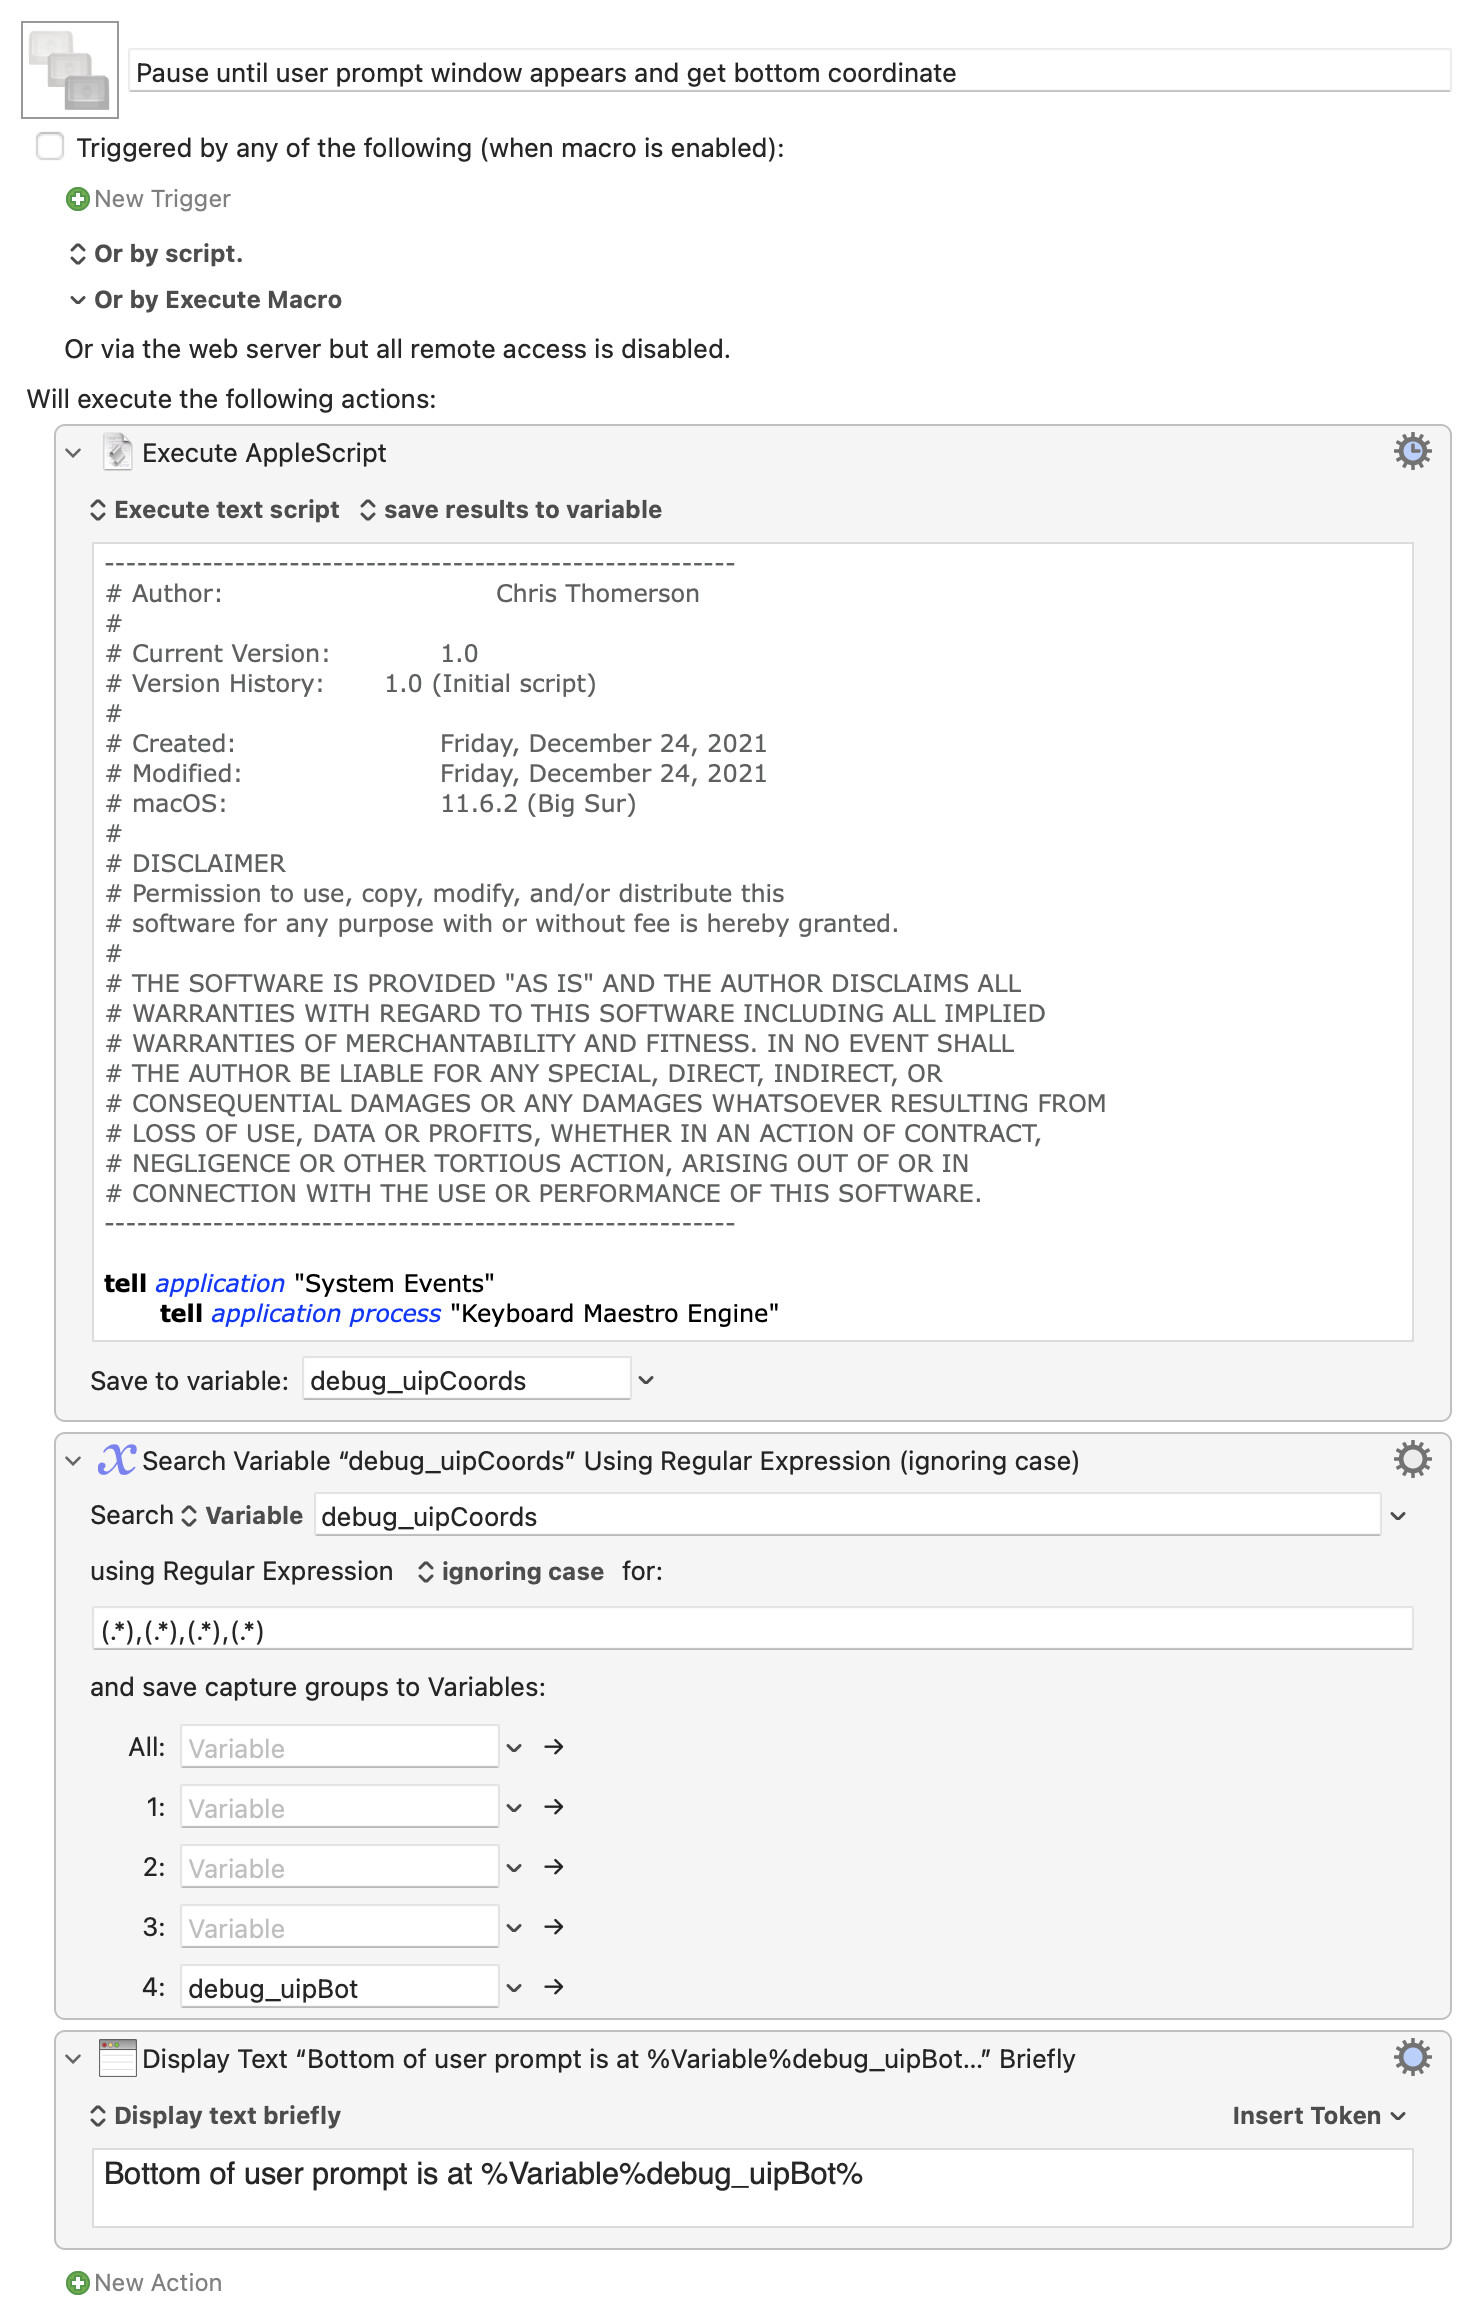
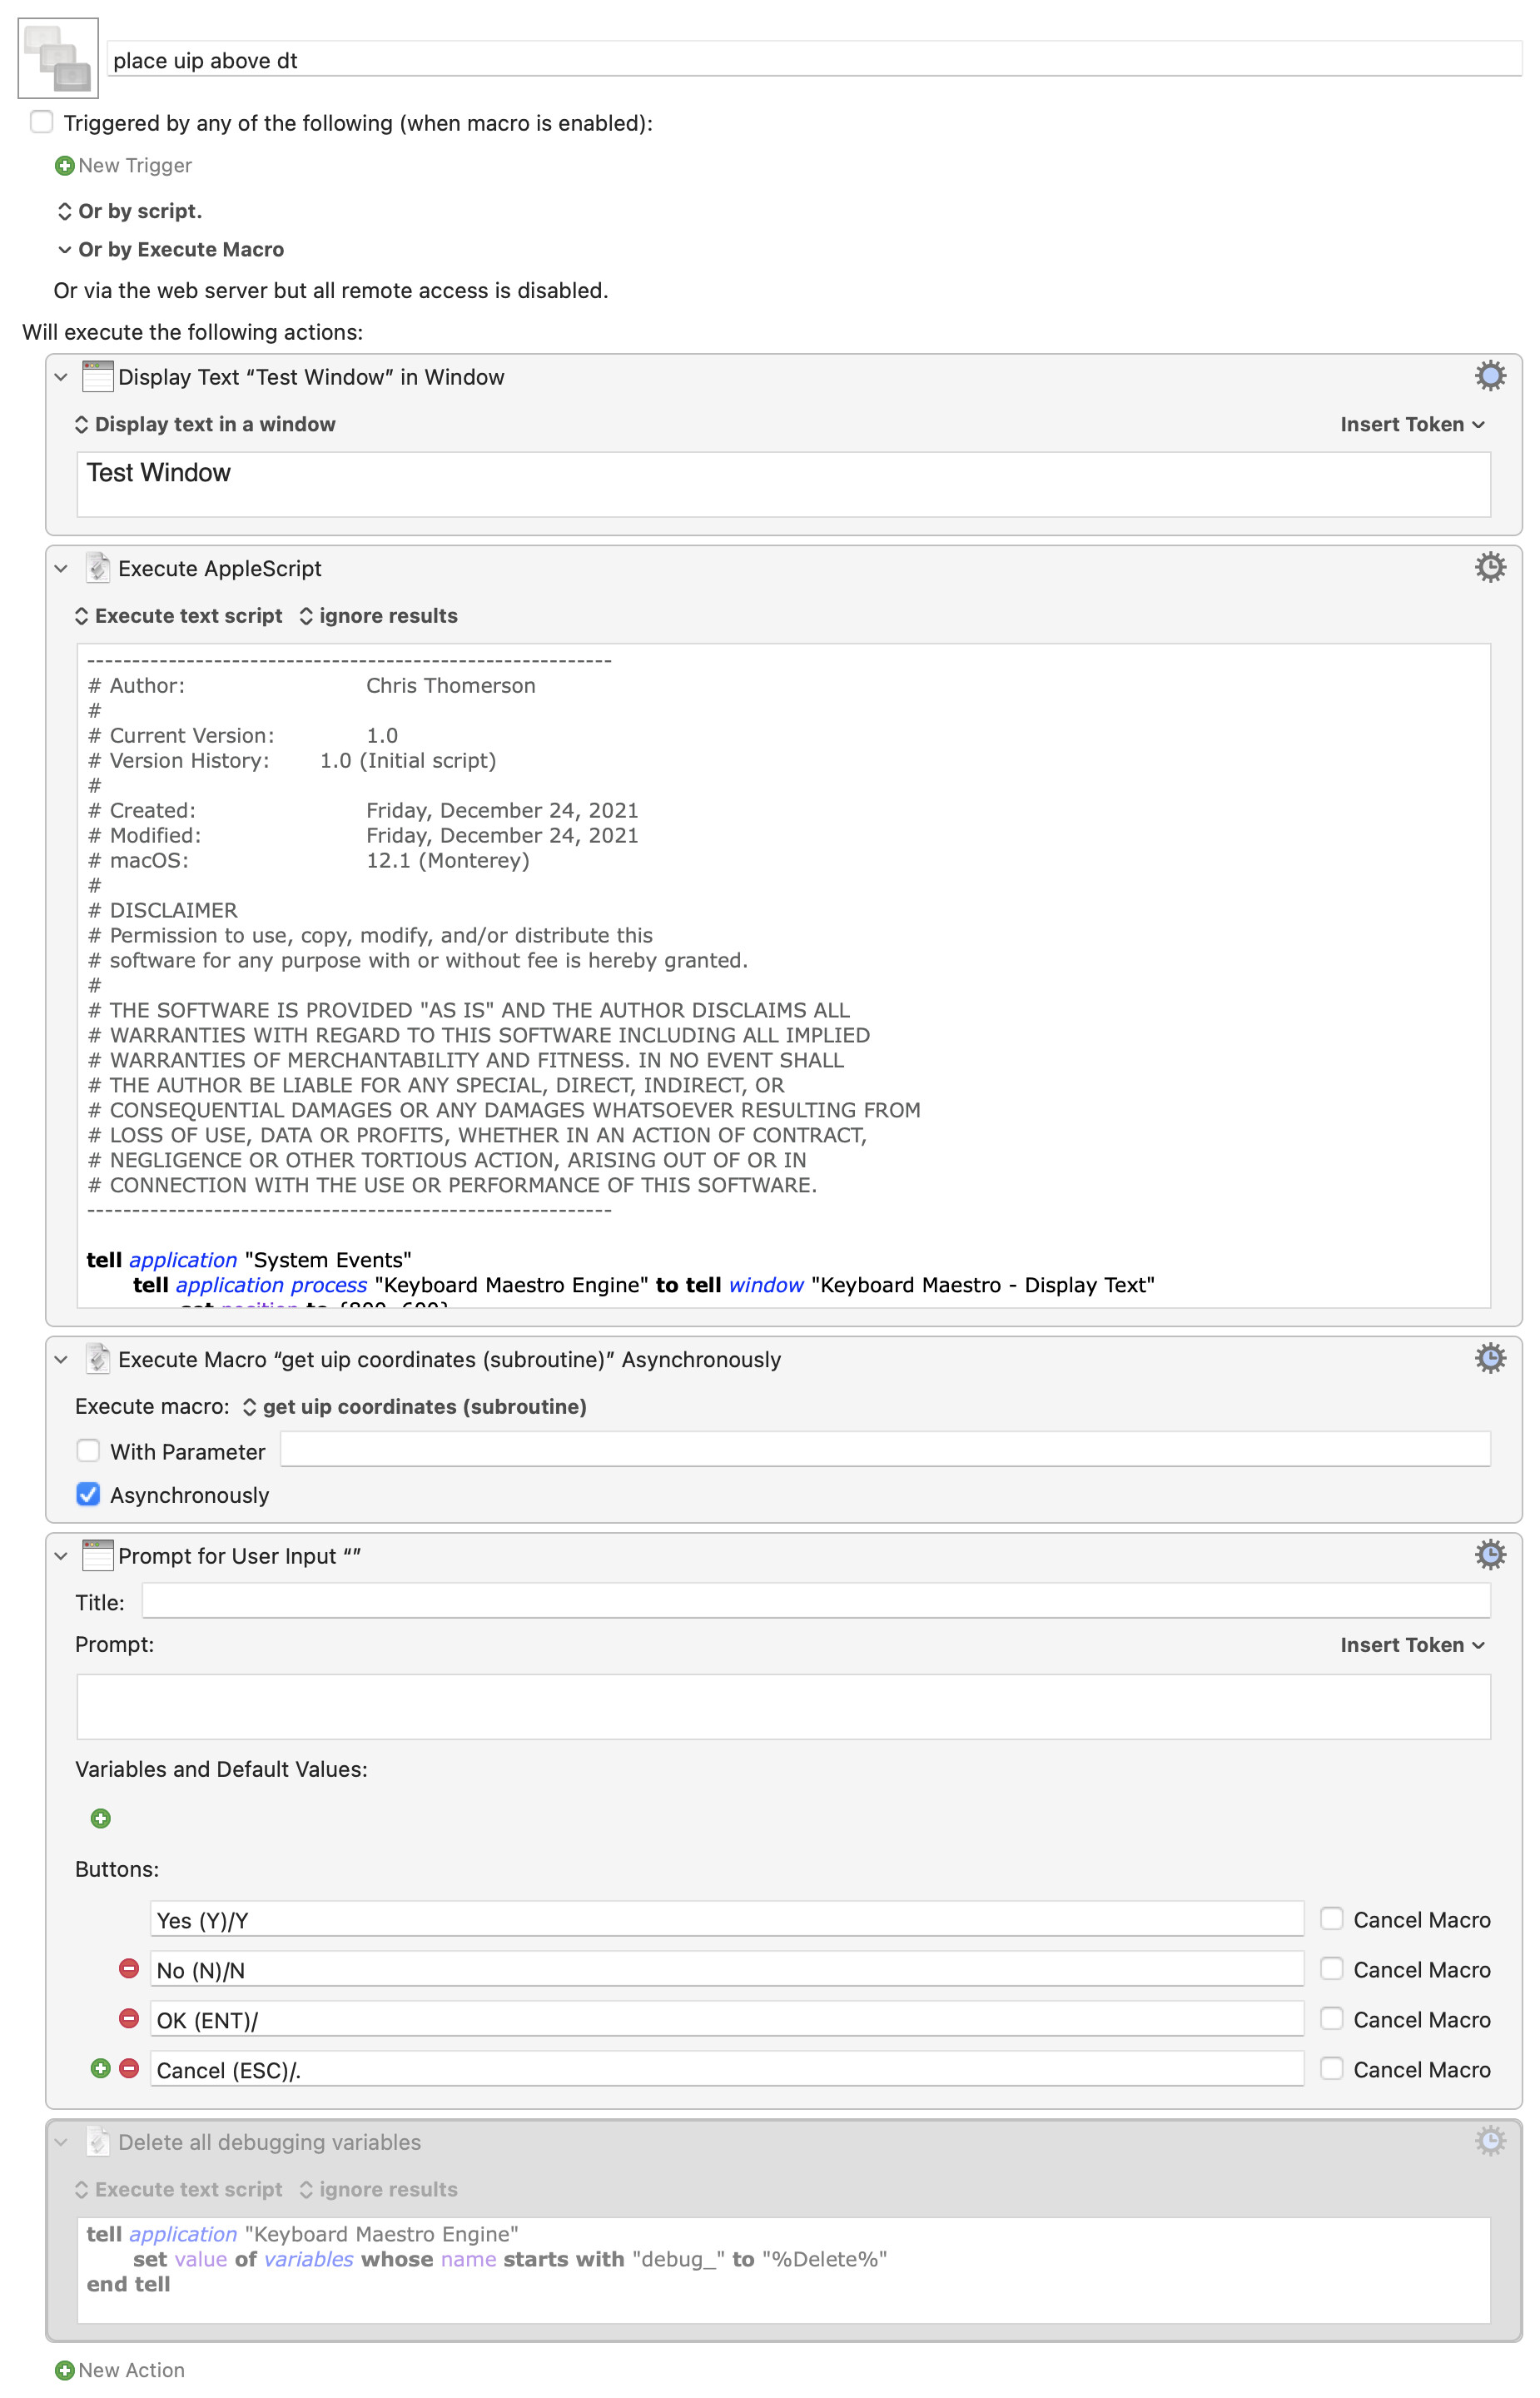
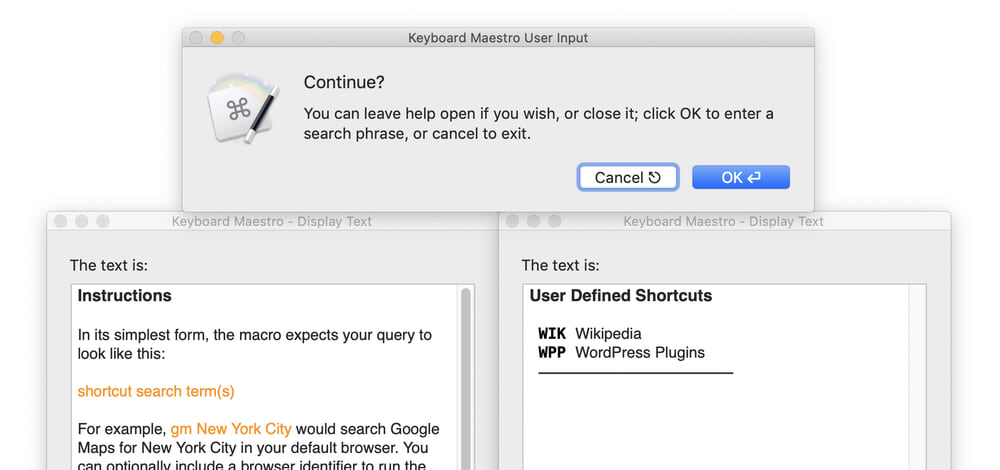
Alright here's something I came up with. It works well for me, but will no doubt need to be modified to suit your needs. Since I don't know what kind of window you need to place below the UIP window, I just used a Display Text action from KM itself. But the principle is the same.

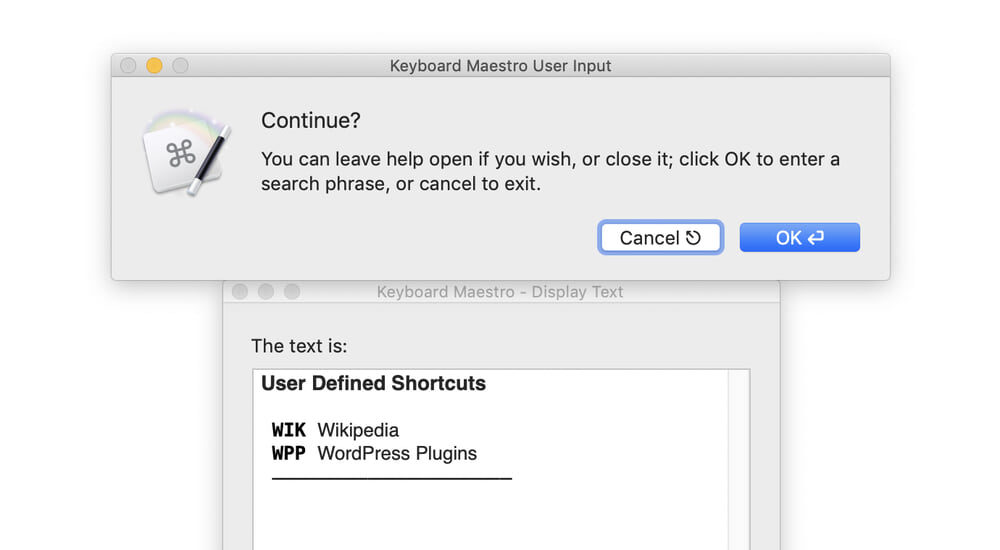
You still need to run the get uip coordinates macro asynchronously from within the calling macro but it handles all of the positioning from within the same AppleScript so it doesn’t need to wait for the prompt window to be acted on.

Try this out, see if it could be adapted to your needs and let me know what you think!

EDIT: These macros and AppleScripts use global variables, prefixed with debug_ to facilitate troubleshooting while building. The calling macro has a basic AppleScript at the end (currently disabled) to delete all those variables. You could probably convert them to instance variables if you wanted, but I didn't feel like messing with that part haha.

-Chris

place uip above dt.kmmacros (6.7 KB)

Macro screenshot (click to expand/collapse)

AppleScript for place uip above dt macro:

----------------------------------------------------------
# Author:				Chris Thomerson
#
# Current Version:		1.0
# Version History:		1.0 (Initial script)
#
# Created:				Friday, December 24, 2021
# Modified:				Friday, December 24, 2021
# macOS:				12.1 (Monterey)
#
# DISCLAIMER
# Permission to use, copy, modify, and/or distribute this
# software for any purpose with or without fee is hereby granted.
#
# THE SOFTWARE IS PROVIDED "AS IS" AND THE AUTHOR DISCLAIMS ALL
# WARRANTIES WITH REGARD TO THIS SOFTWARE INCLUDING ALL IMPLIED
# WARRANTIES OF MERCHANTABILITY AND FITNESS. IN NO EVENT SHALL
# THE AUTHOR BE LIABLE FOR ANY SPECIAL, DIRECT, INDIRECT, OR
# CONSEQUENTIAL DAMAGES OR ANY DAMAGES WHATSOEVER RESULTING FROM
# LOSS OF USE, DATA OR PROFITS, WHETHER IN AN ACTION OF CONTRACT,
# NEGLIGENCE OR OTHER TORTIOUS ACTION, ARISING OUT OF OR IN
# CONNECTION WITH THE USE OR PERFORMANCE OF THIS SOFTWARE.
----------------------------------------------------------

tell application "Keyboard Maestro Engine"
	
	--gets DT variables from Keyboard Maestro
	set dtXPos to getvariable "debug_dtXPos"
	set dtYPos to getvariable "debug_dtYPos"
	set dtXSize to getvariable "debug_dtXSize"
	set dtXSize to getvariable "debug_dtYSize"
	
end tell

tell application "System Events"
	tell application process "Keyboard Maestro Engine"
		
		--checks for user prompt existence
		repeat until window "Keyboard Maestro User Input" exists
			delay 0.1
		end repeat
		
		--gets all coordinates for user prompt
		tell window "Keyboard Maestro User Input"
			
			--gets user prompt position and size
			set uipPos to its position
			set uipSize to its size
			
			--separates user prompt individual coordinates
			set {uipXPos, uipYPos} to uipPos
			set {uipXSize, uipYSize} to uipSize
			
			set its position to {dtXPos, dtYPos - uipYSize}
			--set its position to {100, 100}
			
		end tell
		
	end tell
end tell

tell application "Keyboard Maestro Engine"
	
	--sets separated UIP coordinates to Keyboard Maestro variables
	setvariable "debug_uipXPos" to uipXPos
	setvariable "debug_uipYPos" to uipYPos
	setvariable "debug_uipXSize" to uipXSize
	setvariable "debug_uipYSize" to uipYSize
	
end tell

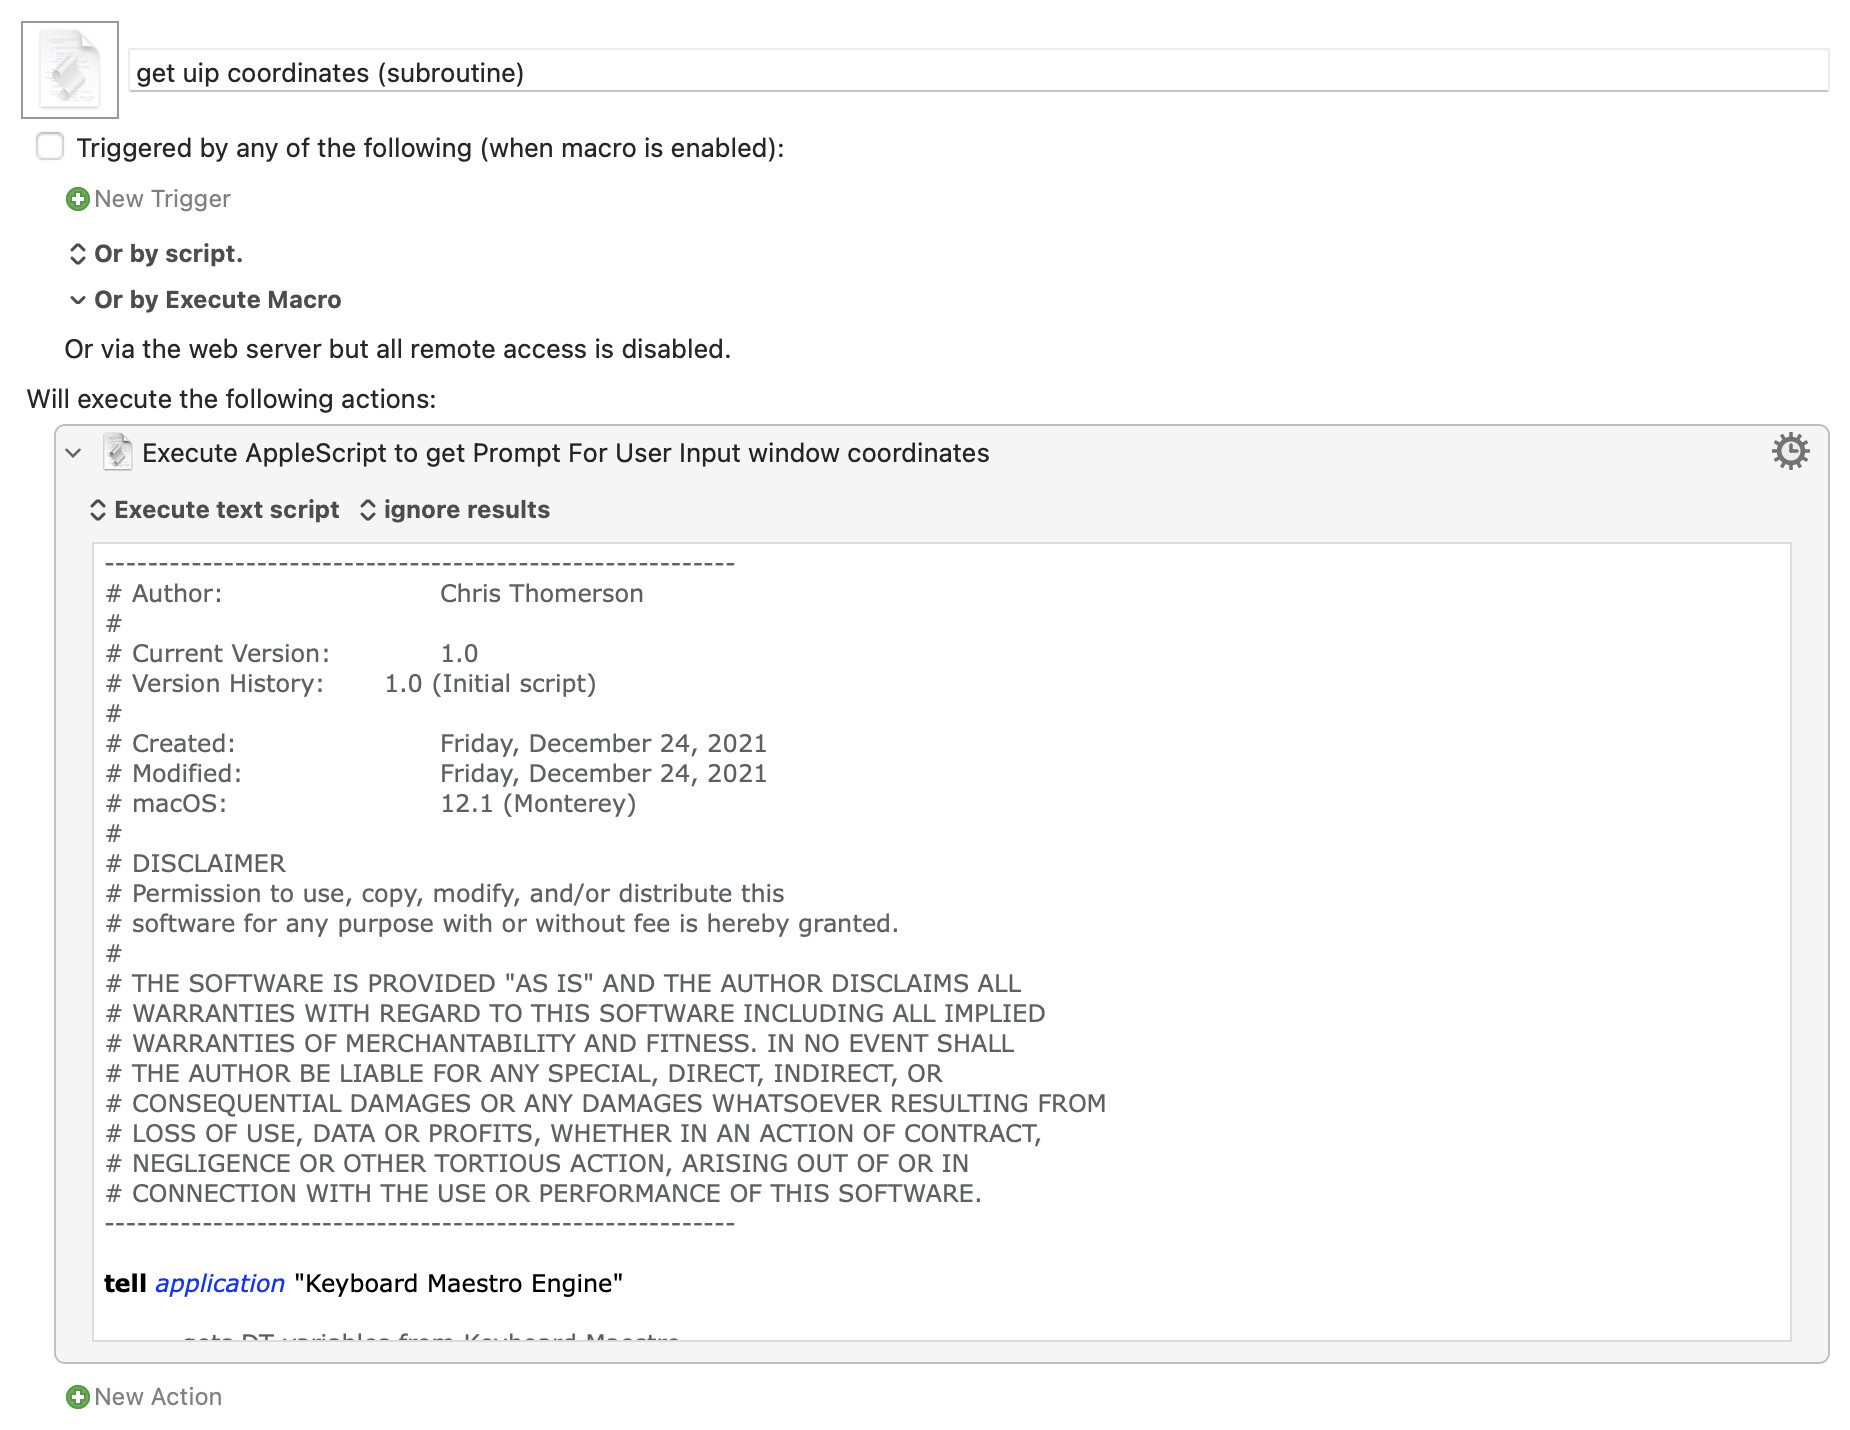
get uip coordinates (subroutine).kmmacros (4.1 KB)

Macro screenshot (click to expand/collapse)

AppleScript for get uip coordinates (subroutine) macro:

----------------------------------------------------------
# Author:				Chris Thomerson
#
# Current Version:		1.0
# Version History:		1.0 (Initial script)
#
# Created:				Friday, December 24, 2021
# Modified:				Friday, December 24, 2021
# macOS:				12.1 (Monterey)
#
# DISCLAIMER
# Permission to use, copy, modify, and/or distribute this
# software for any purpose with or without fee is hereby granted.
#
# THE SOFTWARE IS PROVIDED "AS IS" AND THE AUTHOR DISCLAIMS ALL
# WARRANTIES WITH REGARD TO THIS SOFTWARE INCLUDING ALL IMPLIED
# WARRANTIES OF MERCHANTABILITY AND FITNESS. IN NO EVENT SHALL
# THE AUTHOR BE LIABLE FOR ANY SPECIAL, DIRECT, INDIRECT, OR
# CONSEQUENTIAL DAMAGES OR ANY DAMAGES WHATSOEVER RESULTING FROM
# LOSS OF USE, DATA OR PROFITS, WHETHER IN AN ACTION OF CONTRACT,
# NEGLIGENCE OR OTHER TORTIOUS ACTION, ARISING OUT OF OR IN
# CONNECTION WITH THE USE OR PERFORMANCE OF THIS SOFTWARE.
----------------------------------------------------------

tell application "System Events"
	tell application process "Keyboard Maestro Engine" to tell window "Keyboard Maestro - Display Text"
		set position to {800, 600}
		set size to {300, 150}
		set dtPos to its position
		set dtSize to its size
		set {dtXPos, dtYPos} to dtPos
		set {dtXSize, dtYSize} to dtSize
	end tell
end tell

tell application "Keyboard Maestro Engine"
	setvariable "debug_dtXPos" to dtXPos
	setvariable "debug_dtYPos" to dtYPos
	setvariable "debug_dtXSize" to dtXSize
	setvariable "debug_dtYSize" to dtYSize
end tell
1 Like

Hooray, and thanks for that—I used bits of your new one, and bits of the original one, and then massaged some more AppleScript and Keyboard Maestro, and I think I got it.

This all came up when I decided to make it simpler for users to keep a customized version of my web search macro—updating prior versions meant a fair bit of copy and paste work to get their customizations back. I've now separated their customizations into a separate area, complete with its own help screens, and I won't overwrite these macros.

But that meant I had to be able to display either one (just the user) or two (built in and user) help windows, and I wanted them attached to the associated dialog box (at least visually attached). I also wanted this to work on any display or resolution, so the boxes are all scaled and placed based on screen size.

Here's the final result with one help window:

And with two help windows:

I've attached a demo version of the help display portion of the macro, so anyone can play around with it if they like. After installing and activating, run the macro named zm-Display Help Pages to see it in action. Change instanceUseMode from BOTH to USER to see two boxes versus one box.

It turned out to be quite complicated, but (as always) I learned a ton about Keyboard Maestro in the process (and some about AppleScript, and a lot about instance variables versus AppleScript versus ansynchronous mode). The final result works as well as I think I can make it work, given the constraints.

Window Grouping Demo Macros.kmmacros (49.3 KB)

Thanks, Chris!
-rob.

2 Likes

Very nice! Glad you got a finished, working product, and glad I was able to help (even though I'm certain you would have figured it out without me :grin:).

Just to circle back on this, as with many things I do…I wound up throwing away 95% of the work I'd done, because I wasn't happy with the way it was working. Instead, I tackled another project I'd been meaning to figure out for a while: How to use the HTML Input Form just for display, not for input.

Net net, I'm still using your AppleScript to position the input window (still can't figure out how to make it active, though, but that's a minor inconvenience), but my help window is now just a single pane of HTML and CSS that I build on the fly.

By doing this, I can also make it much easier to use—it's one window that integrates both help sources, and the scrolling table beats two long text windows any day:

So much better than what I had—none of which was your fault, just me going about things in the wrong way. The key to happiness was learning about this...

document.write(window.KeyboardMaestro.GetVariable('KMvar'));

Which I discovered in this forum thread. Instead of just dumbly showing two text boxes, I build a set of HTML and CSS variables (to keep the editing easier), mash them all together, then display the result:

The "For Each" and "Switch" variables do the work of creating each row in the table, and handling the two help data sources; everything else is just static text.

If anyone else is looking for more control over text in windows, creating a set of HTML+CSS variables and then displaying them via a Custom HTML Prompt provides a lot more control over both the display of the content and the appearance of the window.

-rob.

3 Likes

That looks great!

Are you referring to making the custom HTML prompt active?

I'll be the first to admit that I know next to nothing about HTML and CSS. I would love to learn but for the tie being I'm focusing on AppleScript.

-Chris

No, it's the opposite issue, i.e. the same one I had before: Once I put the Custom HTML prompt onscreen, the input dialog no longer has focus, even though it comes onscreen after the custom prompt—due, again I think, to the async setting required for the Custom HTML prompt to enable the input dialog to appear at all.

-rob.

Try running this AppleScript after your custom HTML action...

tell application "System Events"
	tell application process "Keyboard Maestro Engine" to tell window "Keyboard Maestro User Input"
		perform action "AXRaise"
	end tell
end tell

It will bring the UIP to the front.

2 Likes

Doh! It was even easier than that—I just added the AXRaise action as the final step in your positioning macro; works perfectly!

thanks;
-rob.

3 Likes