Quick actions on multiple files selected on desktop

I have a macro that will convert one file selected on the desktop using the Finder feature that allows right click > quick actions > convert image

My problem is, I can't figure out how to make this work for multiple selected files. Here is a screenshot of the process being done manually for 1 file.
s

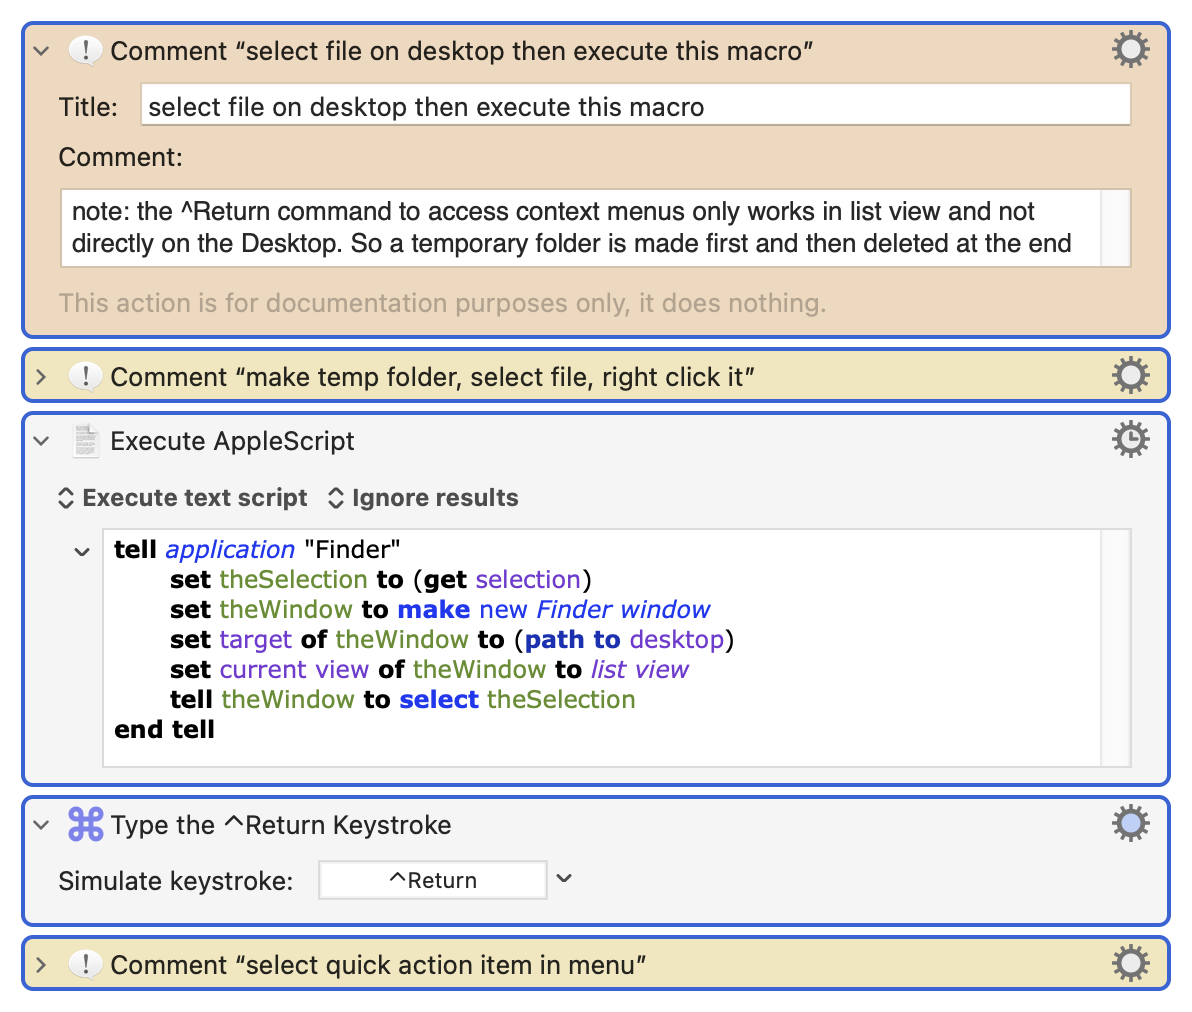
Here is a screenshot of my working macro (see below for non-working macro screenshot):

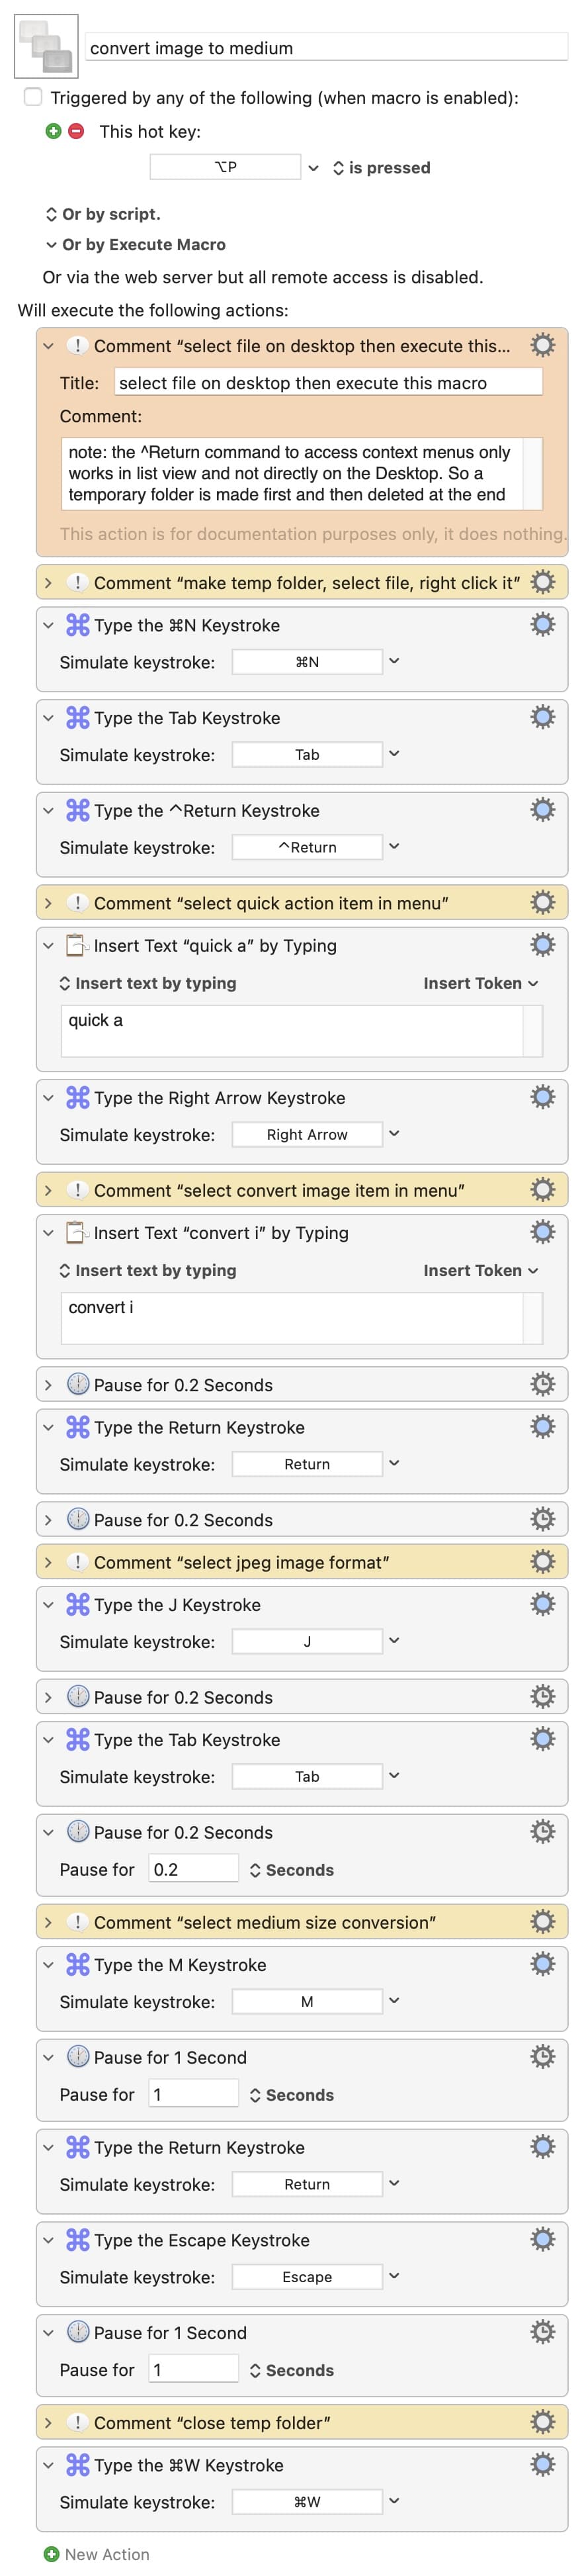
Here is my macro that works on 1 file selected on the desktop:
convert image to medium.kmmacros (13.0 KB)

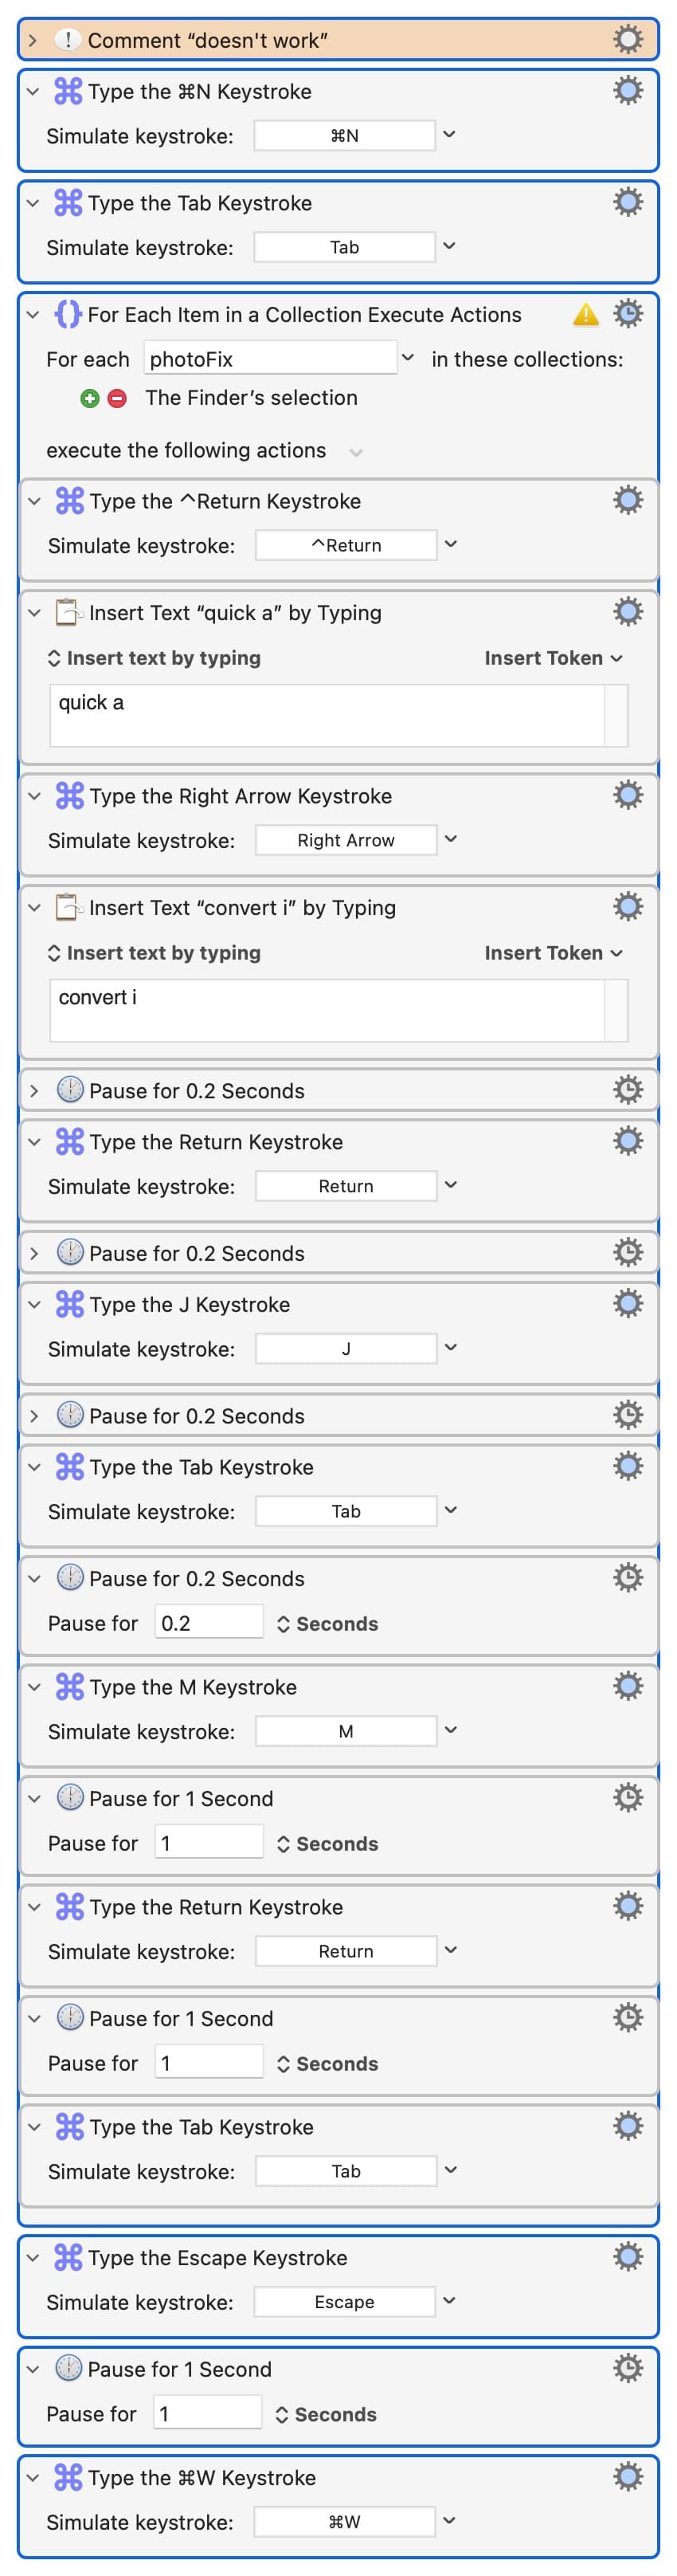
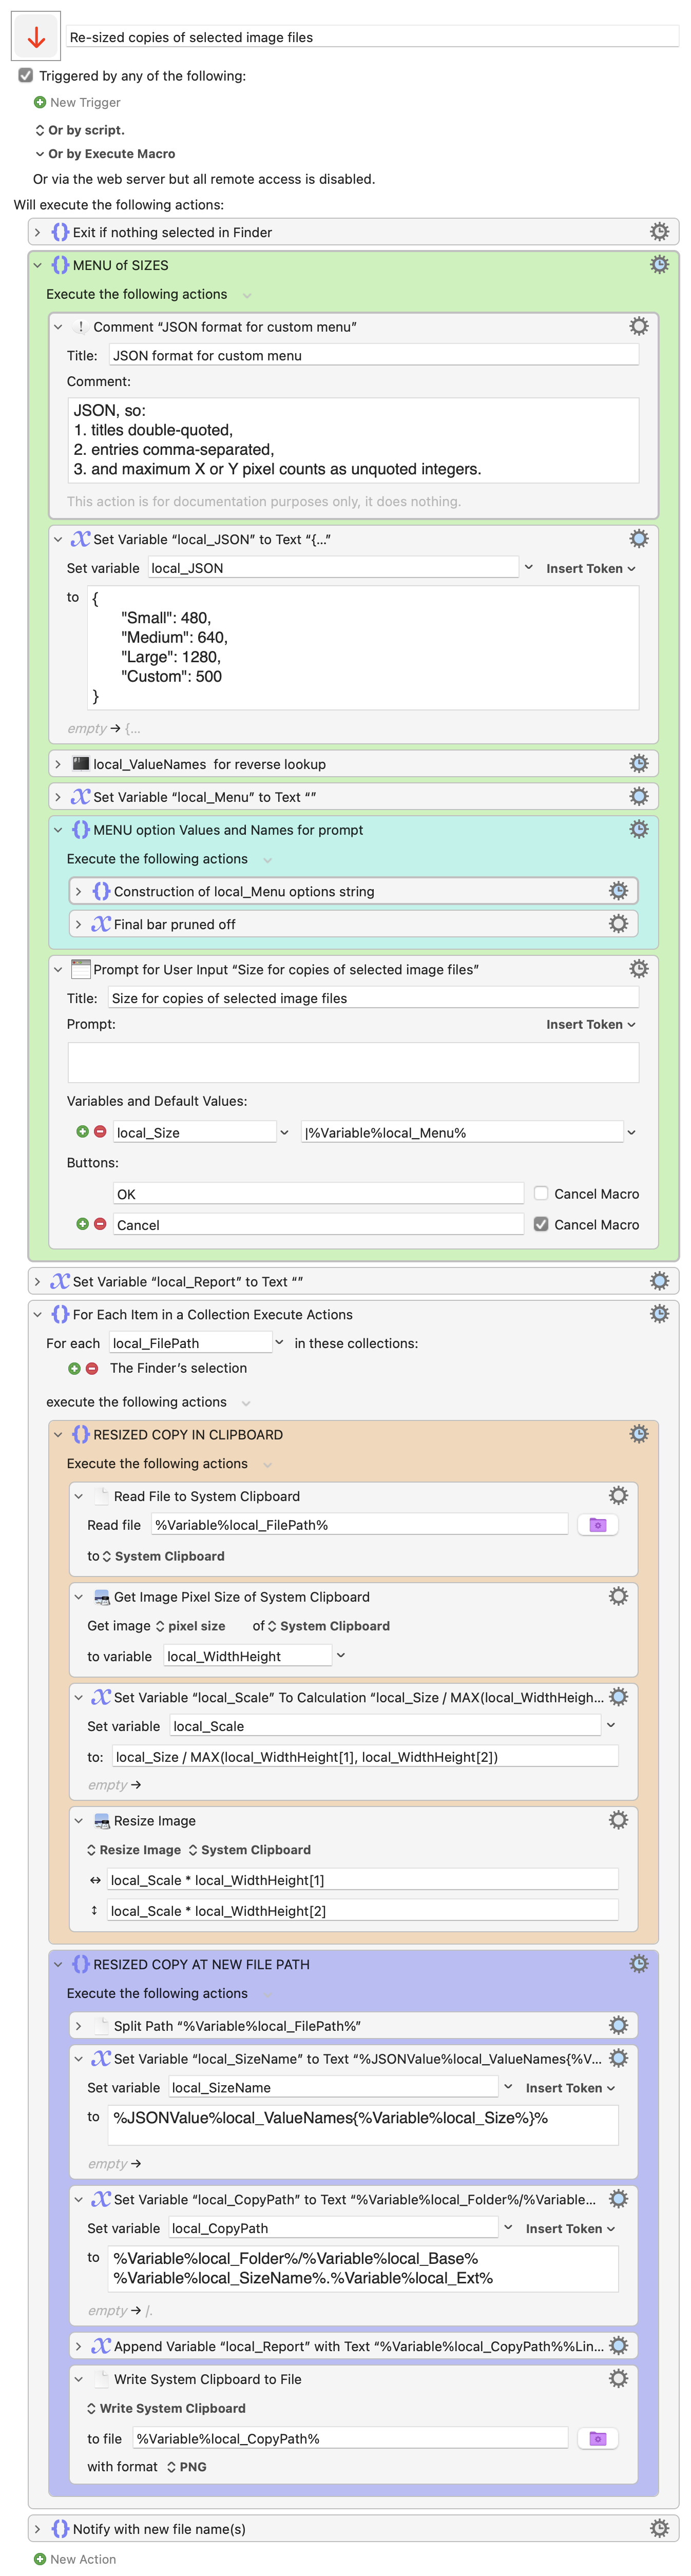
And here is my (non-working) macro for multiple selected files:
convert image to medium batch.kmmacros (12.0 KB)

Details
Doing this on the desktop is challenging because the Finder right-click (context) menu does not work on the desktop (I learned that in this forum). For that reason, my macro makes a temporary desktop folder to access the context menu and then deletes that temporary folder when done.

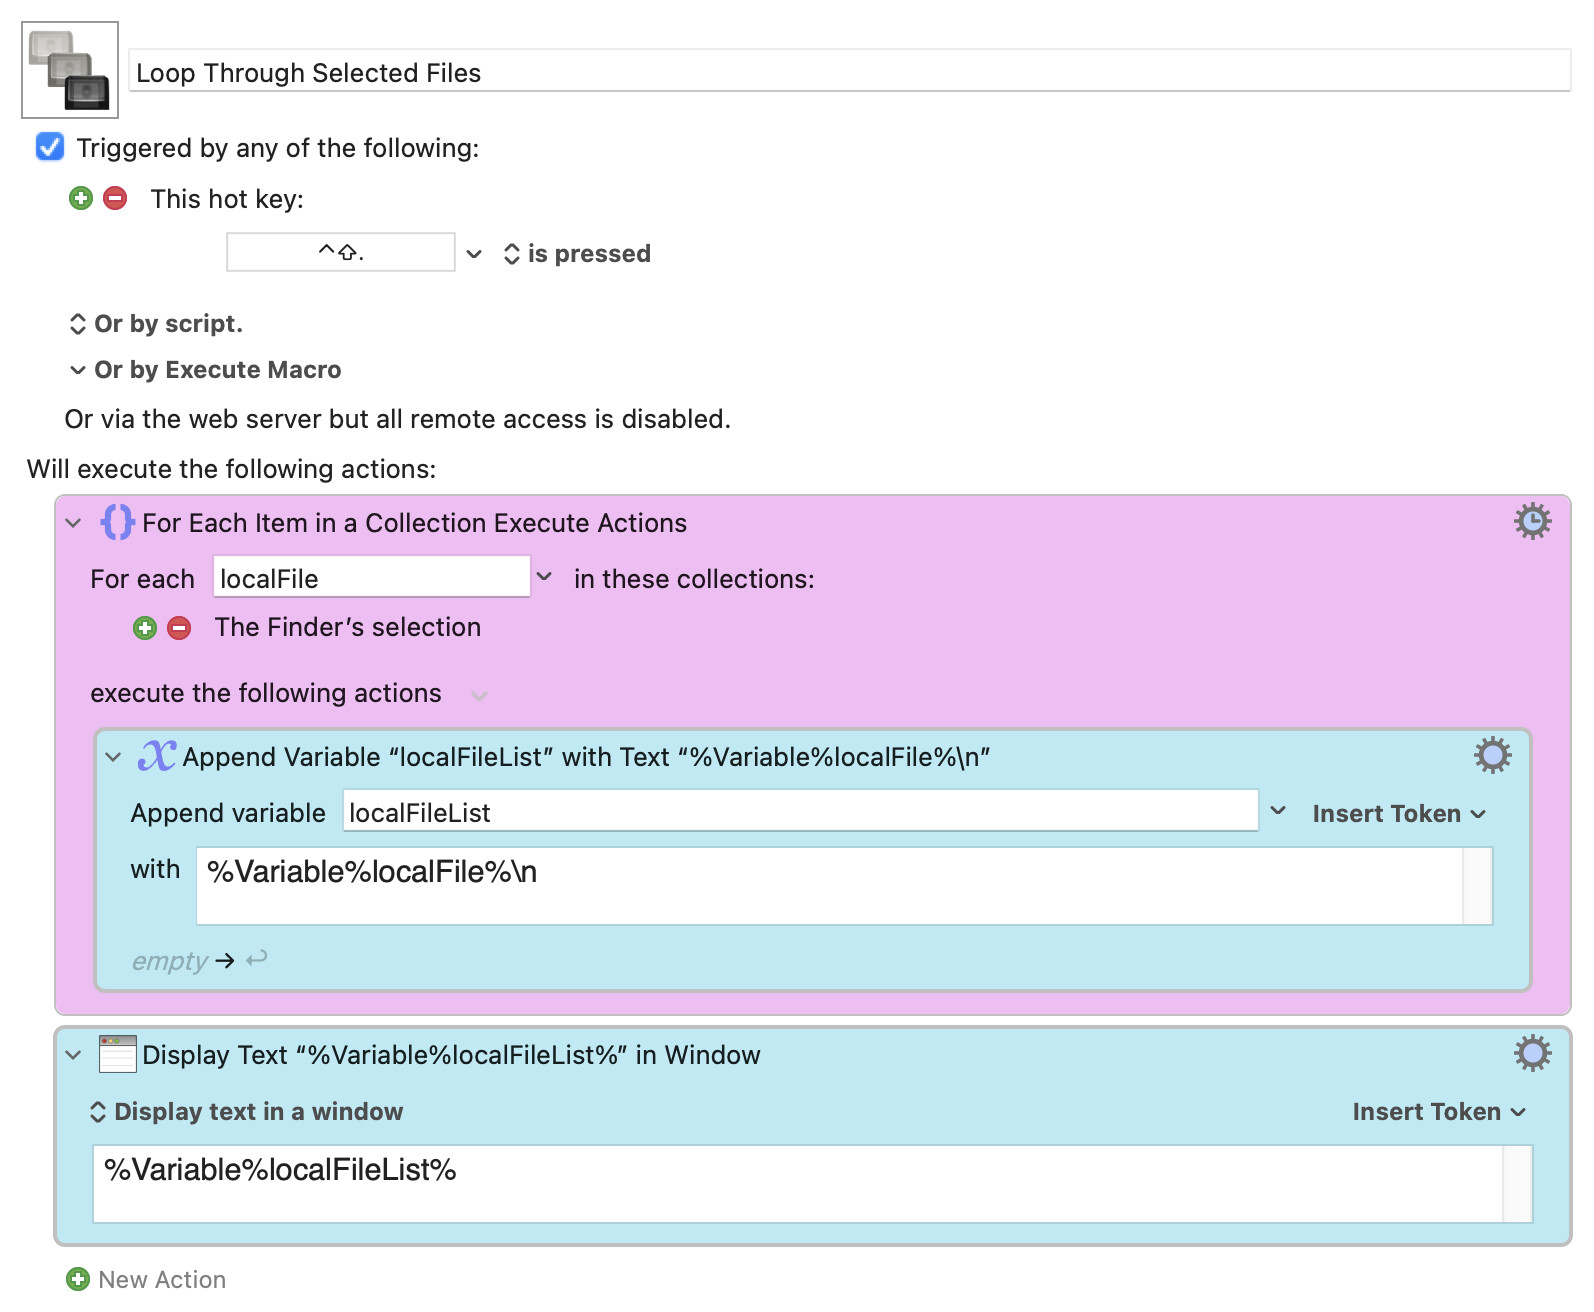
But that leads to the problem of selecting each file before executing the commands of my working macro. That's what I can't figure out. The version I've uploaded here tries doing it using tab keys, but there must be a better way.

Here is a screenshot of my macro that doesn't work on multiple files selected on the desktop:

For batch operations over a set of image files, it may turn out to be worth installing ImageMagick

See:

https://forum.keyboardmaestro.com/tag/imagemagick

1 Like

Way more complicated than what I'm looking for -- and besides, I want to learn how to make better Keyboard Maestro macros -- isn't that what this forum is focused on?

It's just one way of using Keyboard Maestro – simpler in some senses – successfully managing interactions with a GUI through clicks, keystrokes and suitable pauses can have its own complexities too, particularly over several files at a time.


If you prefer to avoid the Execute Shell Script action, then it may still be worthwhile to bypass GUI contextual menus and use some of the Keyboard Maestro image editing actions, like:

image

3 Likes

I am not yet using MacOS 15,[1] so I do not use ⌃-↵ and the like, but in case it helps, I will mention these tokens, which I have used for similar Finder operations. I appreciate though that these might not fit into your preferred method.

The %FinderSelections% token returns (v10.0+) the paths of the currently selected files in the Finder, one per line.
token:FinderSelection [Keyboard Maestro Wiki]

The %FinderInsertionLocation% token returns insertion location in the Finder, which is usually the path of the front window.
token:FinderInsertionLocation [Keyboard Maestro Wiki]


  1. And you can’t bully me into using it, Apple. :stuck_out_tongue_closed_eyes: ↩︎

Thanks @ComplexPoint -- I tried, but just don't understand file manipulations in KM well enough to implement successfully.

@kevinb I tried using your tokens but couldn't get it to work. My basic concept is to use KM to duplicate things I do repeatedly, and I could do it for 1 file. But then when multiple files are involved I just get stumped.

Your question is an interesting one. I see multiple ways to solve this.

Yes, one way would be to install ImageMagick. It's a wonderful program but it's very annoying to install and learn. I think ImageMagick is open source which means it could be installed as part of KM, which would be wonderful. But I found that some of its image processing took 60 seconds to perform on a single large screen image, which meant the program was pretty useless to me. That was more than 100 times slower than I what wanted.

Yes, another way would be to use tokens, which is actually a pretty decent solution. That's probably how I would do it.

But I have another way. This approach is quite simple, and should meet your requirements. But my method involves (1) changing your screen's background image (either temporarily for the macro or permanently), (2) changing your Finder option so that JPEG file icons are not displayed with a thumbnail of the image, but rather with a consistent image for JPEG files, (3) using a For Each action which will run your macro multiple times on each location that contains the image of a "selected JPEG file."

So the first action in your macro will look like this, and then you can insert your code into the body of this loop, and you can reference the coordinates of the location of each found image using the variable "LocalFoundImage".

image

As I implied above, you probably need to have your screen background set to a solid colour, in order for this action to reliably target only your SELECTED images. You probably can't tell from my image above, but the image in the image well above contains a grey boundary around the JPEG item which indicates that the file is actually selected. This is important!

It would actually be better if you changed your requirement to allow this macro to process EVERY JPEG file on your screen, (or have your icons in a Finder window) instead of just the SELECTED icons, because then you wouldn't have to tune your macro to recognize the selection box around the file icon, which means you wouldn't have to change your screen background at all.

Thanks for placing a video of your manual process in your original post. That made this much easier to solve.

Postscript: If the macOS GUI changes the selection after you process one icon, then you may have to save the locations of the icons in a variable and then run through them in a separate loop.

You have selected a group of files on the Desktop. Now you need to loop through that list. This macro demonstrates how to do that in the magenta action which executes the first Teal action for each file (appending the file name to another variable in this case, but you'd run your routine here).

Loop Through Selected Files Macro (v11.0.4)

Loop Through Selected Files.kmmacros (3.7 KB)

1 Like

And here, imitating the "Medium" Convert Size (Quick Action option) chosen in your GIF (which corresponds, I think, to scaling the longer edge of your image (assumed for the moment to be PNG) to 640 pixels:

Medium sized copies (longest edge 640) of selected image files.kmmacros (4.3 KB)


FWIW my impression is that the Finder's convert size Quick Action options correspond to these scalings:

  • Small: The longest side of the image is resized to 480 pixels.

  • Medium: The longest side of the image is resized to 640 pixels.

  • Large: The longest side of the image is resized to 1280 pixels.

3 Likes

thank you @mrpasini, I did try your macro and it did work. But when I wrote

But then when multiple files are involved I just get stumped.

I was saying that in the context of being able to get it to work for a single file and probably didn't explain clearly enough. You see, when I do it with 1 file, I have to
(1) select the file within a folder (not the desktop)
(2) execute the ^Return and then
(3) other keystrokes, etc...
But then to continue with another file I would have to somehow do select the next file. That's where my problem comes in.

I've used code similar to yours to iterate through files, but to select them one after another to do steps (1), (2), ... is what's got me stumped.

1 Like

Does it? Or does it open a Finder window that targets the Desktop (and close it later)?

That also implies that your Finder defaults to Desktop and list view for any new windows.

That you can Tab to select the file in your "single file" macro also implies that you only have the image file(s) you want to convert on your Desktop.

If the above is correct then the answer should be simple -- instead of Tab-ing to select the first file, ⌘A to select all the files, then continue with the ⌃Return and the rest of your macro. All the selected files will be converted using the same settings.

@Nige_S

First, selecting all files and then right clicking (⌃Return) is a great idea. I tried it and yes, it does apply the same settings to all files.

But, if there's any folder on the desktop the context menu's Quick Actions submenu will no longer contain the conversion option

@ComplexPoint has provided a solution to my problem that doesn't use Finder's Quick Action, but has more flexibility because I can replace the "640" value he uses with anything and thus make my own custom "small, medium, and large"

However, the result is not exactly the same as can be seen from the different color profile, Alpha channel settings in Get Info. But that's probably a minor point.

As mentioned above, I also wanted to learn how to write better KM macros and the solution of @ComplexPoint certainly provides several new things I didn't know about. It gets away from my simple concept of using KM to mimic actions I normally do repeatedly by hand and starts down the road of programming, which has a much steeper learning curve. On the other hand, I also admit that all my keyboard commands were getting a little complicated, despite their simplicity -- if that makes sense.

I'll need to study this some more as I make use of it in place of Quick Actions, but my initial impression is good enough to conclude this response has the right balance of simplicity/usability for a novice like me so deserves to be the accepted solution.

1 Like

Then your "single file" macro will also break whenever there's a folder that alphabetically sorts before your file -- which is why the "only image files on Desktop" assumption. Since that's not a valid assumption we're going to have to:

  1. Get the current Finder selection
  2. Open a new Finder window
  3. Set that window to target the Desktop in list view (just to be sure)
  4. Set the window's selection to that which we got in step 1

AppleScript to the rescue!

tell application "Finder"
	set theSelection to (get selection)
	set theWindow to make new Finder window
	set target of theWindow to (path to desktop)
	set current view of theWindow to list view
	tell theWindow to select theSelection
end tell

And if you pop that into your single-image macro as an "Execute an AppleScript" action, replacing the first two actions, you should be golden:

As @ComplexPoint has shown, it's often better to "roll your own" versions of Quick Actions as they'll be more flexible and you don't have to drive the Finder UI. But for a one-off, or a QA or other Finder contextual menu item that would be difficult replicate, the above might come in handy.

A few extras here for a custom menu of sizes:

Re-sized copies of selected image files.kmmacros (17 KB)

2 Likes

Here is an explanation:

Thanks again @ComplexPoint -- a lot to learn from this example and it's great just as it is. But of course, learning programing is all about fiddling to make things better so here's what I did:

As I was playing with it, I noticed any changes to the custom menu via the "Set Variable local_JSON' to Text" action caused it to break.

I tried a couple things:
I tried to change the names to include the resolution, like "Small-480" instead of just "Small" -- since this broke it, I looked for any other place where the word "Small" might appear in the code, but could find none.

I also noticed that the "Prompt for user input..." action has a "Variables and Default Values" section where local_Size is defined, so I was wondering if I could enter as a default size the previously used value. But nothing was obvious and I know enough that I can guess this might be a little tricky.

Anyway, as I wrote, it's great just as it is. Thanks for the lesson.

Edits to the JSON string work fine here, but as the comment field above that action says, it does have to be well-formed JSON.

If your edits are breaking it, it will just be something like a missing comma, or unmatched or redundant quote character – something like that.

If you show us the edit you have tried, we should be able to see what the problem is.

(More generally, you can also paste your edited JSON string into an online JSON syntax checker, and click its Validate button to find the issue)

Okay, I've studied it some more, and was able to change the JSON to customize it to my needs (my previous JSON problem was because I had MacOS set to insert smart quotes). I've done 2 things:

  1. added a whole list of pixel options
  2. added a dash in the filename

This allows me to easily choose any pixel size between 100-1900 just by typing in a number after executing the macro (eg, 1 for 100 pixels, 18 for 1800 pixels). This gives me a lot of control and I know I'll be using this all the time
s

I have a general sense of what's going on in the various actions, and to be honest I'm a little disappointed it's so darned complicated. Much of it has to do with the %AWKWARD%variable_naming%requirements one seems to be forced into with KM. I'm no programmer, but I've done a heck of a lot of it. I think KM's learning curve would be considerably less steep if simple variables names (x, y, a, b) were allowed.

Yes, I know that there's the problem of local and global names causing confusion, and that one day when I reach KM programming nirvana I'll be able to read through such jumbles as

%Variable%local_Folder%/%Variable%local_Base%%Variable%local_SizeName%.%Variable%local_Ext%

in order to insert a single dash "-" where needed

But until that day comes I remain among the myriads of KM programmer wannabees who can't handle the over-stimulation of %Variable%local_Folder%/%Variable%local_Base%-%Variable%local_SizeName%.%Variable%local_Ext%

1 Like