Why so bad at matching images?

Why is Click at Found Image in KM 11.0.4 so bad, when being given as a target exactly the image it needs to match? Look at the example below: I need to use at least 75% fuzziness for KM to find the actual target in the menu bar icon, instead than finding the screenshot of the same that is part of the KM configuration further down.

I've done a few tests extending or reducing the area around the target image, and KM seems to perform better with a smaller area. With a bigger area, KM seems to be looking for the green part more than the white part, to the point that - ironically - it matches many of the other menu bar icons better than the target one!

Please advise, I must be doing something wrong. Thanks.

How did you get the image? The best way usually is to ⌃⇧⌘4 to activate "interactive screenshot to the Clipboard", click-and-drag round the area you want, click the action's image well and Paste directly in.

Done like that, for me this:

image

works 100%, even on a 27-inch 5K display.

It's still better to reduce the searched area if you can -- less processing required, and less chance of false positives. Luckily, we know the image is going to be in the right-half of the menu bar so we can restrict the search to a (calculated, so it should work for different display setups) area:

image

2 Likes

Yes, it's possible you are doing something wrong. I rewrote your macro and I found that KM matched a very similar image with a 2% fuzz factor, which is an excellent match. In other words, your macro worked fine with my system.

My advice is for you to tell us the exact process you used to obtain that image and place it into your image well in the Move and Click action. It could be that your mistake is in the process you are using.

Now I see that Nige has also responded to you. His opinions tend to be better than mine, so you should consider what he said.

All, I was using ⇧⌘4 to capture the target image, instead than ⌃⇧⌘4. Could it be that that was the culprit? I am using an LG Ultrafine 5K like in @Nige_S 's reference.

Almost certainly -- it seems that when you screenshot to file the image resolution isn't recorded so it defaults to 72dpi. But your Retina display is (probably) 144dpi, hence the mis-match.

Going through the System Clipboard and pasting directly into the KM image well solves the problem in almost all cases -- try it and see.

3 Likes

I feel you’re close to the solution, but some of the testing I’ve done is not consistent with that. I feel that it’s also important that there is as little “non meaningful” background as possible. E.g. in my case, capture as little of the green background as possible. I’ll do more testing, thanks!

These are two different problems.

The first is that of capturing an image with the appropriate resolution to match against what's on screen. For most people (and this has cropped up many times), screen capture to Clipboard and Paste into the image well is the most reliable way of doing that.

The second is capturing an image that KM can detect amongst from all the other busyness you will have on your screen, with as few false negatives and positives as you can manage. This is where it becomes an art...

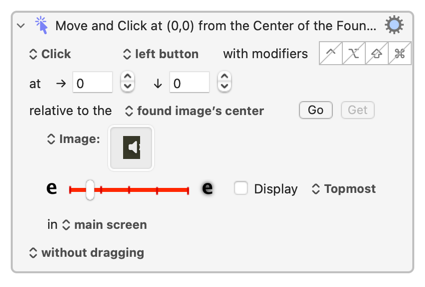
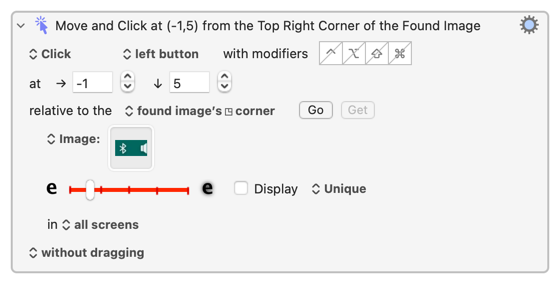
For the captured image you want lots of "differentiation". Yes, too much "non-meaningful" background can swamp the foreground when matching. But so can "non-meaningful" foreground -- to the algorithm, one collection of pixels that's 90% white looks just like any other. It can actually pay to expand the image past your actual target and then offset the click accordingly -- in your case you could also include the Bluetooth icon in your screen shot and click inside the right-edge of the matched area. Maybe:

image

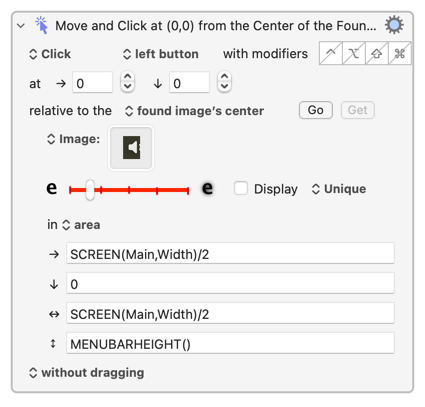
Limit the searched area if you can -- an defined area, as above, is good when you know roughly where something will be, "front window" or "window with title" is also useful, etc. Don't rely on "Unique" unless you want the action to fail when there's more than one potential match -- "Best" is usually better, "Topmost" is good choice for menu bar items (as you've found). Then start increasing the "fuzziness", testing as you go, to achieve the most reliable detection with the minimum of false positives.

Basically, play around until it does what you want! Not very scientific, I know, but every case is different so nothing beats finding out how it works for you.

But what image detection isn't is "so bad" -- loads of people here are executing macros that include image-detection many, many times a day, so it must work.

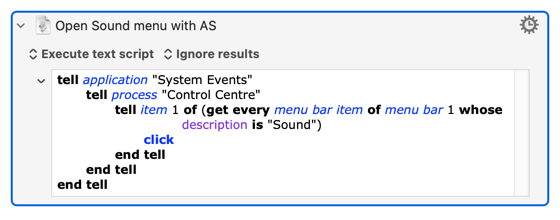
Hopefully the above will help you with general image detection. But, for the problem at hand, consider using AppleScript instead. Working with the "Sound" menu bar item has been covered many times on the Forum, and here's an action that will click open the "Sound" menu to get you started:

Open Sound menu with AS.kmactions (1013 Bytes)

image

Nike's answer is (as usual) wonderful. But I have two things to add.

I have used Find Image every day since it came out, and the statement above contradicts my experience. What's important is "colour contrast" within the image being searched for. The perfect image to search for would be something like a small "rainbow emoji," as it has many colours. In your case, the background is the same colour (green) as most of your image, so it's not going to make much difference to add or remove that background.

One more thing. On very rare occasions, (perhaps after calling it a million times, as some of my macros do) the Find Image mechanism stops working, (I suspect it's within the API's code, not the KM code) and a reboot of the KM Engine solves this issue. I have no reason to think that this has happened to you.

1 Like

To click relative to an image, you use the Mouse Click action, configure it to be relative to a found image, and take a screenshot of the desired area of the screen using Command-Control-Shift-4, and paste it into the image well on the action (Note: if you have trouble with this matching, and you have a retina monitor, check that the captured image is 144dpi - if the system erroneously uses 72dpi, you'll need to correct that to 144dpi). The image has to be unique (which includes not being visible in the action if the image is small enough not to be shrunk in the image well) otherwise Keyboard Maestro will not know where to click. The Display option in the action will allow you to see where Keyboard Maestro is matching.

Also keep in mind that Apple tends to like translucency and the menu bar is translucent by default and thus will pick up the color of your desktop image and so if that changes it will mess up the match.

Similarly, menu icons sometimes change to reflect status (eg the volume icon changes depending on the volume setting).

These sorts of changes, which to a human are inconsequential, change the image quite dramatically as far as matching it goes.