As well as what @peternlewis said (and forgive me if I've gone too basic!). And trust me, this takes way way longer to read than actually do when creating your macro:
Screen coordinates are in {x,y} format with {0,0} being the top-left corner of your main screen -- x increases as you move right, y as you move down, and units are "nominal resolution pixels".
That means that if you know the position of two points you can calculate the distance between them -- or if you know one point and have a distance, you can calculate the second point's position.
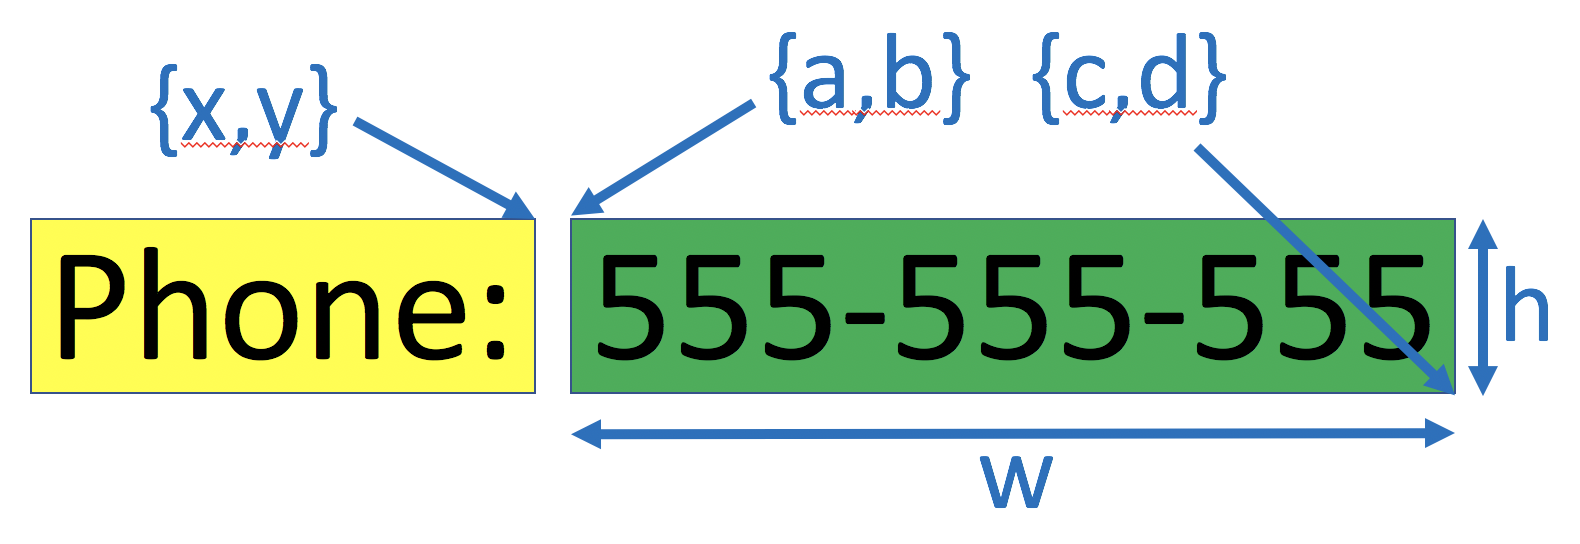
Really poor diagram time...
So your "Find Image" action returns the position of your found image to a variable -- I'll use Local_myImage. While it actually gives you left and top coordinates plus the width and height of the image (and fuzziness), KM knows it is a "rectangle" data type and provides various built-in calculations for you (see the "Variable Dot Notation" section of the manual) so you can easily get useful values. For the diagram above:
{x,y} = {Local_myImage.Right,Local_myImage.Top}
So now you need to find example values for {x,y}, {a,b}, and {c,d} -- it doesn't matter where on your screen you do this because we are only concerned with the differences. If you do it manually it's a bit more work, but you'll have a method you can use in almost any situation:
- Get the thing you want to "measure" on screen
- Press ⌘⇧4 to activate the OS's "screen grab a selection", which will show a "target" pointer complete with coordinates
- Hover the pointer over the approximate position of the top-right corner of the image you are detecting and write down the coordinates shown -- that's our
{x,y}
- Hover the pointer over the approximate position of the top-left corner of the area you want to grab and write down the coordinates shown -- that's our
{a,b}
- Hover the pointer over the approximate position of the bottom-right corner of the area you want to grab and write down the coordinates shown -- that's our
{c,d}
- Hit the
esc key to cancel the screen grab
And now it's maths time -- I'll use my on-screen numbers for the image above:
a - x is the x-offset for our grab area's top-left corner -- for me, 1038 - 1023 = 15b - y is the y-offset for our grab area's top-left corner -- for me, 841 - 841 = 0c - a is the width of our grab area -- for me, 1425 - 1038 = 387d - b is the height of our grab area -- for me, 917 - 841 = 76
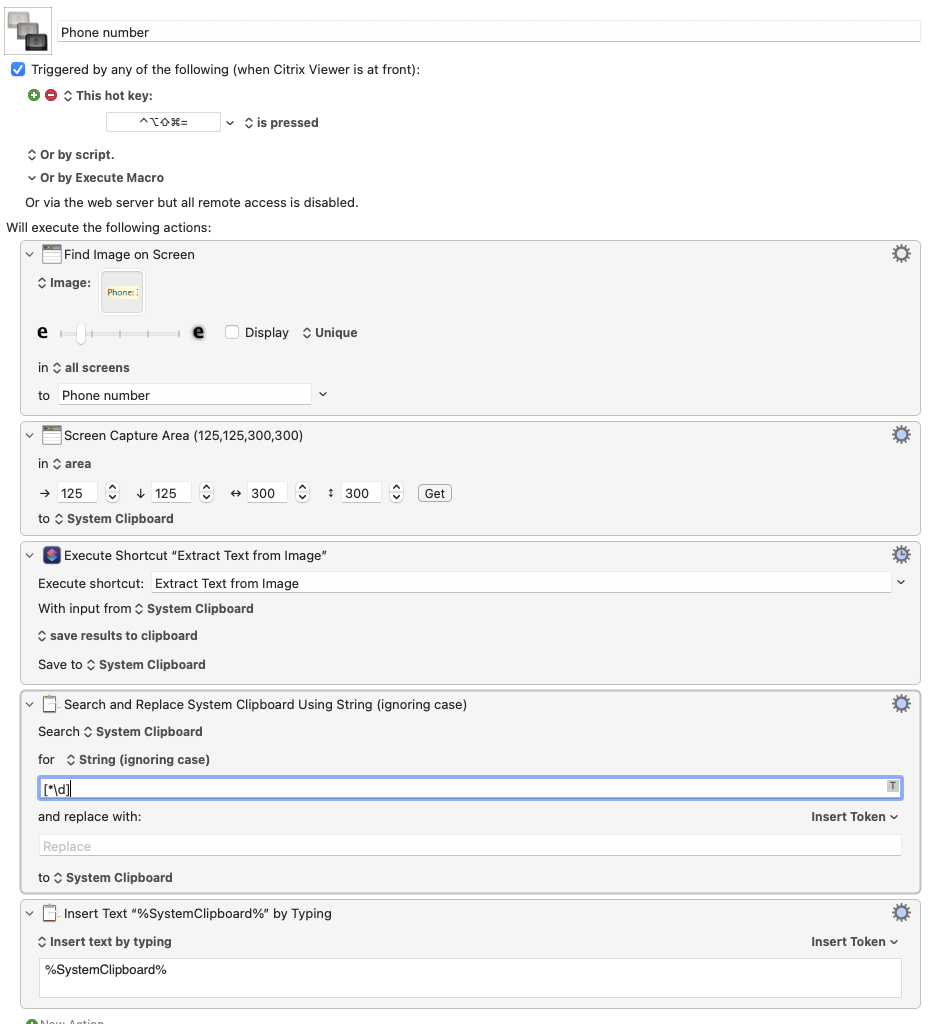
..and we now have the numbers we need for the "Screen Capture Area" action. In dialog order (and again using my numbers):
- Right edge is
Local_myImage.Right + 15
- Top edge is
Local_myImage.Top + 0
- Width is
387
- Height is
76
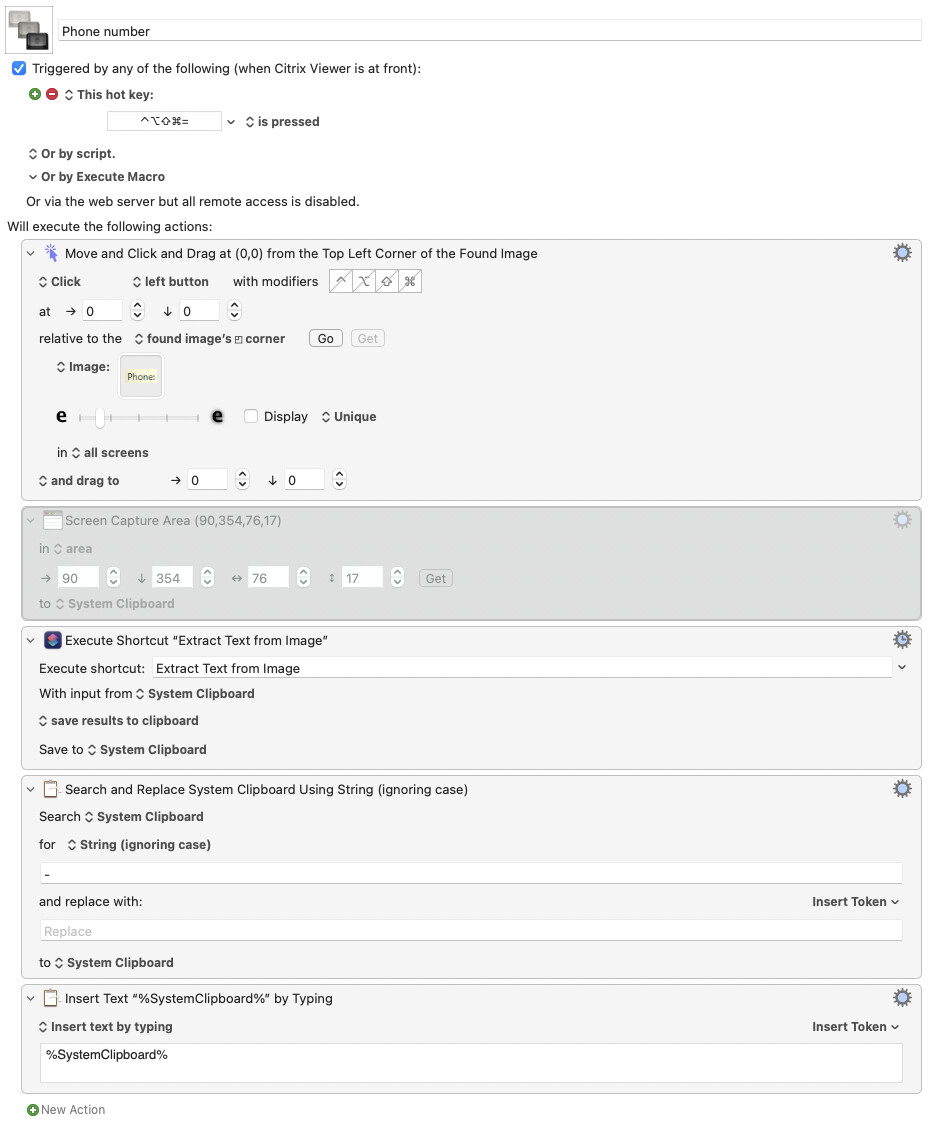
Remembering that the area we want to grab is always the same size and always the same offset from our found image, it's simple to code this into our macro:
As I said at the top, it will have taken you much longer to read all this guff than it will actually take you do this when writing your macro. Try it, and let us know how you get on. And if I've confused more than helped (not unusual  ) -- just ask what the &^%$ I'm going on about!