Floating Screenshot

Many years ago, I created an Automator workflow that creates a floating screenshot using a web view. I use this almost every day so that I can keep a reference of a chunk of an email, a before/after version of an image, even a snippet of code from Stack Overflow, front-and-center above all other windows. (Especially useful on small screens!)

I got to wondering whether I could improve this using Keyboard Maestro, and not surprisingly, I could.

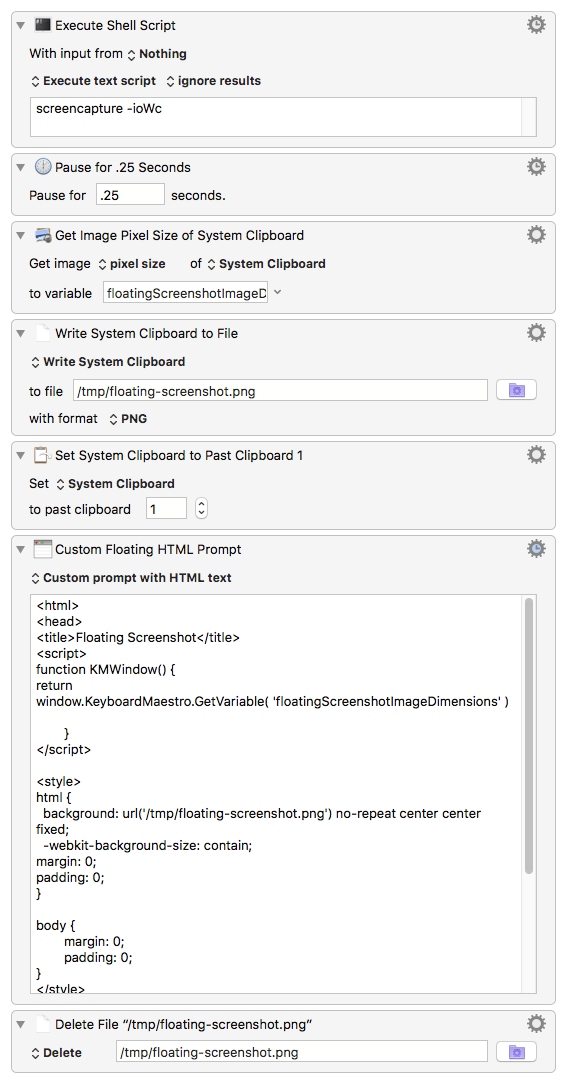
This macro will create a screenshot using the cmd+shift+4 style selection (window or crosshairs) and then float that screenshot above all your other windows. Thanks to KM8, it is resizable and will automatically scale the image as you resize the floating window.

Screen Capture - Floating Screenshot.kmmacros (4.1 KB)

image

14 Likes

Nice!

I agree with Peter, Nice!

I found this macro and gave it try, but it seemed to completely hangup. I was unable to kill the window and had to reboot my machine.

Has this been tested with High Sierra by someone else? Just wondering if I had a one-off issue.

Todd

Still working fine here on low Sierra 10.12.6, but I wonder if you are hitting a permissions issue with its use of the /tmp directory ?

(It could be tweaked to use the temporary directory that the AS/JS scripting additions point to)

Does this tweaked version work ?

Screen Capture - Floating Screenshot (minor variant of iNik macro).kmmacros (22.7 KB)

(It uses a different temporary directory)

1 Like

Tried the original again and didn’t have problem a second time. My machine was < 5% battery and was starting to act a bit flaky anyway, so perhaps in the writes to “disk” to store state before a shutdown something happened.

1 Like

Good !

( I enjoyed taking a look at how it works – it’s an excellent macro )

I have upgraded both MacOS X and KM and am not having any problems.

1 Like

Great workflow. I wonder if this can be modified to append several screenshots in a row (vertically scrollable) from a set folder of screenshots. Would avoid multiple windows and afford user to reference previously clipped information. Perhaps this is possible, @iNik

It's a thought. I would certainly find it helpful.

@iNik, thanks for sharing. :+1:
This is an excellent Macro, which overlooked when you first posted it. I just discovered it today.

The screencapture always starts in "Window" mode, and I could not find a way to change then to "Selection" mode.

I had to change the first Action to this in order to get "Selection" mode, when running:
Keyboard Maestro 8.2.4 on macOS 10.12.6

image

SCRIPT:
screencapture -ic

Pressing ⟨spacebar⟩ toggles between the two modes
System version: 10.13.6

1 Like

Pressing space toggles between the modes, just like normal screen cap.

This is one of the most useful macros I’ve found here -- and that's saying a lot!

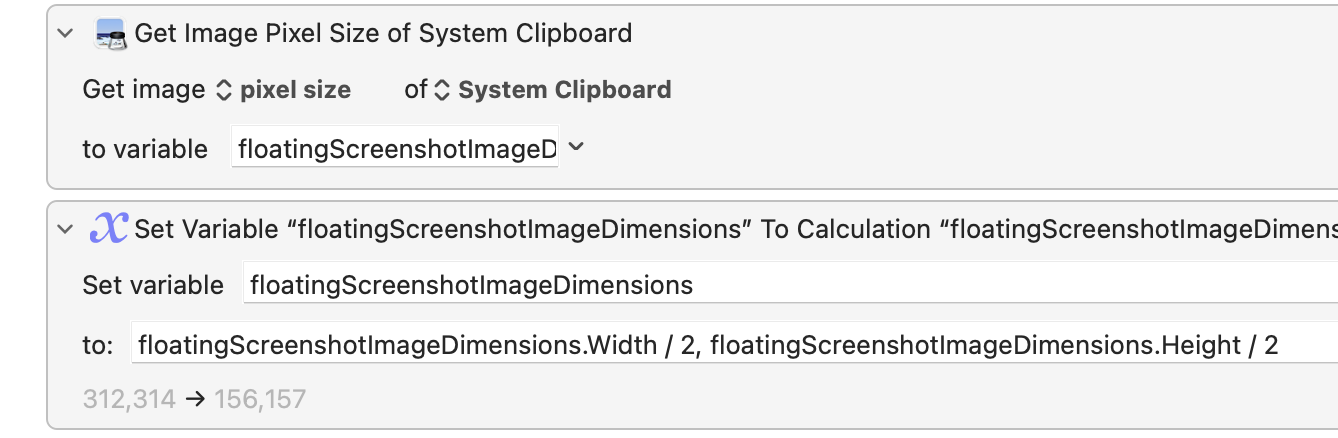
I recently bought a 4K display, and now the screenshot appears at about twice the size of the area I selected. On the old 2013 iMac's display, it was the same size.

Is there a way I can force the resulting window to be the same size as what I selected?

Thanks,
Russell

Hey Russell,

Nik hasn't been around since November...

You're getting this problem due to the 4K resolution.

I think if you divide the two values assigned to this variable by 2 and put them back you can solve the problem.

image

I'm still using a non-Retina machine, so I can't test...

-Chris

I figure it out, based on the actions list in the wiki, and it works:

Is that the best/correct way?

Thanks, Chris, for teaching a man to fish!

Best,
Russell

I reckon so.