If you've used my MacroBackerUpper macro, then you've seen The Decision Maker in action—it's the green box that appears when you run a backup:
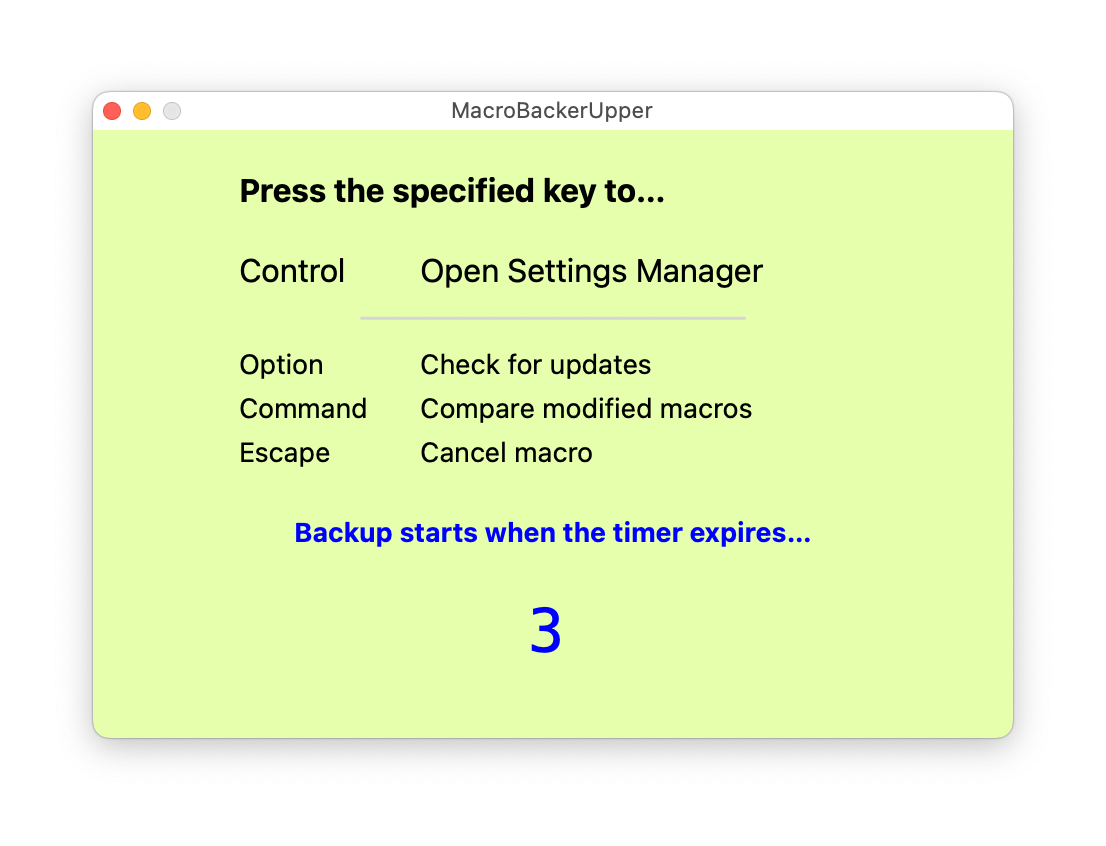
I use this box in a lot of my macros now—it's an incredibly useful way to pause a macro and have it do something else (or not, if I don't pick an action) before continuing on. Or it can be used at the start of a macro, as in MacroBackerUpper, to determine what specific task I'd like the macro to perform.
It's incredibly simple, though I've built up this example macro with a number of features, just to show how to use it. First, the macro…
Download Macro(s): The Decision Maker.kmmacros (34 KB)
Macro notes
- Macros are always disabled when imported into the Keyboard Maestro Editor.
- The user must ensure the macro is enabled.
- The user must also ensure the macro's parent macro-group is enabled.
System information
- macOS 14.4.1
- Keyboard Maestro v11.0.2
When you run this one, you'll see a somewhat more loaded green box:
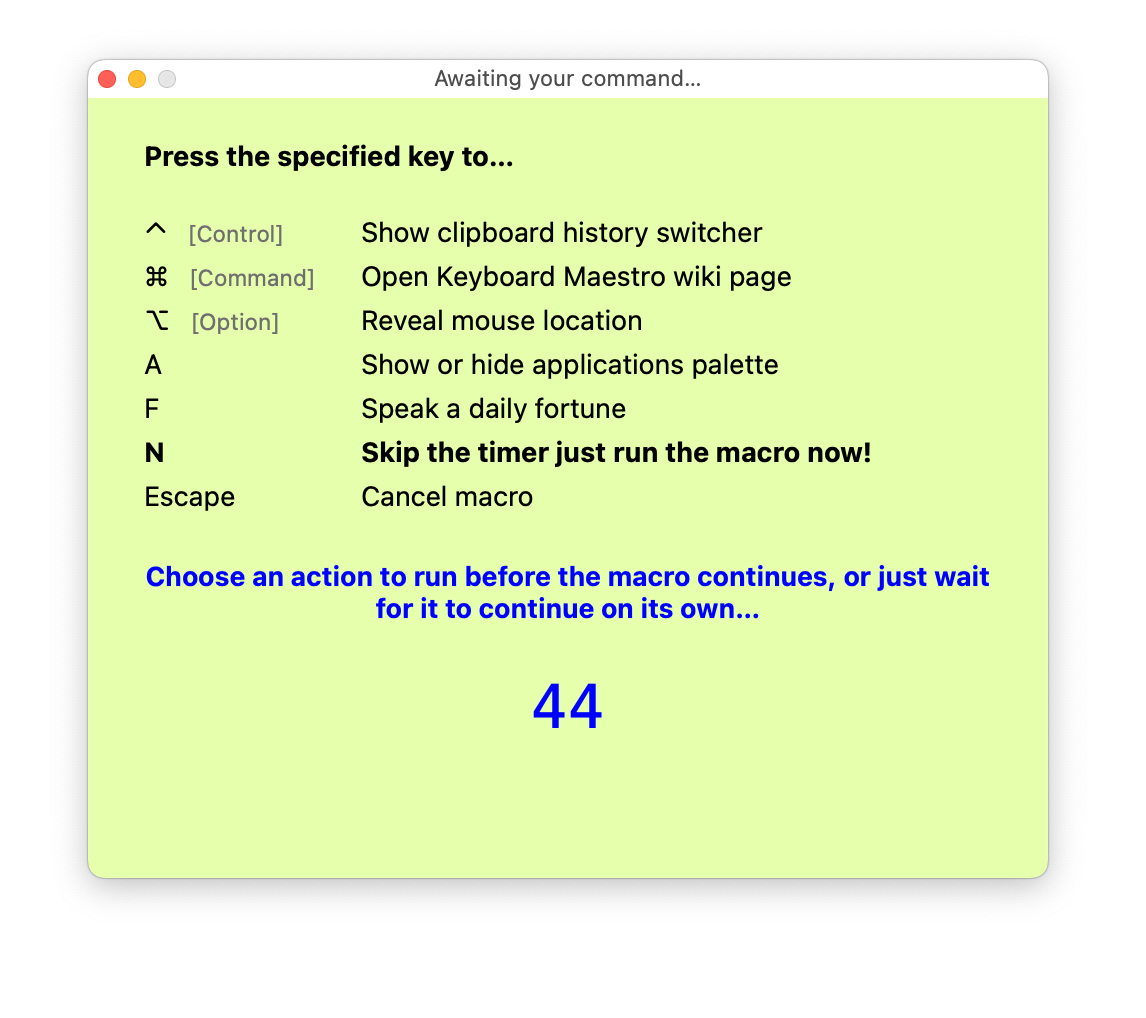
Press any of the defined keys while the box is onscreen, and that action will run, then the macro will continue. Wait 45 seconds, or just press N, and the macro will continue without executing any of the actions.
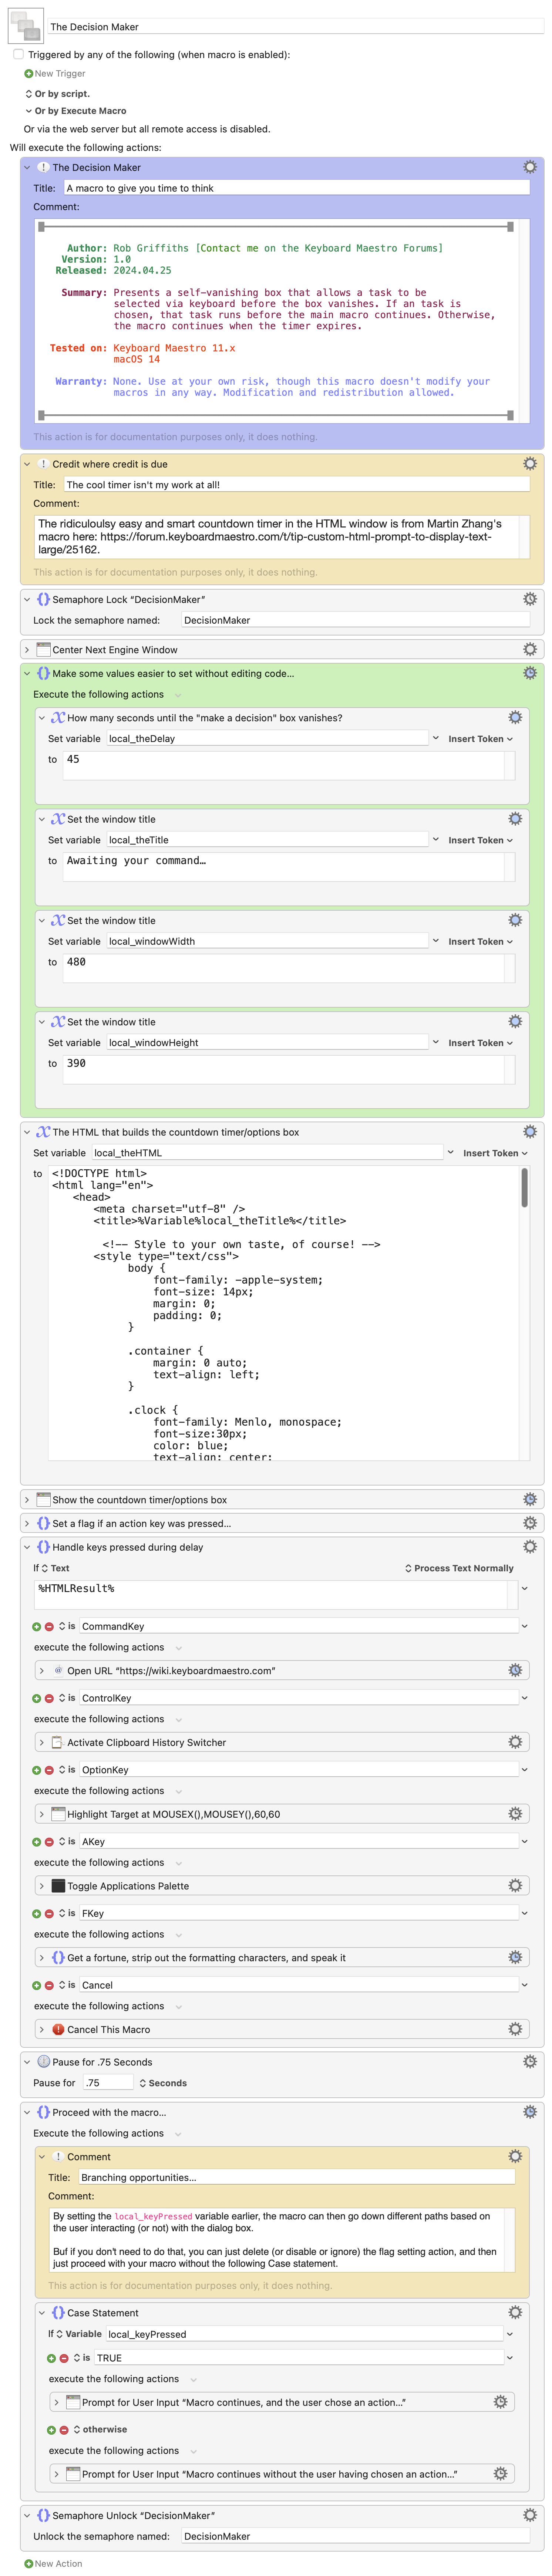
The green group in the macro are values you can set that will be inserted into the HTML code (without having to edit that code)—how long the window stays onscreen (it's set really long for the demo), and the title, width, and height of the window.
Most of the real work of the macro is in the first action below the green group—named "The HTML that builds the countdown timer/options box". This is just a mix of CSS, HTML, and Javascript, so you can do basically whatever you like with it. The key parts are:
- You should probably show a key of some sort in the box, showing what happens for a given key press. The demo is set up to do that using a two-column table, but that's not required in any way.
- The
Key listenerssection holds the Javascript that watches for keys and sets return values based on which key was pressed. You can see there are three special keys (event.followed byctrlKey,metaKey, oraltKey), as well as normal keys (event.codeand thenKeyF, whereFis the actual key you want to watch for). This is required, as it's what makes the macro work :). - To be able to act differently on different key presses, you need to return something via the
window.KeyboardMaestro.Submit('something goes here')lines. This does not have to be descriptive of the key that was pressed, as it is in the macro. It could sayorangeorsodaorcalculatoror whatever you want. Each key needs a unique value, though, as you'll branch based on these values in a Case statement.
To capture additional keys, add them to the box in text form (so the user knows about them), then add a section in the Javascript:
if (event.code === "KeyB") {
    window.KeyboardMaestro.Submit('They pressed the B Key')
    window.close();
}
And finally, add a new option in the Case statement that acts on the returned values.
After the macro displays the box and gets (or doesn't get) the user's input, it sets a flag based on whether the user pressed a key or not. This makes it easy to branch the macro after the box is gone—if the user pressed a key, you could have it do something different than if they didn't press a key. (This is demonstrated in the macro.)
The large Case action named "Handle keys pressed during delay" does just that: It acts based on the text in %HTMLResult%, which holds the value sent by the HTML box in the .Submit('something goes here') lines.
In the demo macro, these are just all simple single commands (with one exception), but they could just as easily be calls to run other macros or subroutines, etc. Once the user's selected action is finished (or if they just waited out the delay), then the macro checks for the "did the user choose an action?" flag, and shows one of two different dialog boxes and quits. There's also a comment that explains how to skip the whole branching thing if you don't need that capability.
You can do similar stuff with a Prompt for User Input box, but I prefer this fully customizable window for such things—I especially like the countdown timer feature, where my macro can just continue on if the user doesn't do anything, and they know exactly when that will happen.
-rob.