It is Black Friday, and so seems my creativity to be. So maybe there is someone out there with a useful solution?
This is what I do by just using mouse and click:
I have downloaded a nice recipe for "The perfect turkey". In his/hers jubilant mood over the super well done bird there is used a photo in full size, even it looks small, which means that there is added about 40MB to the size of the whole file.
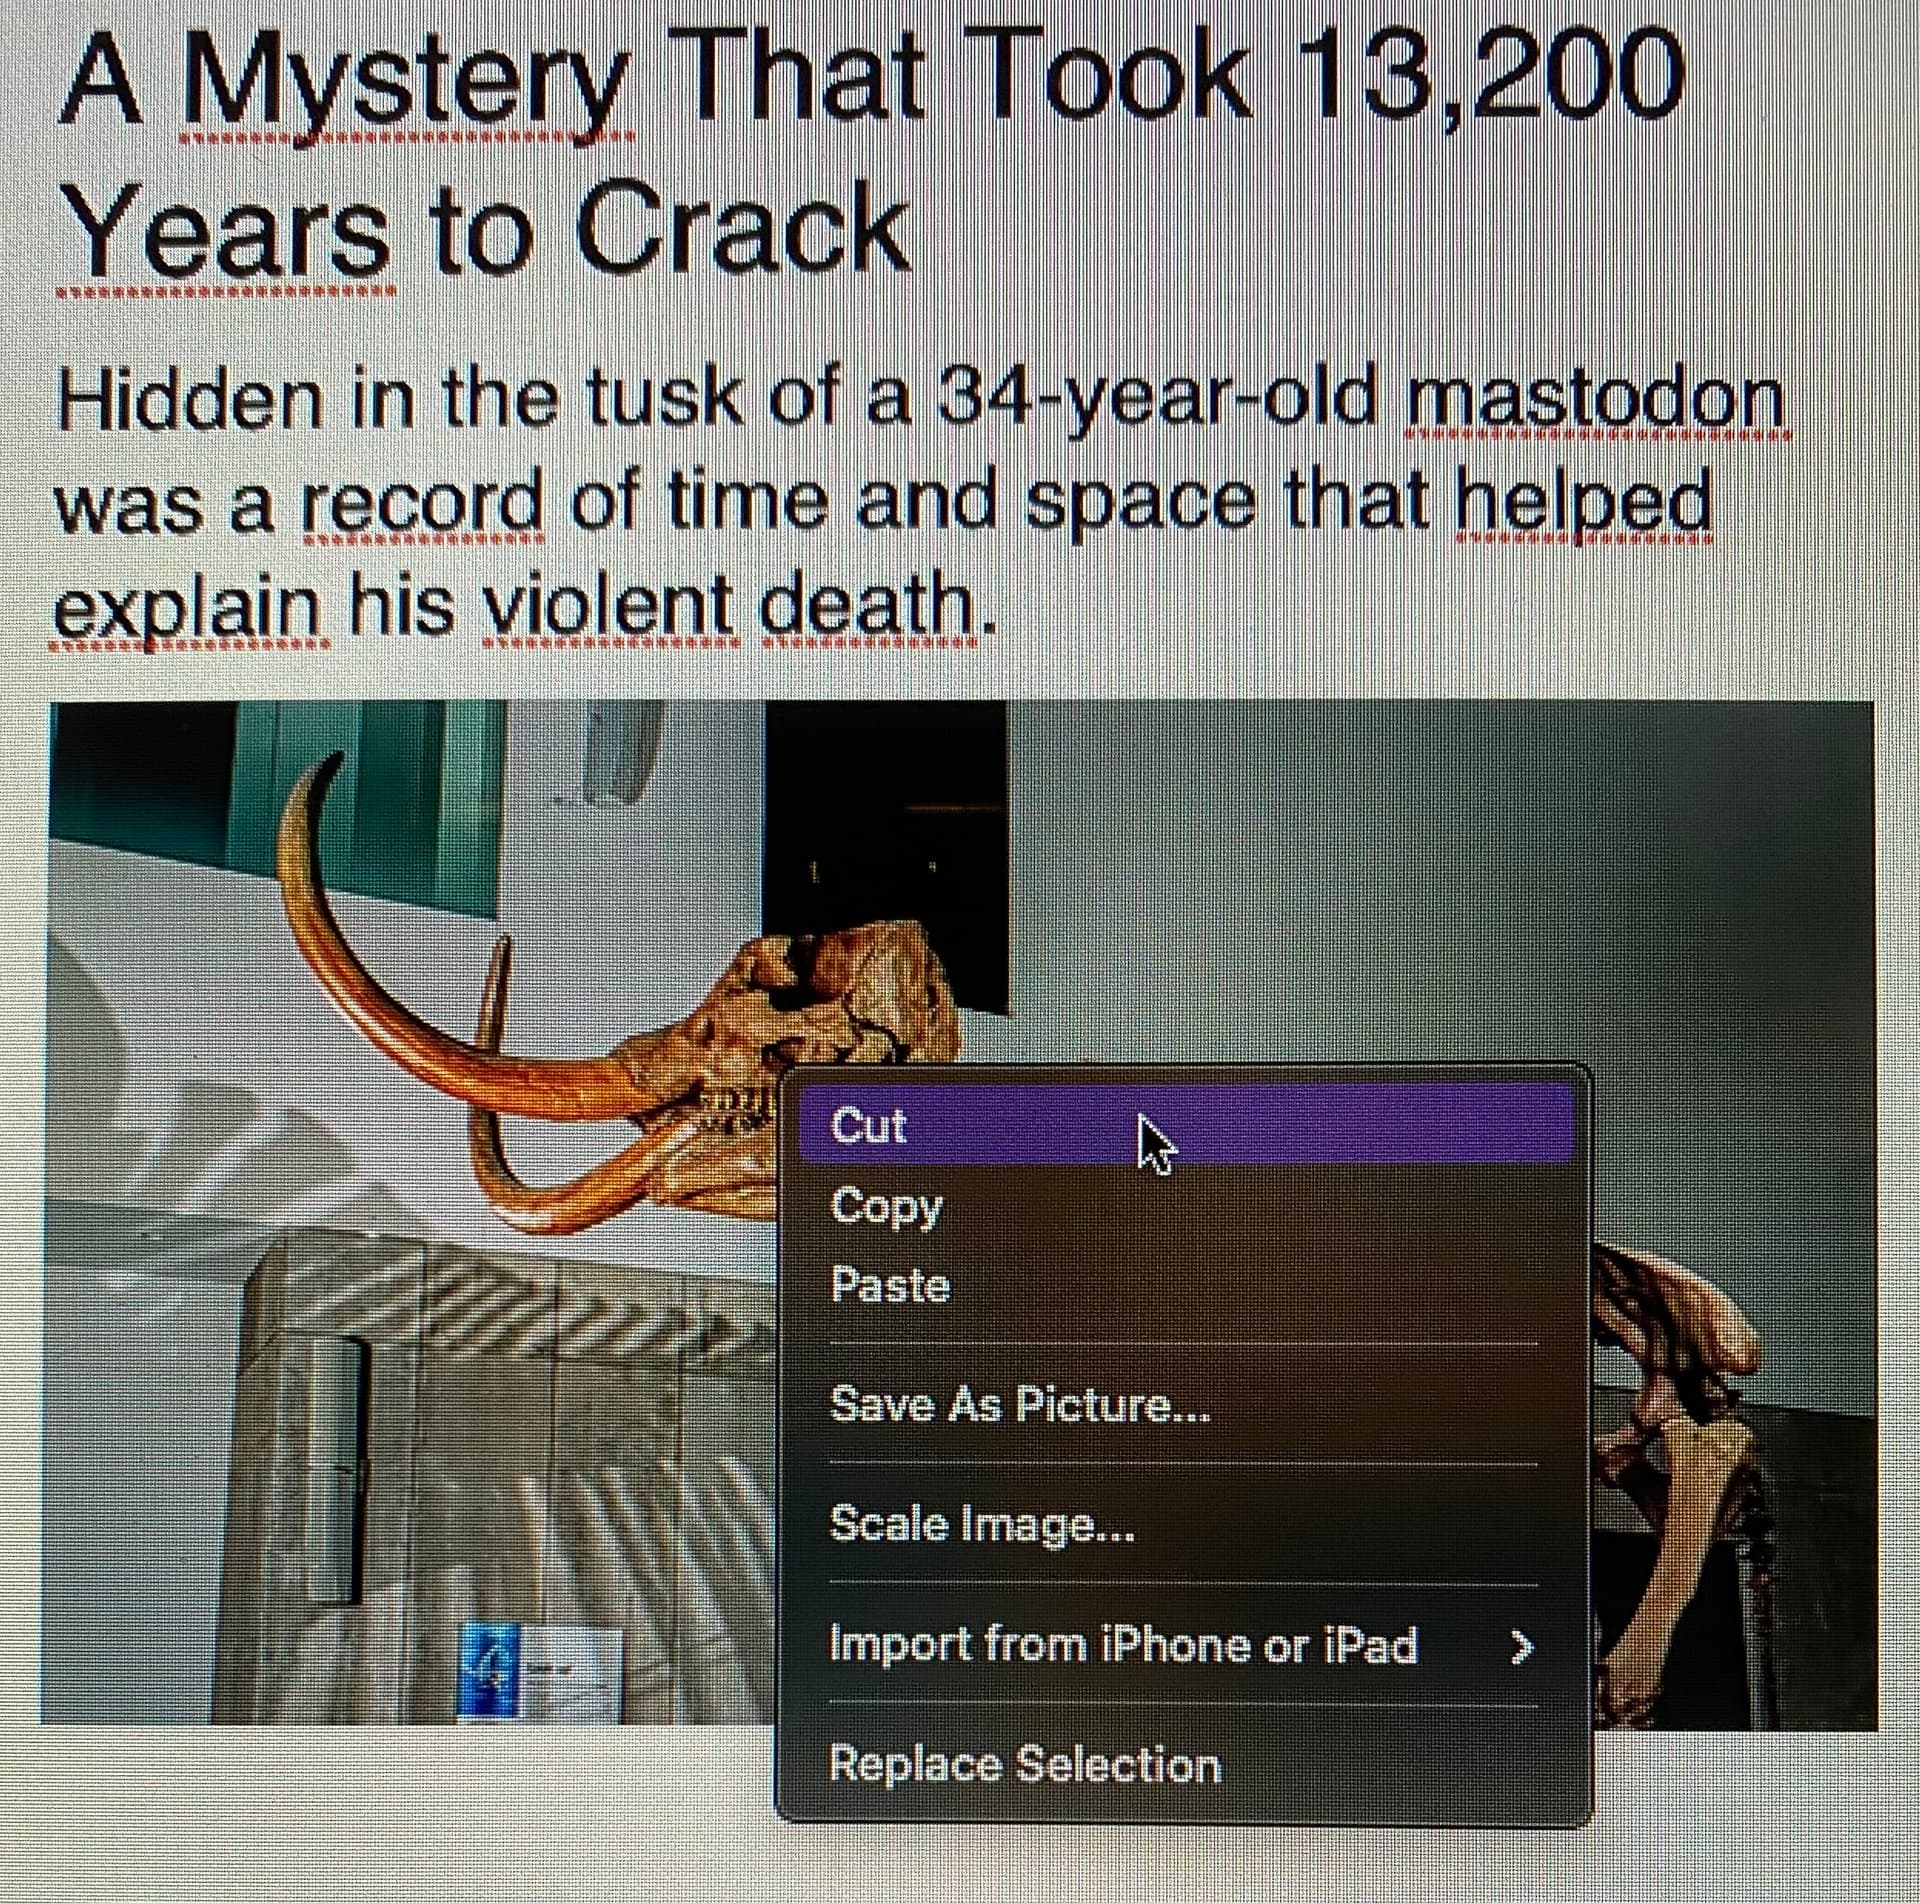
So I will right-click on photo, and from the dropdown menu select copy.
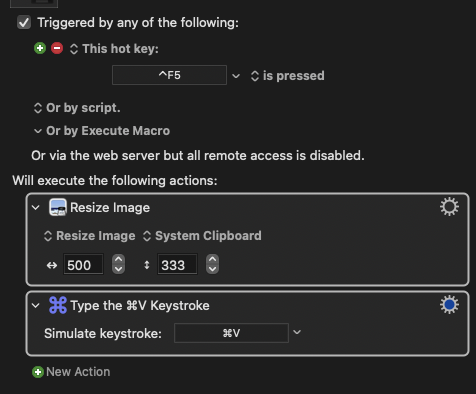
Then I switch to my photo editor (Acorn) which will create new picture (from the system clipboard) via the (Alt-Cmd-N) shortcut.
Another keyboard shortcut (Alt-Cmd-I) lets you then trim size, which is simple to do by entering the value 500 (pix) in the appropriate field (the first shown), and then hitting enter, it is shrunk.
Then right-clicking on the reduced picture (there is no Save action required) and selecting copy... and switching back to the original document... the reduced picture should land into the document, and I would then delete the original!!!
However this was never the outcome of the "logical steps" I chose in building a macro, and it seemed that I had not chosen the 'correct clipboard', either!
So has any one a simple solution for me in this bleak/black night???
Good input
So this morning I came up with a simple, crude, solution:
I right-click on image, and select 'Cut'
Then I just make sure the cursor is "where the picture was"
and run this tiny two-step macro:
Part of my earlier frustration came from my ignoring the "visual steps" --> my eyes finding the desired photo and my hand placing the mouse-cursor on the photo...
and I did not find or look for appropiate options inside the Macro-Verse to substitue those steps! Posssibly they dont exist, also because the photo may be placed rather arbitrary inside its app-window, due to scrolling of document!
Anyway the present solution is managable and yelds the desired reduction in overall filesize of the Scrivener project, while still presenting the photo as "original".
After further tinkering I came up with my final version, that will work like this:
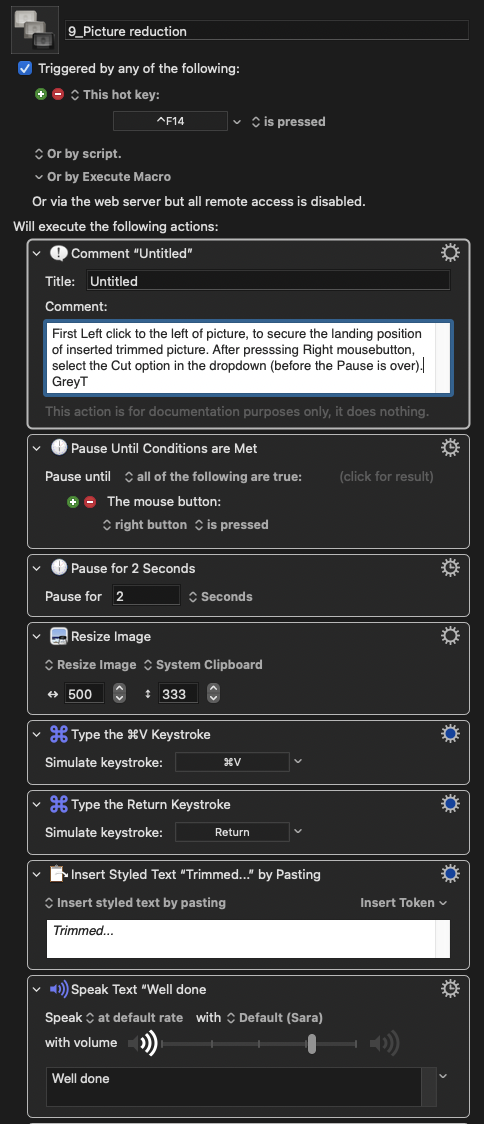
The macro is invoked by its keycombo
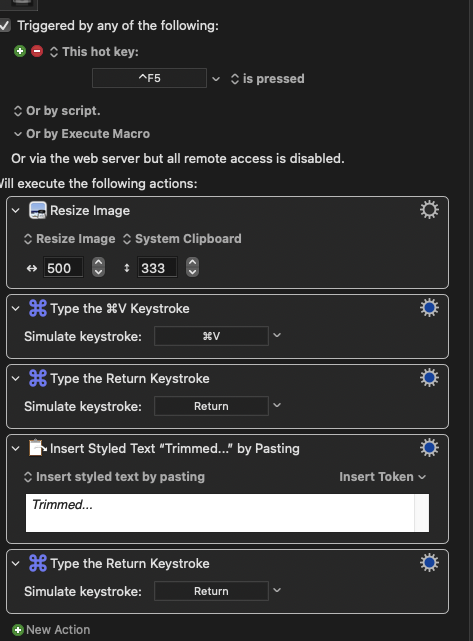
I have ample time now to move mousepointer to the left side of Picture and Left-click, to secure that the reduced picture will be placed as substitute.
I then Right-click on picture and immidiately select 'Cut' from the options.
Then I just wait until trimmed picture is placed (with its "Trimmed" footer, so I know all is fine) The Speak Text at the end is just for fun.
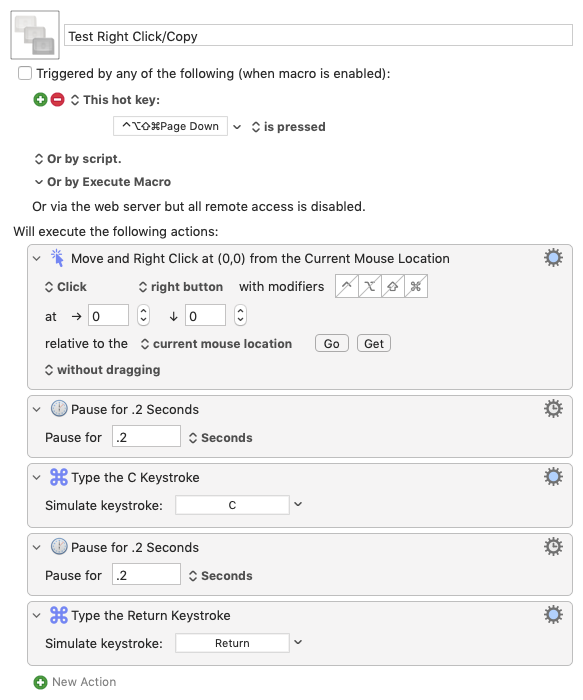
For some unknown reasons it doesnt work out for me. It is true that after a rightclick, pressing the "c" key and then "Enter" will do the job, but I have failed to put that into a working macro.
I attach the one I use. Maybe you can get it to incorporate your findings?
What app do you start with; in other words, what app contains the image that you're trying to resize? And is that the same app that you're pasting the image back into?
Its Scrivener. And the macro removes/cuts the larger picture/photo an replaces it with the resized (diskwise) much smaller version.
For the eyes they will seem equal.
I have Scrivener so I've been able to do some proper testing.
I've made 3 changes to your macro:
I've removed the Pause Until action as it's not required.
I've Inserted the 5 actions I suggested previously at the top of your macro.
I've changed the options on the Resize Image action so as to preserve the image's aspect ratio.
Now, to use this modified macro you need to do the following in Scrivener:
Left click your mouse at the left of the picture (as usual)
Move the mouse pointer over the picture without dragging or clicking
Press the macro's hotkey - ⌃F4
Let the macro do its stuff!
The macro seems to work but with one potential problem: if the image is centred horizontally then sometimes when it's pasted back in its new size it is not centred. I have not been able to fix this as I'm a bit short of time.
Remember that the macro I’ve uploaded is in a disabled state. Did you enable it once you downloaded it into KM?
Well, the macro performs a right-click as it’s first action, which is why you must put the mouse pointer over the image once you’ve click to the left of the image.
Hmmm... if there is performed a right click I would expect the.dropdown menu to be visible, even for a short time, but the only action I see is that the mousepointer sort of disappear in the left margin of picture
Yes I'll click outside the left side of picture then move mouse so the cursor is inside the picture and then press the shortcutkey, but no dropdown here, that I spot!!!
Sounds to me like you’re still running your original macro and not the new one. Make sure your old one is disabled. The new one that I posted has “v2” at the end of its name!