Testing on why the *Click at Found Image* action fails

Keyboard Maestro’s Click at Found Image action is very useful, and frankly, amazing to me. But only when it works. And in my hands it was rarely working (as for example in this recent post)

I did some reading on the forum (see below), but still couldn’t figure out why it was so rarely working for me. So I did some testing on my own and came to a surprising conclusion:

It depends on how you collect the screenshot image and place it into the “image well”

There are 2 ways I know of to collect screenshot images:

  1. Using ⇧⌘4 which generates a “Screenshot xxxx-xx-xx at xx.xx.xx” file
  2. Using ⇧^⌘4 which copies the image to the clipboard

With method (2) you paste the image into the “image well” of the Click at Found Image action. But with method (1) you drag the screenshot file into the image well instead.

Based on my testing (detailed below), using method (2) works but using method (1) does not. That is very good for those out there who actually read the Users Manual. But for those like me who think they already know everything about taking screenshots, well… you get the idea.

However, in my testing I found method (1) would work if I cut the image dimensions of the file in half (eg, using Preview > Adjust Size > enter 1/2 the value in the Width box, assuming “Scale proportionally” checked). Surprisingly, this suggests there is a difference in image scaling depending on whether one uses ⇧⌘4 or ⇧^⌘4

Details of my testing
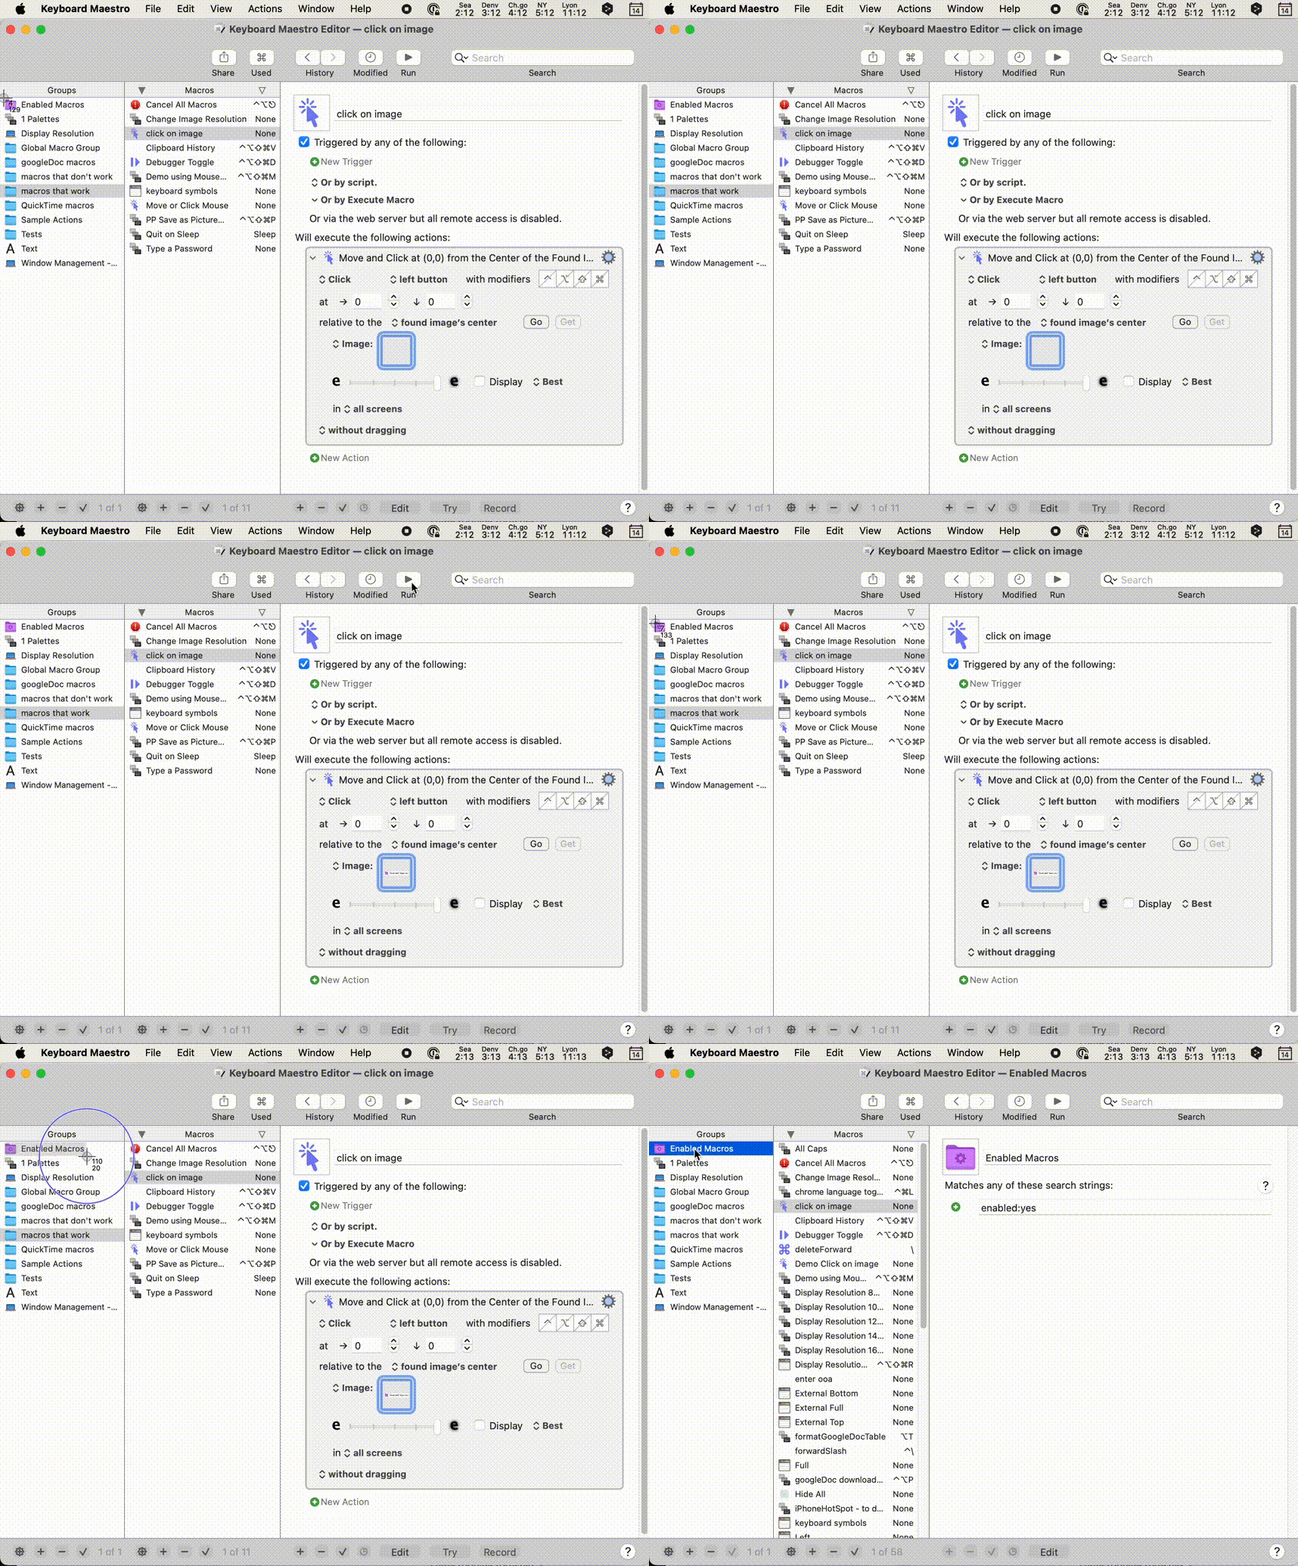
The animated .gif below shows how I did my testing. It involves directing the mouse to click on the “Enabled Macros” folder in the “Groups” pane. I chose this for testing because clicking there will show its content in the “Macros” pane (hat tip to MacSparky).
screen

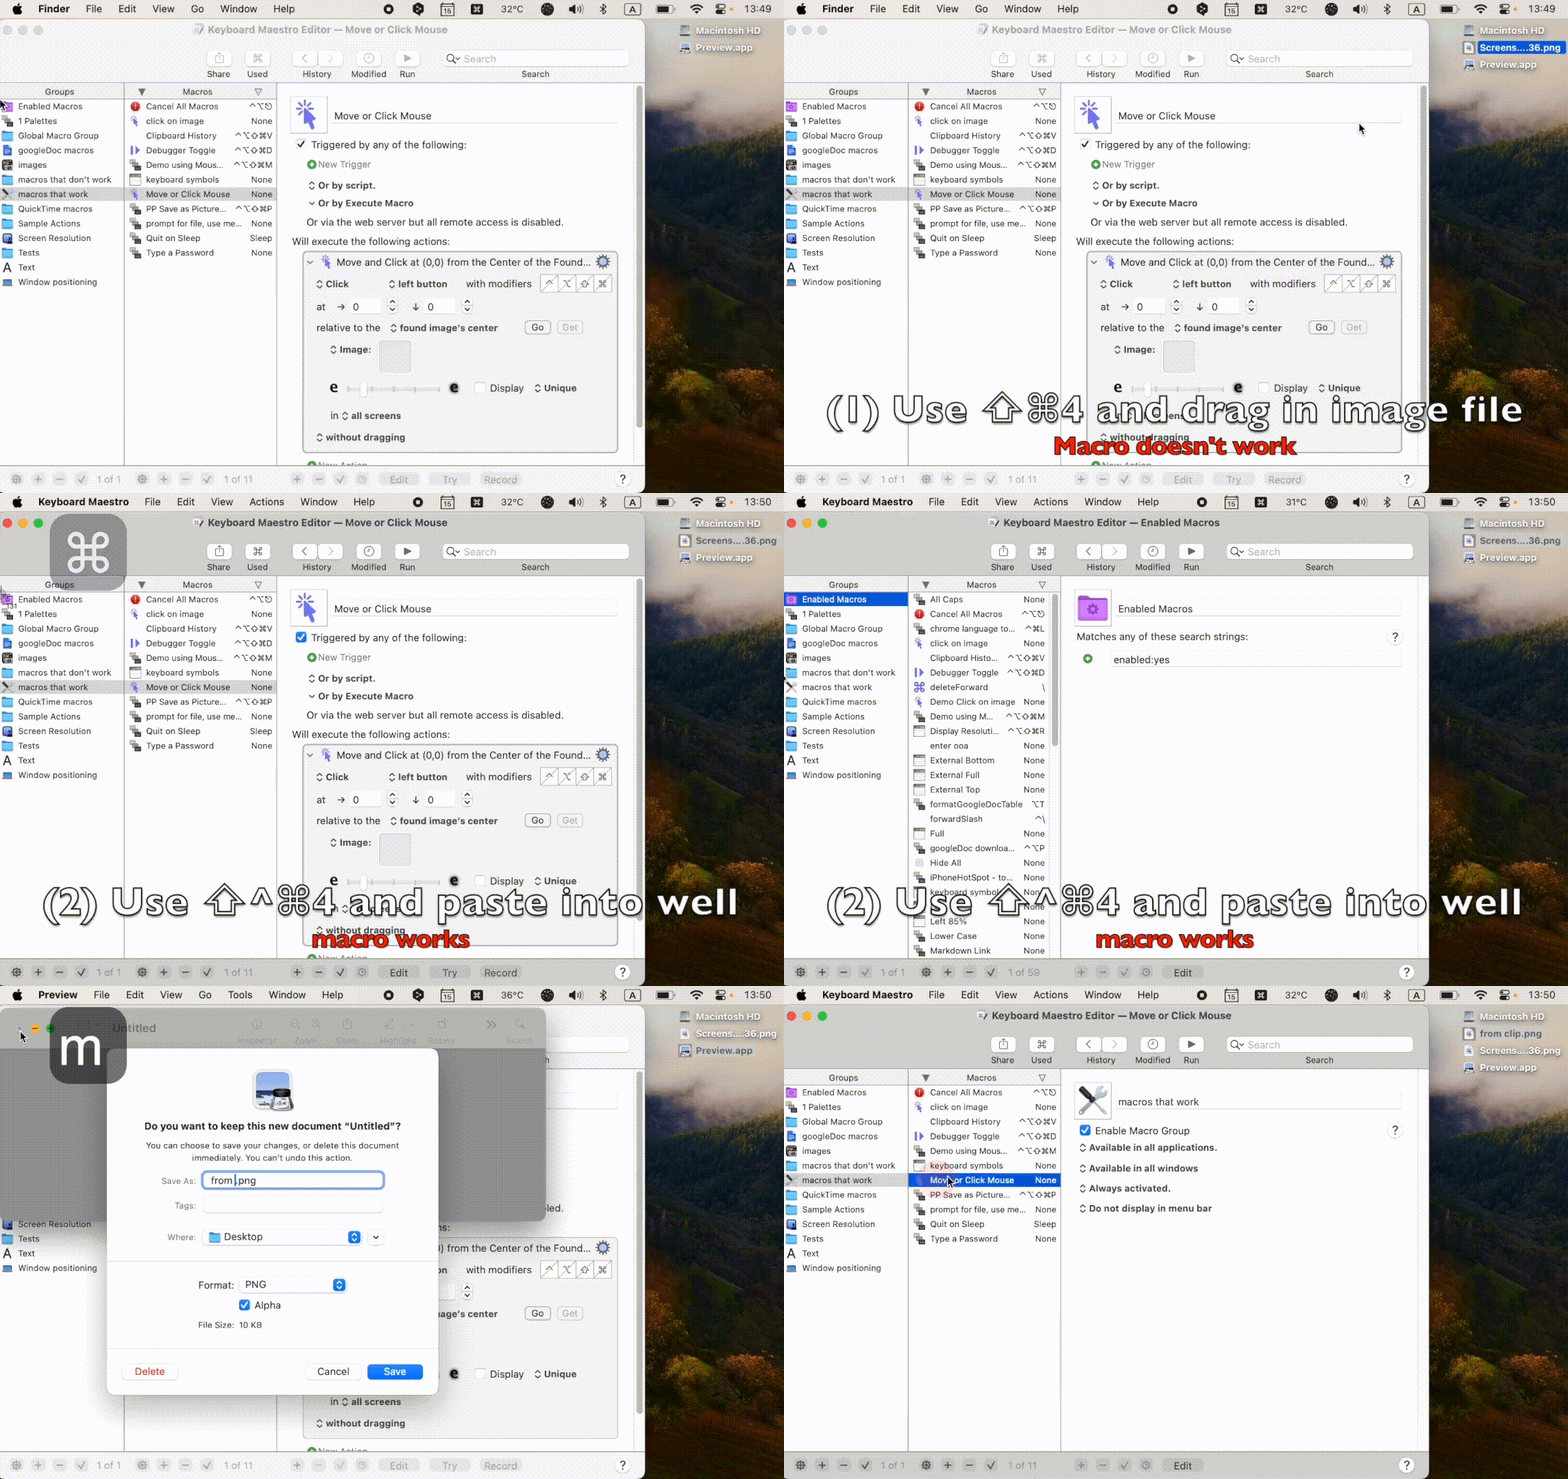
In the first part of the video I use method (1) and it doesn’t work: nothing happens when the macro is run. After that I use method (2) and it works: when the macro is run the content of the “Enabled Macros” folder is shown.

I tried this test at the following resolutions on my 2020 M1 MacAir, but it made no difference:
1024x640
1280x800
1440x900
1680x1050
MacAir resolutions

I also did tests using both .png and .jpg format screenshots, which can be changed as described here. Again, it made no difference.

In going though posts on this form I found that @Sleepy “spent days troubleshooting” a similar problem and suggested that it depended on what display resolution was being used. That’s why I tried all the resolutions listed above. In that same thread @Sleepy also describes what I call method (1), but in that case it worked.

Therefore, I doubt my findings can be generalized to all cases. I suspect it also depends on the size of the image being found. The testing I did was with a relatively small image. On the other hand, I don’t think it was so small as to be unrealistic.

I also did some testing with the fuzziness control, and other factors but could never come to a clear conclusion until I set up the controlled testing described here.

One final thing
It’s important to have Notifications enabled for Keyboard Maestro (System Settings > Notifications > Keyboard Maestro Engine > Allow Notifications). Because I initially had KM notifications turned off I had no clue why the Click at Found Image action would just “do nothing”. But when notifications are turned on a brief text window appears so that you at least know Keyboard Maestro tried but couldn’t find the image.
2 Likes

What are you using to do screen shots? Have you changed any settings from their defaults?

Asking because you are dragging in a "jpg" file. A quick test suggests that changing your defaults to make screen shots save as JPEG doesn't change the clipboard format -- that remains PNG. So your test is actually comparing different formats.

My guess is that it is the JPEG compression that's messing up your "insert from file" method.

To make screenshots, I am using the key strokes that I mentioned as method (1) and method (2).

I've been assuming that my settings related to screenshots and image quality are no different from anybody else's, and if there is a way to change the quality settings I have no idea how. As far as I know, the only change I've ever made is between.PNG and.JPEG using that link that I mentioned. But as I pointed out that didn't make any difference in my testing. Regardless of whether screenshots were set to be saved as PNG or JPEG I still got the exact same results as described above. If someone else changes from JPEG to PNG screenshots and things become different, I would be very interested

In fact, I would love to have others attempt to reproduce the exact testing that I've described. If it is not reproducible by others then it would suggest that somehow my settings are different, and I would like to learn what the difference is so that I could change it back.

I welcome all feedback because I really like this feature of keyboard maestro

I don't have any problems with image recognition from screenshots, but one thing I noticed that is crucial is the image resolution. IIRC, every time a recognition didn't work, it was because of a "wrong" resolution.

By 'resolution' I mean the pixel-per-inch (ppi) resolution, not the absolute number of pixels. For example, on my iMac ("Retina") screen, the screenshot has to be 144ppi, otherwise, e.g. 72ppi, KM will not find the image.

If I understand you correctly, I think you're saying that there is a way to change the resolution of the screenshot image itself (as it is being collected, that is). I am not aware of how to do that. Can you explain?

Of course, I do know how to change the screen resolution and as detailed in my post, I tried the four different screen resolutions that I listed and that made no difference in my testing. So that means I did eight different tests using method (1) & method (2) at each screen resolution

Good work. I hate to complicate matters, but there are times for me when simply restarting the KM engine will allow the KM Find Image action to find an image when it wouldn't find the image before the engine restart.

So I tend to restart the engine every hour to avoid that situation. Whenever you do tests like this, you should do it when the Engine has recently been restarted, not running for days.

I run so many Find Image actions, that the air coming out of my iMac is hot instead of lukewarm. Most people say don't do that, but when you need to, you need to. Perhaps my extensive use of that action is causing my issue.

That doesn't mean that you haven't installed another screen shot utility that has taken over those keys, remapped those keys to a KM hotkey macro, etc.

They definitely are -- the default format is PNG and the file you are dragging in has a ".jpg" extension. So either you have changed the built-in's defaults or you are using something else.

You can check the built-in's default format in the Terminal with the command

defaults read com.apple.screencapture

If type = jpg then you've changed the default. If you want to set it back to PNG and see if that cures things then you need to do the following two commands in Terminal:

defaults write com.apple.screencapture type png

...then:

killall SystemUIServer

You can check that's worked by doing

defaults read com.apple.screencapture

...again.

There's no ifs or buts about the format differences between your two approaches, and you can see that for yourself. Your file is a JPEG, but if you do ⇧^⌘4 then switch to Finder end select "Edit" then "View Clipboard" you'll see in the bottom-left corner that that's a PNG.

I don't know if there is a setting to "natively" set the resolution of screenshots taken by the OS, but I tend to think not.

I usually set the desired resolution afterwards, via script (e.g. this one), or in Preview > Tools > Adjust Size… (make sure to deselect "Resample image"!)

It seems to me that the PNG versus JPEG (ie file format) issue is independent of the image resolution issue. So let's deal with them separately:

Format:
I isolated the format issue by using the link I provided in my original post. If you follow that link it shows how to change whether the screenshot is using the JPEG format or the PNG format by using a Terminal command. So that's what I did. I went back-and-forth between PNG and JPEG, holding all other things, equal and found that it made no difference.

Resolution:
As I wrote above, and seems to be confirmed by others, I do not know how to change the image resolution at which screenshots are taken. Of course, I know how to change image resolution after an image is taken, but I would let you know explicitly if I did that. Because that's a manipulated screenshot.

Now, regarding screen display resolution, I did explicitly let you know when I change that and as I wrote, that also made no difference.

There is one place in my original post where I talk about changing the image resolution after it was taken: cutting in half the width and height dimensions But to my way of thinking then it's no longer a screenshot, but a manipulated screenshot.

I have not installed any screenshot utilities that I am aware of. And since I'm the only one that uses the computer, I think I would know.

I provided a lot of detail of exactly how I performed my tests doing my best to change only one thing at a time keeping everything else constant. I welcome anyone to reproduce what I have done and let me know if they got a different result.

There is one place in my original post where I talk about changing the image resolution after it was taken:cutting in half the width and height dimensions But to my way of thinking then it's no longer a screenshot, but a manipulated screenshot

That's why I explained that with 'resolution' I'm not referring to change the amount of pixels, but the PPI (this is actually image metadata and does not modifiy the image content).

Of course, I know how to change image resolution after an image is taken, but I would let you know explicitly if I did that.

So, have you tried it with the image resolution set to 144ppi? (assuming that your original screenshot is 72ppi)

I did not spend any time manipulating screenshot images, except for the one case that I mentioned.

I'm well aware that all sorts of manipulations are possible. But what I want is to be able to use this keyboard maestro feature as it's intended to be used. for that reason, I am interested if my system is somehow messing me up from doing that.

I did not spend any time manipulating screenshot images,

It would take you 30s to save a screenshot at 144ppi and try it with that. At least then you would know if the resolution is your problem.

Screen shots are literal pixel dumps. A full screen shot of a 13-inch Air's default 1440x900 Retina display is 2880x1800.

KM's image detection is a pixel-by-pixel comparison (plus fuzziness as set). KM's interface sizing is dependent on your screen resolution, i.e. increase resolution and the interface is visibly smaller. Take your screen shot of KM's Groups pane at 1680x1050, reset your resolution back to 1440x900, and you'll still get a pixel match.

You might have a problem if you take the screen shot on a Retina display and then try to use it on a "normal" one, but I don't think so -- we'd hear a lot more about it if so! IMO KM is smart enough to either use the image's metadata and display characteristics to compensate or, more simply, it processes everything to the nominal 72dpi "standard".

You can check all the above for yourself with various screen shots and Preview's information window.

Perhaps the next thing to do is check for yourself the dimensions/DPI metadata of the two screen shot methods.

  1. Do the ⇧⌘4 one
  2. Do the ⇧^⌘4 one
  3. Open the file from step 1 in Preview
  4. Select "New from clipboard..." in Preview
  5. Compare the Information windows for both

You could even add in a "paste into KM Image Well, copy from KM Image Well, "New from Clipboard..." to see if that changes anything.

On my 14.3.1 system the images are the same -- the only obvious difference is that if I set files to be saved as JPEGs they're output at ~80% quality, which is why I'd suggest you don't use that format just to be safe.

What OS version are you running? If there is a difference in the two methods of taking a screen shot then it should be reproducible on the same OS. It may be that they add Exif metadata differently, as that's where suggested DPI is stored (neither the PNG nor the JPEG formats hold any DPI data themselves, its in the optional metadata).

You might have a problem if you take the screen shot on a Retina display and then try to use it on a "normal" one, but I don't think so -- we'd hear a lot more about it if so! IMO KM is smart enough to either use the image's metadata and display characteristics to compensate or, more simply, it processes everything to the nominal 72dpi "standard".

This is interesting, and it is definitely not like that on my system (Intel iMac 27" Retina, Sonoma 14.4.1, KM 11.0.2):

Example:

When I take a screenshot of a region, open it in Preview at "Actual Size", it is displayed twice as big as the region on my screen. The info says 72dpi.

Using this screenshot in KM Find Image fails.

Now I set it to 144dpi (without physically changing the size), and Find Image works.

It may be that they add Exif metadata differently, as that's where suggested DPI is stored

To my knowledge, the DPI metadata can be stored in the PNG's EXIF chunk or the pHYs chunk (or both). Actually, the unmodified screenshot (⇧⌘4) does not contain any resolution metadata (in neither of the two).

(Setting the image to 144ppi in Preview writes the information to the pHYs chunk (eXIf contains no related information).)

Now, I think I remember that this wasn't always the case, i.e. that some years ago screenshots were automatically saved at 144ppi (if Retina display). I don't know when or why this changed (or if it is just my memory failing and it was always like that).

Very interesting, as I was testing on an M1 Air.

Putting a pin in this until I get home and in front of my Intel iMac. It might need a point update to match yours, so that's a fun evening ahead :wink:

Meanwhile, here's a couple more data points:

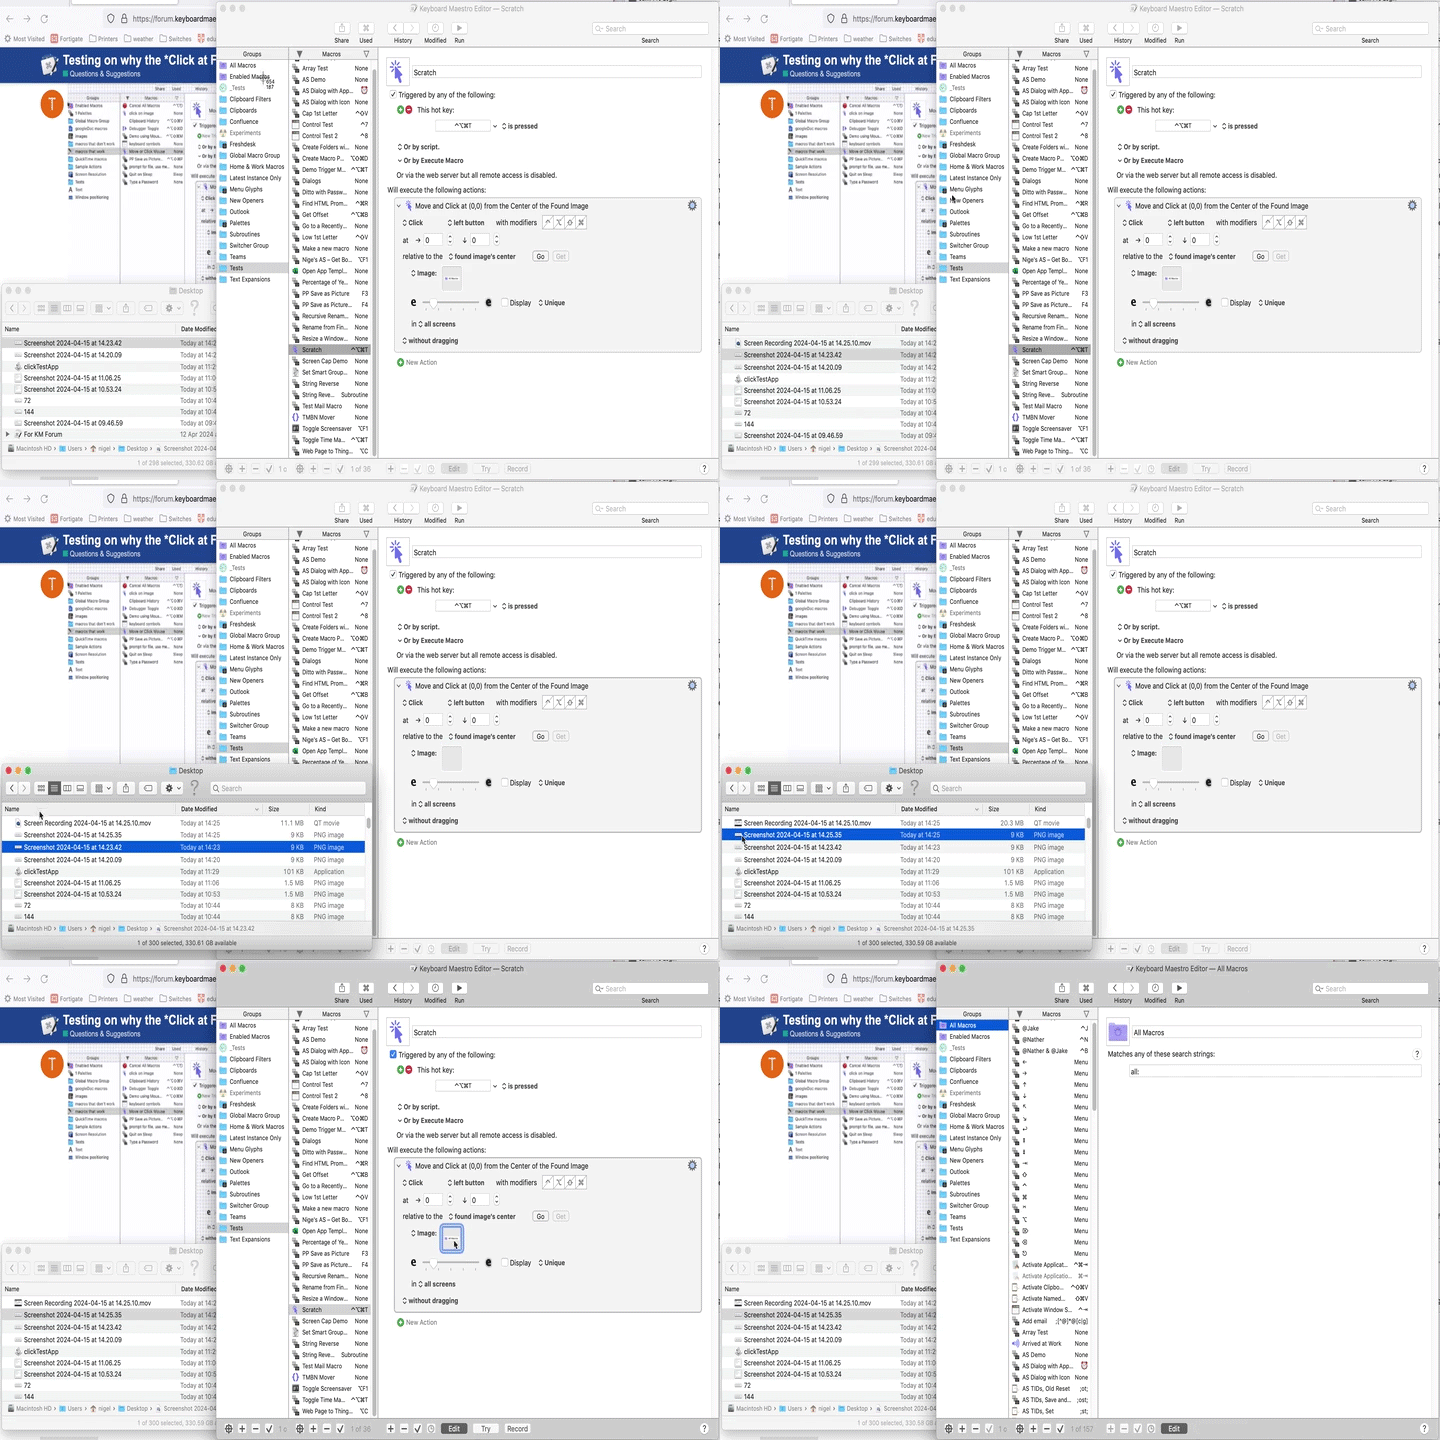
Image data is stored in the action's XML. Screen shotting to file gets me a 144dpi PNG file. Opening that in Preview, changing the resolution to 72 without changing pixel dimensions and doing "Save As..." gets me a 72dpi PNG file. Dropped the 144dpi file into my "Scratch" macro's "Click on image" action's image well, copied the macro's XML, deleted the image from the well then dropped in the 72dpi file and copied the XML. diffing the two XMLs, the only difference was in the modification date -- image data was identical. Implication -- KM knows about pixels, not resolution.

Used ⇧⌘4-Space and ⇧⌃⌘4-Space to screen shot the front window (ensuring the same dimensions) to file (as PNG) and clipboard. Clipboard pasted into image well, XML copied, file into image well, XML copied, XMLs diffed. Only difference was in the macro's modification date. Implication -- method unimportant when dealing with the same image data.

Now I'm the first to admit that a couple of quick tests don't guarantee that the behaviour will be the same each and every time! But if you try similar on your machine, which seems to fail image detection more often than not, you may be able to spot something different.

When it comes to getting things to work, I trust controlled testing more than theorizing about how it’s supposed to be. Don’t get me wrong, I loved theory as a scientist — and teaching it to others. It’s so beautiful!. But I had to face the facts staring me in the face in the lab. So, I mostly ignore people’s theorizing about how things should be now. No offense intended.

And that’s why I’ve repeatedly asked for controlled testing by others to reproduce (or not) my testing.

So I decided to do some more testing.
First I confirmed what Nige_S wrote here

by making a screenshot using ⇧⌘4 (or ⇧⌘3) at 1440x900 screen resolution gives an image with 2880x1800 according to Get Info. I then repeated the same thing using ⇧^⌘4 and using Preview > New From Clipboard (⌘N) and I found the image also was 2880x1800.

Then I applied this to my testing method using the Enabled Macros folder in the KM window. I used .png formatting (even though I’d found previously it made no difference).

In the screen recording you will see these 3 steps:

  1. I made a screenshot using ⇧⌘4 noticing the little numbers while capturing that image were around 112x18. But when I looked at the resulting image file using Get Info it was double that, around 224x36. My macro did not work when that image was dragged into the image well — just like in my previous testing.

  2. I repeated these steps using ⇧^⌘4 instead and pasted into the image well of my macro — now the macro worked, just like in my previous testing

  3. I then used Preview > New From Clipboard (⌘N) and found the image was 224x36. Consistent with above. But strangely that image when dragged into the image well DID WORK.

<send animated .gif to a new tab to see better quality>
more testing

I repeated this at both 1024x640 and 1440x900 screen resolutions and it made no difference.

So, it seems there is something special about using ⇧^⌘4 instead of ⇧⌘4 — That is, if I want KM macros to find images consistently, the key is using ⇧^⌘4

All of my above was fully tested, as far as could be. Any theorising is about aspects I can't test -- the internal workings of KM, for example, or how your computer may be set up.

One quick note on your most recent tests:

This disparity is by design -- the pointer is displaying "nominal resolution" values, the same as AppleScript does with window bounds or KM does with SCREEN(). Or, indeed, as your OS does in System Settings->Displays. And on a Retina display that is half the actual pixel values.

There's obviously something going on, and you have a work round. What intrigues me is why the method that consistently fails for you works 99% of the time for me...

demo

Well, if it's working 99% of the time for you and it's not working 99% of the time for me, that leads me back to suspecting a problem with my system

hmm

The difference is that when taking the screenshot to the clipboard (⇧^⌘4), the resolution is set to 144dpi, whereas – see my post above – when saving it to file directly (⇧⌘4), the PNG does not contain any resolution metadata.

Here the partial output from pngcheck -v (only eXIf and pHYs chunks):

A screenshot saved to clipboard (⇧^⌘4) --> clipboard opened in Preview (⌘N, no modifications made) --> saved to file:

  chunk eXIf at offset 0x00ad7, length 150: EXIF metadata, big-endian (MM) format
  chunk pHYs at offset 0x00b79, length 9: 5669x5669 pixels/meter (144 dpi)

(In addition, the resolution is also saved in the EXIF metadata, checked with exiftool)

A screenshot saved to file directly (⇧⌘4):

  chunk eXIf at offset 0x00ad7, length 56: EXIF metadata, big-endian (MM) format

(no pHYs chunk, and also EXIF metadata does not contain resolution data)


So, the presence/absence of the144dpi resolution metadata makes the difference.

This is not theorising, this is how it is on my system setup.

Can you try outting each into a KM action's image well and comparing the XML, as per here?