Floating Window - Screen Capture (ImageMagick)

Inspired by 'Floating screenshot' forum.keyboardmaestro.com @iNik 2017/10/05
Floating screenshot

Some new features:

  • No clipboard use
  • Time stamped screenshot
  • Automatic Retina ajustment
  • Optional file sampling (hard) resizing (50%)
  • In case of hard resizing, reset (delete) of Extended Attribute 'com.apple.metadata:kMDItemIsScreenCapture' to avoid potential future spurious dynamic resizing for Retina display.
  • Optional keeping of file screenshot (Trash)
  • Automatic ImageMagick path
  • Screenshot file size optimisation (ImageMagick)
  • Display Screenshot file information (time stamp, dimensions, type, size)

Dependencies: ImageMagick (https://www.imagemagick.org/): use Homebrew (https://brew.sh)/MacPorts (https://www.macports.org) to install.

For KM8 users only: Resizing of "Custom HTML Prompt" Action window is a new feature which need to be selected in the gear menu (see Floating Window - Screen Capture (ImageMagick) - #29 by peternlewis)

Have fun
-alain-

floating-window--screen-capture-(imagemagick)-v1.2.kmmacros (61.4 KB)

2017/10/08 Version 1.0

  • No clipboard use
  • Time stamped screenshot
  • Automatic Retina ajustement
  • Optional file resampling (50%) keeping display size
  • Optional keeping of file screenshot (Trash)
  • Automatic ImageMagick (https://www.imagemagick.org/) path (installation manager independancy)
  • Screenshot file size optimisation (ImageMagick)
  • Display Screenshot file information (time stamp, dimensions, type, size)

2017/10/18 Version 1.1

  • Stronger and simpler automatic ImageMagick path, suggested by @Tom

2017/10/28 Version 1.2

  • In case of resizing (resampling 50%) reset (delete) of Extended Attribute 'com.apple.metadata:kMDItemIsScreenCapture' (avoid potential future spurious dynamic resizing for Retina display).
  • Renaming of the macro by consistency with forthcoming companion 'floating' macros 'Floating Window - Post Capture' & 'Floating Window - Clipboard Text'.

3 Likes

@alain, thanks for sharing.

Could you please clarify the following:

  1. What are the differences between your macro and the one by @iNik?
  2. What is "ImageMagick", and what are it's benefits? (perhaps a link to it)

Thanks.

Hey, @JMichaelTX, I hope you are joking or you are just teasing @alain to post a more detailed description :wink:

ImageMagick is a must-have tool on your Mac (or Linux/Win PC) if you are ever going to try to manipulate pixel data in any way.

It is very powerful and very extensive, but you will also find plenty of good pre-made scripts on the web.


Some KM Forum posts referring to ImageMagick:

…just to name a few.


ImageMagick has a very good documentation (e.g. here and here) and a very good forum.

Did I mention that it is a great and essential tool? :wink:


I'm using it every day to quickly produce nice screenshots…

…with a decent shadow:

…with torn edges and a slight shadow:

… as polaroid with caption:

Everything scriptable, without any GUI.

Did I mention it is a great tool? :wink:


If not already done install it via Homebrew

brew install imagemagick

Also available via MacPorts or as direct download.


Edit/PS:

I've posted a script/macro that showcases some things you can do with ImageMagick on another tread:

3 Likes

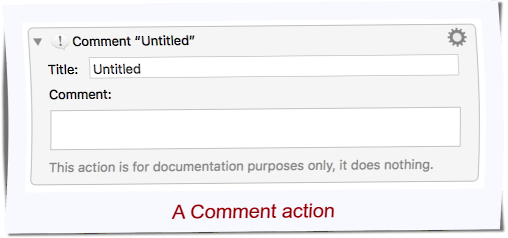
In the text field of this macro heading comment:

2017/10/08 Version 1.0

  • Time stamped screenshot
  • Automatic Retina ajustement
  • Optional resizing (50%)
  • Optional keeping of screenshot (Trash)
  • Automatic ImageMagick (https://www.imagemagick.org/) path
  • Screenshot size optimisation (ImageMagick)

Naming of Group actions containers gives you more details.

More I don't use clipboard (which I try to avoid).

Just download and have a "small" look inside this macro and feel free to let me know if something is still not clear.

2 Likes

Thanks, Tom. Nope, I was just ignorant. I should have known that Tool-Man Tom would know all of this sort of stuff! :wink: I have learned about so many great tools from @Tom, that it is unbelievable.

I do not have, nor have used, ImageMagick. But clearly, I've been missing out on something big. So, it is now near the top of my to-do list.

Thanks for the update, alain.
I did read the Comment, but it was not clear to me whether those were features of the original macro, or of your macro. May I suggest that you add this block to the top of your OP, so it will be explicitly clear to all.

Since ImageMagick seems to be a major feature, it might also be worth a word or two about it. :wink:

Just so you know, my SOP is to NOT download macros unless I find something interesting/compelling in the description provided for the macro.

@alain, it looks like you have a clever, useful macro, but since I have limited knowledge about shell scripts, I never run a macro with them until I understand exactly what the scripts do. A Comment just before each Execute Script would be very helpful.

I have downloaded and read your macro, and I have these questions:

  1. Is there any setup/install required BEFORE I run your macro?
  • If so, please provide complete details
  • Do I need to install "screencapture"?
  • Do I need to install "ImageMagick" ? (now I know the answer is yes from Tom's post)
  • If you use any temp file storage (and I think you do) you should make this clear in the macro setup, and tell us if you delete all temp files that the macro creates.
  • In the Group "Initial Setting" you provide several variables, but no info on how they are used. May be obvious to some, but not to others.
  • You provide a Comment "screencapture".
    • Is this just for general info?
    • Is the user expected to do anything, change anything based on this info?
  1. In quite a few Actions you have a path that begins with:
    /Users/alain/
  • Do I need to change all of these to my user path?
  • If so, may I suggest that you use a path of ~/ which will work for all users.
  1. A few screenshots of examples of your macro would be great. Good examples help me decide if I want to download/use a macro.
  2. I'm curious about your method to determine whether or not the user has a retina display.
  • Since KM provides a %DPI% token, why use a shell script instead of it?
  • If your script relies on the text "Retina: Yes" being found, I wonder if it will work with my external monitor that is high DPI, but is not a retina monitor?

TIA for being patient with all my questions.

Please see "Group: Initial Setting"

I use a temp file for the resulting screen shot exactly as @iNik does :wink:
The user can choose root name and folder.

But here this file is time stamped and trashed (in place to delete) to give user facility to keep the floating screen shot if required.

"screencapture" is one of native BSD Unix (so of OSX) commands, so nothing to install.
The Comment Action help me / user to choose the right parameters.

These Actions are Comment / Execute Shell Script Actions. In the later case there is a "#" prefix which is a comment for shell command: just comments :wink:

Selecting a comment as:
file:///Users/alain/Documents/Logiciels/!Mac%20OS%20X/!Doc/Mac-OS-X--Unix-BSD/man-pdf/man_screencapture.txt
gives me a direct link to local resources using "Open URL" service

file://~/Documents/Logiciels/!Mac%20OS%20X/!Doc/Mac-OS-X--Unix-BSD/man-pdf/man_screencapture.txt
is more elegant and generic... but unfortunately don't work.

OP will be edited to add a screen shot of a floating screen shot :wink:

%DPI% I think you means DPI() function which works with clipboard image, but on the contrary, I avoid to use the clipboard...

Exactly. As I can only test on a Retina MBP with no external display, your own test would be welcome.

Don't worry I will be patient as you are with every of us :grinning:

I'll second the usefulness of ImageMagick. I use it every day to resize images for publication and this little Keyboard Maestro palette runs a few of the more custom options for me:

ss-385

I run ImageMagick mostly through its PerlMagick library rather than the command line utilities.

Great tool. Highly recommended.

5 Likes

That looks like a very useful palette. Would you mind sharing your macro for it?

I wouldn’t mind. Generally speaking.

I haven’t shared my ImageMagick macros because:

  1. Installing and maintaining ImageMagick has been a black art. You have to know what you’re doing.

  2. Installing the matching PerlMagick library is likewise a black art, one not generally supported by Homebrew and other helpful environments.

And I don’t want to get into the IM/PM support game to support this macro.

But let’s see how your install goes and if you get PM installed, too, then I’ll pass it along. Might make a good test case.

2 Likes

I have installed imagemagick.
I can take the screenshot but I cannot resize it once it shows up.
What am I missing?

This is so true. I've used ImageMagick a few times over the years, and every time it has been a nightmare to get running.

It is a fantastic tool, but installing it has always been a pain.

I hope they have finally improved things.

Hi Troy,

You have installed ImageMagick: just for my information please let me know what package manager (Homebrew / MacPorts/other) does you use.

This resizing is a new KM8 feature: Which version of Keyboard Maestro do you use?

I'm seeing the same behavior that @troy is, i.e. the window is not resizable (and is also much smaller than the window screenshotted and has wide borders on the sides, as you can see here):

I'm running KM 8.0.3 on High Sierra 12.13.0, and installed IM via Homebrew just today.

I Tried MacPorts and it failed saying dCode was not installed correctly.
I re-installed dCode, then installed ImageMagick via Homebrew with no errors.
I changed this 'pref' in the macro:
** Set Variable “scfs_resize” to Text “YES” **

See included screenshot showing the floating screenshot just taken of the browser.

KM 8.0.3
OS X 10.12.6

I’m afraid I’m still not sure from your response if this solved the lack of resizability for you. Did it? On my machine, I made sure scfs_resize was being set to YES and it didn’t seem to change anything when I tested the macro again.

** Setting Variable “scfs_resize” to Text “YES” **
Did not make the floating screenshot resizable.
Sorry for my unclear post :pensive:

No worries. Thanks for clarifying!

  • You:

  • ImageMagick c/o Homebrew

  • KM 8.0.3

  • OS X 10.12.6 macOS Sierra

  • Me:

  • ImageMagick c/o MacPorts 2.4.2

  • KM 7.31

  • OS X 10.10.5 Yosemite

  • Good things:

  • The macro is working but some adjustments are needed for window size depending of the configurations... I can't test.

  • Automatic ImageMagick path behave as expected.

  • Resizing of image file vs. resizing of window
    Resize for ImageMagick is about number of pixels along a side of an image.
    So


    will just lead to a image file with 25% of pixels (50%*50%) but with the same size of the floating window except the lost in accuracy...

  • What I suggest for happy users running KM8 (but unfortunately test myself at this moment)

  1. To be on the safe side, duplicate this KM 7 Action and disable one as backup:
  2. Copy in clipboard the HTML/JS code.
  3. Create a brand new KM8 Custom HTML Prompt
  4. Past clipboard in the HTML field
  5. Delete old KM7 Custom HTML Prompt
  6. Test and let me know...