Found Image Macro Only Works Intermittently on macOS Ventura

I have a number of macros that gives me immense help. Now one macro has begun to require 3 'empty' starts before it performs fine for the rest of the sessions/ until next bootup.
There is a brief flash about some item not being found, (and the macro NOT performing its task) but then in the fourth try, by same keycombo it just works.. umpteen times :sunglasses:

So will anyone have a suggestion of what may cause this "morning lazines"???

I have checked the macro, and increased some of the timedelays, but no success.
I am hesitant to tinker , because: If it aint broke... dont fix it :disguised_face:

GreyT
On MacMini M1, MacOS 13.01 Ventura

1 Like

If we can't test the macro we can't venture a useful opinion...

2 Likes

If possible, post the macro itself so we can take a look at it and see what might be going wrong. As one of the moderators likes to say, "If we're not testing we're guessing, and guessing often wastes people's valuable time". :laughing: If you need help on how to post the macro, just let us know and we can walk you through it.

If you haven’t had the opportunity to read this tutorial, I highly recommend it. It will help you get the most help for your question.

Tip: How Do I Get The Best Answer in the Shortest Time?

-Chris

I use the macro to copy selected text, mostly from Safari, into Scrivener. Once this has been done I want to adjust some text (inside the scrivener document) and this is done by the 'Command T' key which will bring forward the 'Fonts' window, (in English, as it looks when called from Scrivener).

Now in other apps, like Mail, the 'Command T' will bring forward a window with same functions, but at a different placement on your screen... and in my case using Danish as main language, it is titled "Skrifter" and has slightly different dimension.

In my experience both windows will remember their (diverging) position on the screen.

This makes pixelwise adjustments for the Go/Get option tricky, but I manage it by putting tape on screen and mark the correct position, and then use the marking as destination for the 'Get'... its kind of goofy and it works.

The Font window is closed by same 'Command T', so maybe my goofy experience is due to a hiccup in this on/off sequence!

Just for general info I attach screenshot of the two 'Command T'-windows.

GreyT

Can you share your macroo?

Hmm... I may have fixed it...

Quality is attendance to detail, and for this I have "really looked into the matter..." first I tried to adjust some pixels (sideways and down) did not really work all the times!

Then: "Ahaaa Mr Watson..."

It turned out that the image the macro was comparing with, was not as it is today. I assume that the original image in the macro was from an earlier macOS.

After I captured the look of the present (Ventura) macOS it seems to have improved. As you may see you really have to LOOK to spot the difference.

So here is the part of the macro where it looks for matches to the stores image:

Active part of macro

and the old image:

old font image

And the present Image(actually same size as the old one):

present font image

The differences are not jumping up if you only look at the fragment shown in the macro.

For me I was 'certain' that the very small white triangle visible there, really matched the font window.

And it still works, in both screen resolution I prefer. :star_struck:

This calls for a Carlsberg :beer:

2 Likes

Glad you got your macro running again.

The devil is indeed in the details...

This is one reason I prefer not to use found images when I have an alternative.

Just for giggles – here's a script that will bring your fonts window to the front.

tell application "System Events"
   tell (first application process whose frontmost is true)
      tell (first window whose subrole is "AXFloatingWindow")
         perform action "AXRaise"
      end tell
   end tell
end tell

BTW – what text are you changing? The text you copied from your browser?

1 Like

Ehhh, yes I got it running, and then NOT...

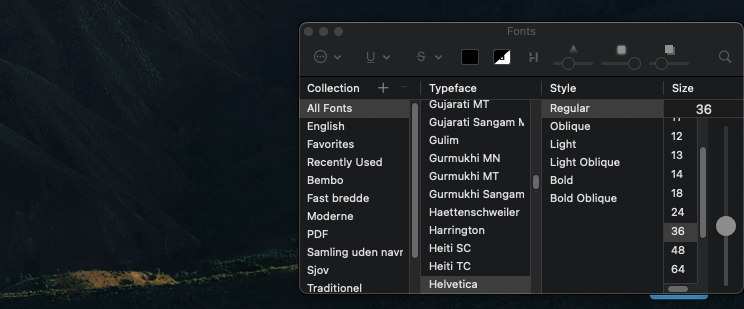
It turns out this Fonts window is rather spooky (what happens in the font window stays in the font window, but you'll never know how it happened).

I found out, by clicking, that the dark square on the left side gives you access to font-colour, so if you change that from black, the saved 'image' will not be found... similar for the triangular shape in the middle.... tsk tsk...

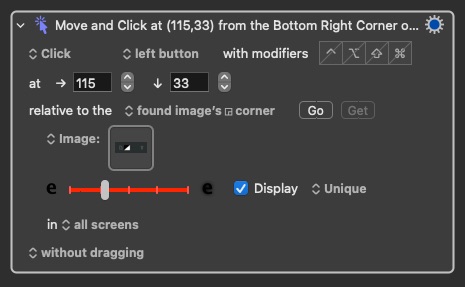
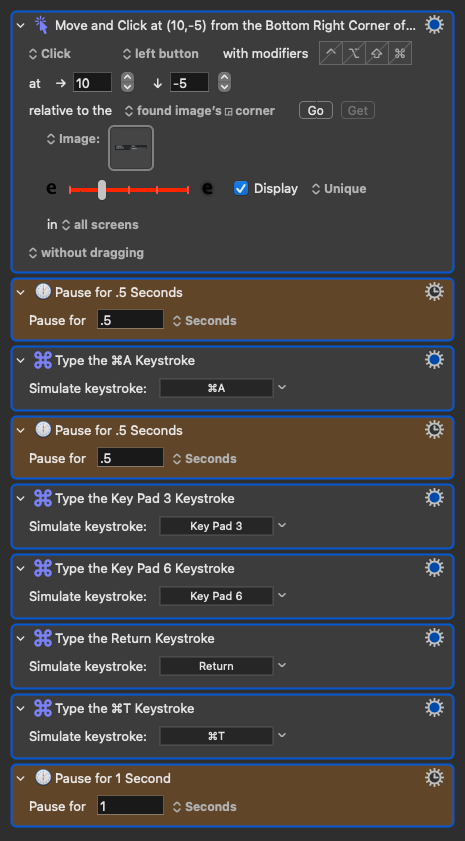
So I changed the selection image to this:

better fonts image DM

And it works (for now) after I have made the offset from lower right image-corner to 10 pixels to the right and minus 5 pixels down. This is a random/good guess, since I cannot use the 'Go/Get' on the evaporizing Fonts window.

There is however one caveat, the top font must be 'Gujarati MT' and 'Regular' for the recognition to be made... and looking into the Font Window from macros, this is not the case. It happens (in my case) only in the Font Window called from Scrivener. Stll I chose to include this, because then hitting the sweet spot for the next macro steps, setting value to '36' would be "somewhere near to the right..."

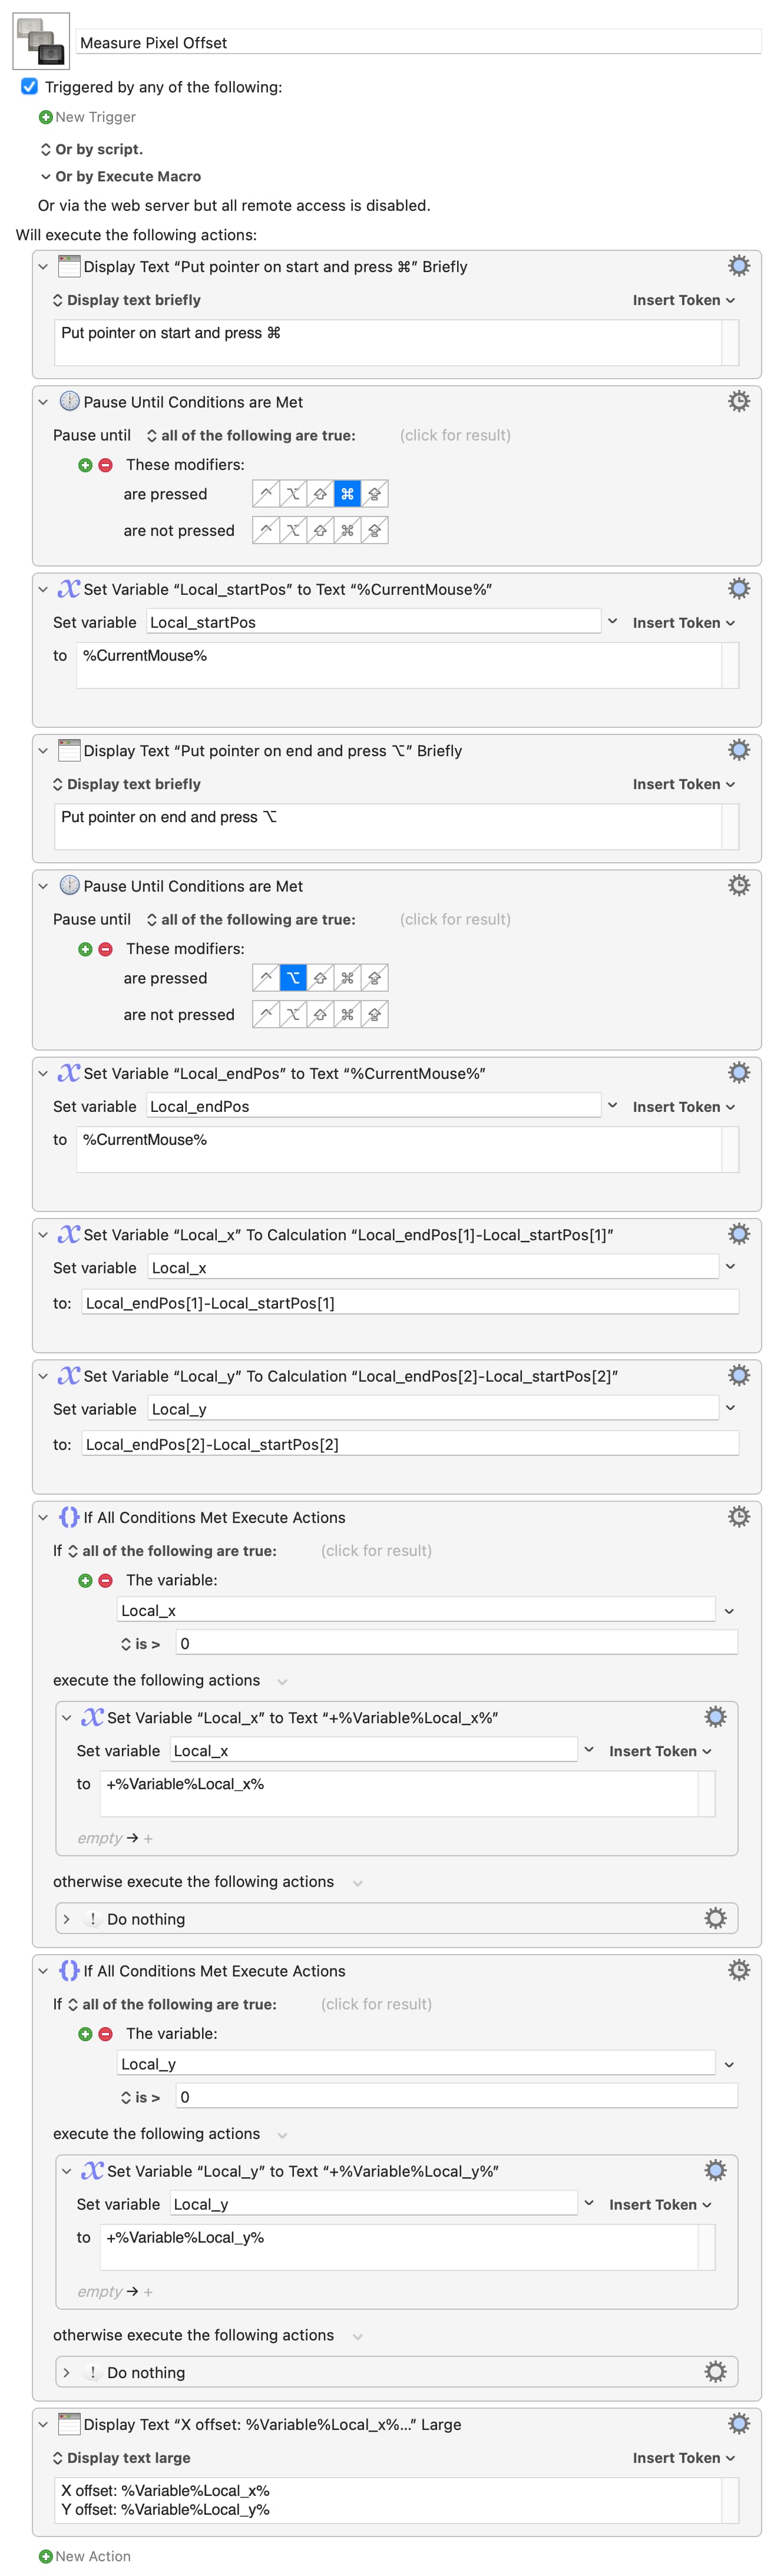
So I just wonder, will the script you mention make the Font window accesible for the 'Get' option? Because that would make it simpler to pinpoint the offset!

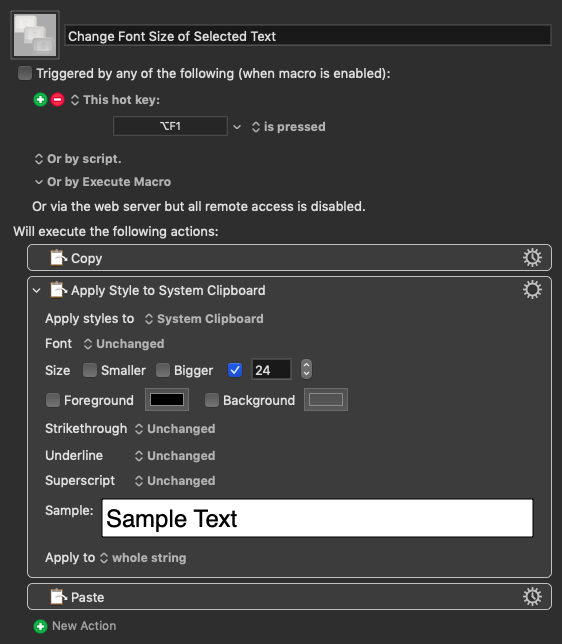
Oh, and I prefer, 'my choice', to have all headings in size 36. It gives more even look and better visual searchability.

Why?

Think of looking for food recipes via your browser, first you copy relevant text, including photos, and then streamline the headings, because some are just 12 points, other may be 96 points :sunglasses:

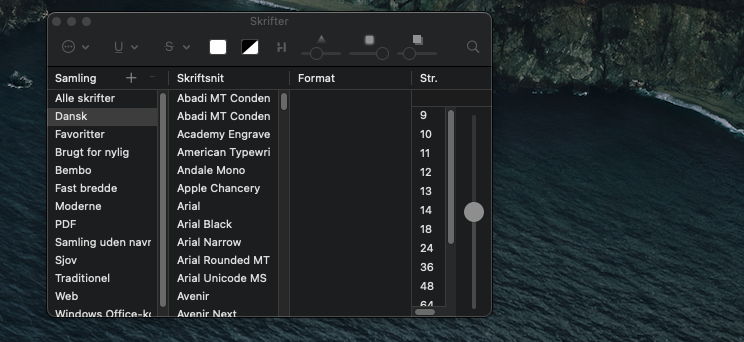
As a PS: I have "same" set of macros running in Lightmode, that gives some hurdles too for defining the 'best' image capture.

Seems the new 'Images' works well.

Have tried it out in dark mode and in light mode, and 3840 x 2160 screen resolution as well as 2560 x 1440. Macro's works perfect. :+1: :+1: :+1:

And as a side effect I have calculated (using a ruler and paper/pen) that 10 mm distance on screen equals ca 55 pixels.

Will use that factor next time I need to define an offset, that the 'Get' will not supply.

:sunglasses:

Don't measure or guess -- ⌘⌃⇧4 to enter macOS's "Screenshot a user-defined area" mode and you'll get a cross-hair pointer that also shows you the screen coordinate in pixels. Put the cross-hair on your starting point, make a note of the coordinates, move it to the offset point, note those coords, press ESC to exit screenshot mode. Simple maths will get you the offset to use.

2 Likes

Good point, it's one step further from what is suggested in KM.

What I found out following your suggestion is that I seem not to notice the start point, which seems like (0,0) but just to note the cooordinates at endpoint... and remembering those.

Only one thing, my eyesight has difficulty in seeing those tiny numbers on the screen on the mostly random backgrounds... but I'll see (pun intended) how it goes.

Thank you for sharing good info

:+1:

You've got KM -- roll your own utility!

Here's a macro that, when run, will let you press ⌘ to record your start point, ⌥ your end point, and display the offset between the two in KM's large dialog. You can easily adjust it to report just one coordinate, the start and end coords, put any of those numbers on the clipboard for you, and so on.

Measure Pixel Offset.kmmacros (7.8 KB)

Image

I've used this critter for decades now for measuring things on screen:

2 Likes

You didn't really answer my question about what text you're changing...

First of all – I'm wondering why you're not using Keyboard Maestro's built-in Apply Style to Clipboard action.

If you really need to use the font's dialog then I'd like to know exactly what you're doing with it, because it could probably be UI-Scripted.

I meant to answer by these words:

"Think of looking for food recipes via your browser, first you copy relevant text, including photos, and then streamline the headings, because some are just 12 points, other may be 96 points :sunglasses:..."

But the macro is really rather old and mostly based on pattern based on mouse action.

I will look into your suggestion on Apply style to clipboard, but what the macro does is just applying specific font size (36 point) to the selection I have made. Is that a clipboard action?

Here is that part of the 'crude' macro, and since it works perfect now, I am a bit hesitant
to change it. Yet it would be nice to avoid the ghostly Fonts Window.

image

image

It is dark mode outside and my concentration is limited, I have tried to make something with this Apply run, but after selecting text in Scrivener I am at a loss on how to get it into this apply, and then back out as replacement.

If I manually use C, run the apply and then manually do the V it works
so how would you do that inside a macro.

I would be doing this when I copied text from the browser and before pasting it into Scrivener, but YMMV.

Change Font Size of Selected Text.kmmacros (2.2 KB)
Keyboard Maestro Export

Thanks Chris :+1:

I had made the same... but I had not enabled the macro... :roll_eyes:

Tomorrow I will hopefully succeed in replacing my font circus wit this straightforward bit.

1 Like

I found more clarity this morning and used your 'Apply' instead of the cumbersome steps I used before, it performs fast & great... and I have noticed that 'Apply' may also be used to (only) set colour of text... so that will be next step for trimming a rather long stepping macro that does just that. :+1:

A new question to you, is there a similar (simple) action that may trim marginsettings of text pasted into scrivener, like left margin is set at '0 cm' and right margin set at '19 cm' ???

The macro string I use now works fine but takes quite a number of 'clicking steps', so in this mood of tidying up... maybe?
:coffee: