Various Methods for Displaying KM Variables and Data

Almost everyone needs to display variables from time to time. This post lists a variety of ways to get the job done. There are quite a few ways, and this post is written as a list of ideas for new Keyboard Maestro users. But some "old hands" may find a few novel ideas in here too. I'm happy to edit this if errors are spotted.

The most obvious way is the Display Text action. It works like this. Notice the [T] in the right corner. This means you can enter text in the box, including tokens.

The most important tokens to be aware of are:

%Variable%MyVarName% :arrow_left: displays the contents of the variable
%Variable%MyVarName[arithmetic]% :arrow_left: the Nth item in a list of numbers in a variable separated by commas
%Variable%MyVarName[arithmetic]:% :arrow_left: Same as above, but items are separated by the specified character
%Calculate%arithmetic,arithmetic% :arrow_left: any list of calculations, including variables or functions

Note that the Display Text action allows you to specify three different display styles:

Screen Shot 2022-03-02 at 10.44.37 PM

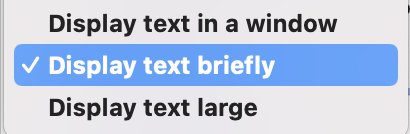
  1. The first item displays the text in a pop-up window that requires the user click on OK to close. This window keeps itself in front of all other application windows. This is useful if the data you are displaying is more than two lines long. The window lets you scroll through very large output.
  2. The second item displays the item briefly in the upper right corner of the screen. It's not very useful if you have much more than three lines of output or your output contains long lines of text.
  3. The third item displays the text as large as possible, filling up most of the screen, and decreasing the size of the text until it all fits on the screen (up to a point. I wouldn't recommend trying to display over 100 lines of text this way. By default the duration of this option is about 6 seconds long, but you can change the duration using this KM action:

None of the three options above will pause the program's execution. But sometimes for debugging purposes you want to display some data AND also pause for the user to press OK before the program continues. If that's what you want, consider this example of displaying output, using the Alert action:

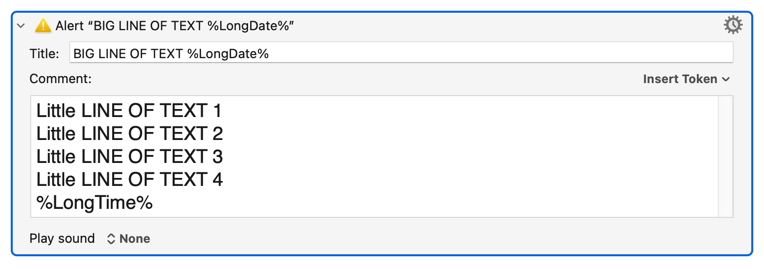
In that action, you can insert text that you want to display in EITHER of the two white boxes, as they are both valid text boxes for output. You can also choose to play a sound. The first box has the extra advantage of being printed in a larger font. Here's the output of the above action:

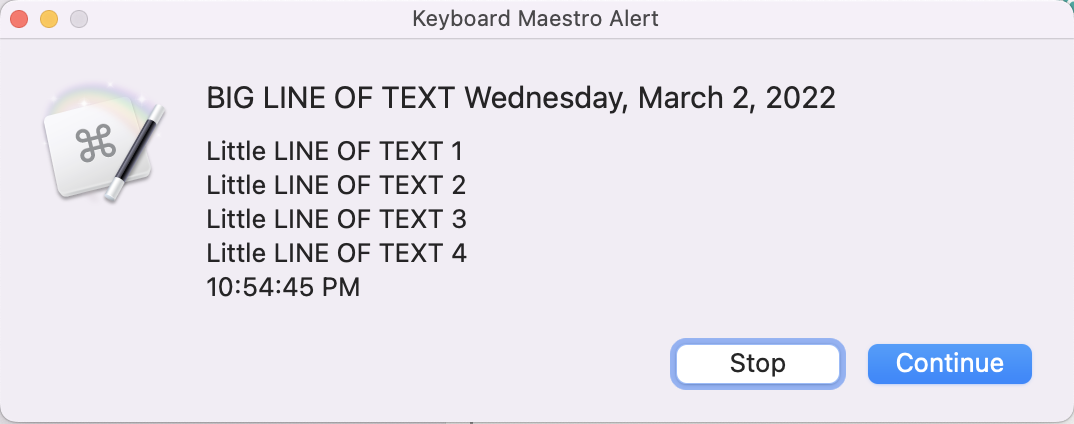
In many cases, the above action can be more useful than the Display Text action for displaying text.

Also, if you have an image that you want to display, you can use the following action. It can display either text or graphics, and you can specify which clipboard you want to display. However it doesn't pause the execution of the macro, so you might want to follow it with an ALERT action to give you a chance to pause.

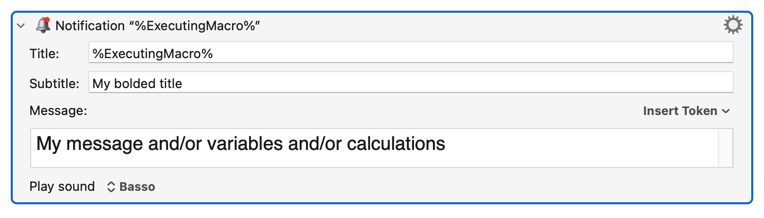
There's a little variation on the Display Text action, and it is the Notification action, as shown in this example. It doesn't have all of the display options of the Display Text action, but it looks a little nicer, and it supports a sound effect.

Here's another way to display variables. Enter this:

That will bring up the Debugger Window, and if you haven't already done so, click here:

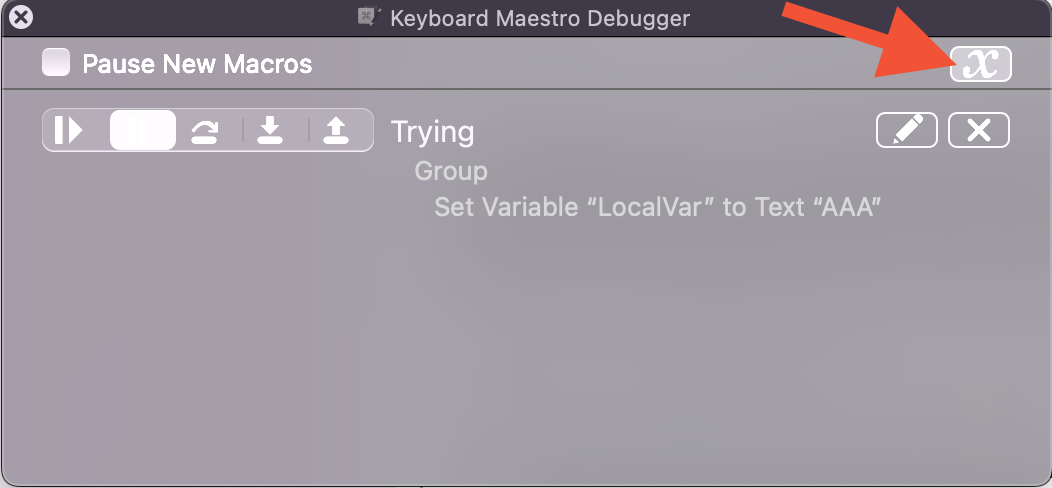
When you click on it, all the variables (both local and global) that have been accessed in the running macro at least once will become visible in the Debugger, like this:

You can resize this window, but it does have its limits.

The Execute a Shell Script action has the same options as the Display Text action previously discussed, but it allows for variables to be manipulated before being displayed, using shell commands. Although there are hundreds of possible shell commands, perhaps this one is illustrative of what can be done:

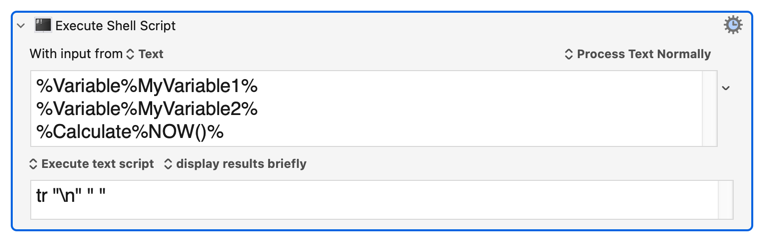
The "tr" command, above, removes all newlines and replaces them with spaces. This can be useful when trying to squeeze as much data as possible into the pop-up window that this command produces. Sometimes when I want to squeeze as much data as possible into that notification, I also strip out all vowels. Like this:

When you do this, you can squeeze a lot more information into that popup. Mind you, you're missing the vowels, but I've used this and it has worked for my debugging purposes.

In addition to displaying messages on your Mac's screen, you can also send messages to your iPhone or Apple Watch if you are away from home. To do that, this is probably the preferred method:

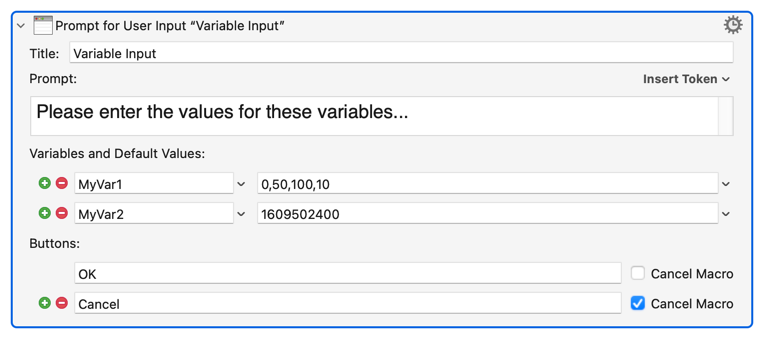
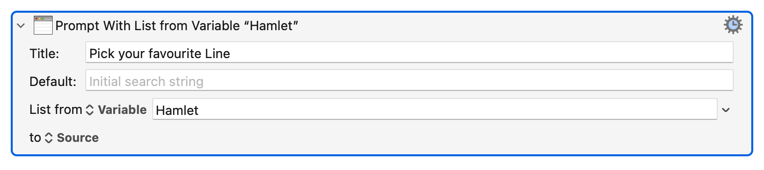
The Prompt for User Input action also works a lot like the Alert action, and has options to customize the way variables are displayed. It even has a mechanism to allow users to modify the variables (I won't explain that here.) Although it looks like it supports variables that are only a single line in length, it actually supports multi-line variables if you are sneaky and smart. And it has some very interesting options for visual access, like a slider bar for your variables. Here is the action, followed by how it looks:

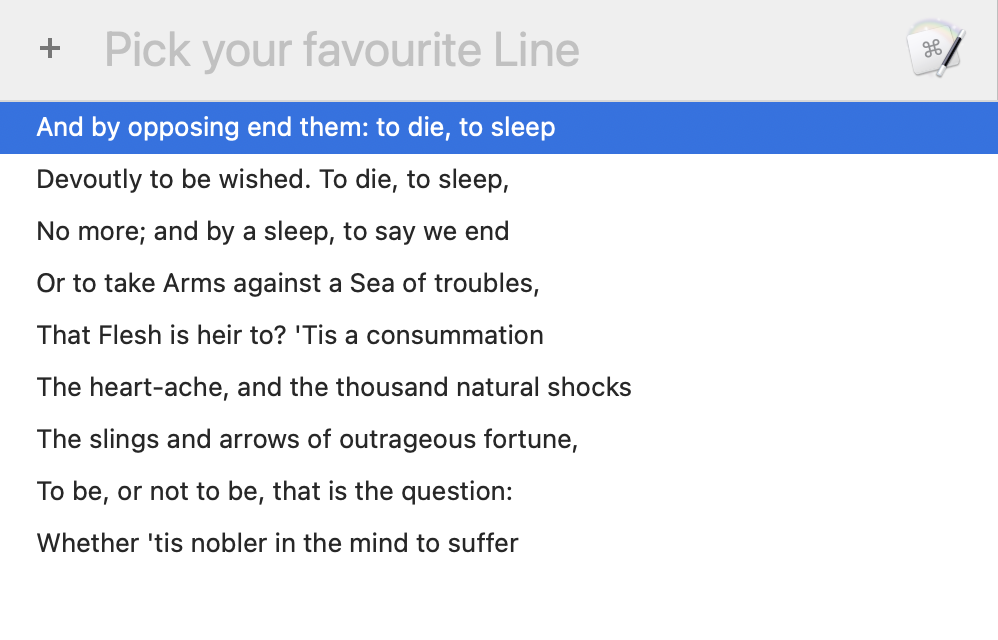
For a multi-line variable, you may want to consider this action for its unique flavor. This action is designed for input but it can be used for output. Here's an example of the action followed by its display: (The main problem is that it displays the lines in alphabetical order, but sometimes that's perfectly acceptable.)

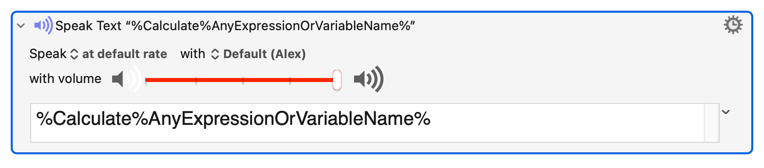
Sometimes you may want to get your program to speak the values of variables or calculations. That can be done like this:

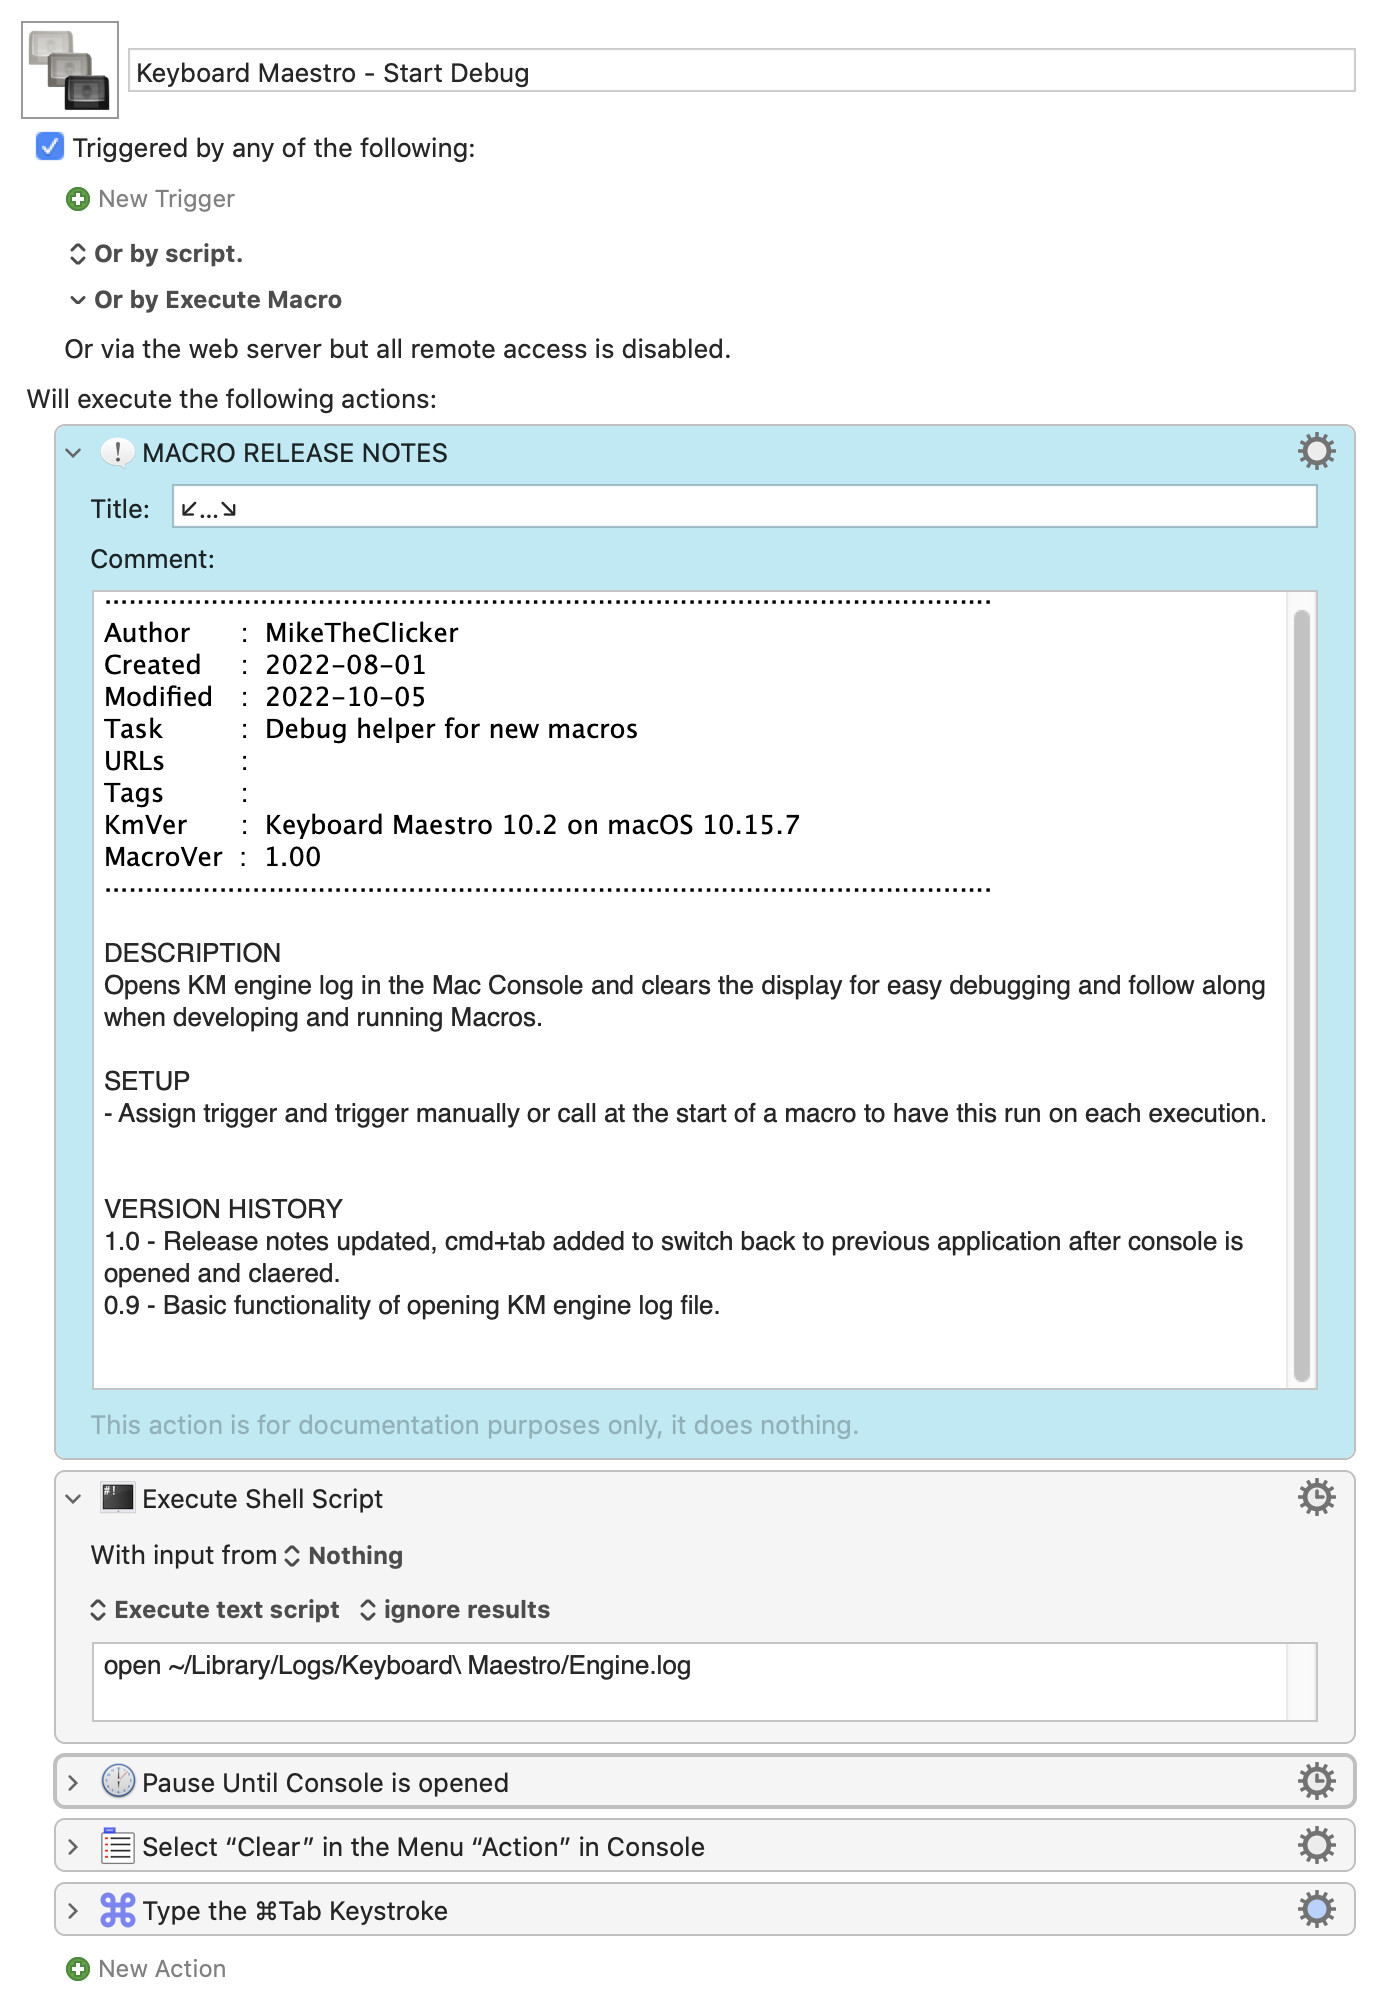
You can also write your variables or expressions into the KM Engine log file, like this:

This isn't a complete list. There's also the Custom HTML Prompt action, but that's a really big one that would take dozens of pages to explain well.

Let me also add a link to a utility that lets you inspect variables (including dictionaries, which is something I haven't discussed in this post.)

So that's all for today. I'll append to this post if I come up with other ideas.

14 Likes

Very clear and useful article @Sleepy. I will make a bookmark to this page. Thanks.

Wow @Sleepy this is a really well written tutorial. I shudder to think how long it took you to write it up. :sweat_smile: Thanks for sharing!

1 Like

Thanks for the compliments, friends. I wrote it up in one sitting. I can't remember how long it took, but it was pretty fast.

2 Likes

Don't forget my Variable Inspector Prompt.

3 Likes

Sorry for forgetting. I can probably append that when I get back from my imminent appointment.

1 Like

I don't know if anyone's already posted anything similar, but I've found this handy.

Setup: Save a Display Text in Window action to your favourites if you haven't already. Change the purple action in this macro to select it from the Menu.

Use: Click in an action's variable field then trigger this macro. It will insert the Display Text in Window below the currently selected action, with the variable entered for you.

Insert "Display Variable..." Action.kmmacros (34 KB)

Macro screenshot (click to expand/collapse)

2 Likes

Hey Neil,

Great idea.

Here's my take:

Insert "Display Variable..." Action v1.01.kmmacros (14 KB)

Macro-Image

Keyboard Maestro Export

2 Likes

Stealing shamelessly from @noisneil and @ccstone, I'll contribute my spin...


PURPOSE

Used during macro editing, this macro will add a group action to display a macro variable. The specific group action added depends on the the state of the shift key (⇧) when the macro is triggered:

⇧ up : Display Text (in window)

⇧ dwn: Prompt for User Input

The first form (⇧ up) is useful in a target macro when one prefers to display the value of a variable but immediately continue macro execution.

The second form (⇧ up down) is useful in a target macro when one prefers to pause a macro and view the value of a variable. After reviewing, the macro can be resumed or canceled.

Note that the text cursor must be properly placed before this macro is triggered. For example, with the Set Variable to Text action or the Set Variable to Calculation action, the text cursor must be placed in the first field of the action, i.e., the field labeled Set variable.

Once the text cursor is properly placed and this macro is triggered, it will insert the new group action immediately below the action that includes the cursor. The inserted group can then be optionally moved manually.

MACRO SETUP

Before triggering this macro for the first time, complete the SETUP STEPS detailed within the macro.

ACKNOWLEDGEMENTS

In a Keyboard Maestro forum thread started by @Sleepy, Various Methods for Displaying KM Variables and Data, @noisneil first suggested this clever technique; @ccstone subsequently contributed his take on the idea. This macro builds off the ideas from both.

TESTED WITH

• Keyboard Maestro v10.2
• Ventura Version 13.0 Beta (22A5342f)/MacBookPro16,1
• Mojave 10.14.16/Macmini6,2
• High Sierra 10.13.6/iMac11,1445

VERSION HISTORY

1.0 - Initial version

1.1 - Changed the Title of the groups to use [Debug] in the name.

1.2
a) Changed name from Insert ⇨****Actions to Display a Macro Variable to Insert Actions to Display a Macro Variable.
b) Changed hot key triggers and changed alternate modifier from ⌥ to ⇧.
c) Removed insered tabs before Display Text dialog
d) Change the vertical bar to a consistent unicode character (⏐).

2.0
a) Added an alternate output format that works better if a variable is a text list. This format is inserted if the trigger includes ⌥.
b) For Display Text action, change unicode character (⏐) to [ and ]. This is consistent with syntax used in Augment or Filter Text.


DOWNLOAD Macro File:
Insert⇨Actions to Display a Macro Variable.kmmacros (38 KB)
Note: This macro was uploaded in a DISABLED state. It must be ENABLED before it can be run. If it does not trigger, the macro group might also need to be ENABLED.

Macro-image

2 Likes

@ccstone Much neater way of adding the variable name. Lovely stuff. What's the purpose of deleting the past clipboard? Is it intended to retrieve whatever was previously copied? I ask because I copy to the clipboard in tons of macros and never add this at the end; maybe I should!

@_jims I like the prompt idea! Very clever! I like the icon too. I watched the new Batman film the other day, so I took the liberty...

?.png.zip (119.3 KB)

image

1 Like

Yes, this is a good thing to do so that your latest clipboard entry is whatever it was before the Macro started. For this purpose I have made a Favorite Action called "Clean Up System Clipboard" to put at the end of my Macros which looks like this (the default deletes the past two clipboards but easy to change the number once inserted to delete however many are needed to get back to previous state).

image

2 Likes

Good to know. I've made one and added a disabled pause action before the clipboard delete, to remind me that a pause might be necessary. This is because I just added your action to some macros whose final step is a paste, and they failed to function because the clipboard was deleted before the paste completed. Just something to be aware of.

2 Likes

Yes, good idea.

@Sleepy just adding my voice to the choir of thanks! This will come very handy!

I'm currently in fresh OSX install hell...

I've set up KM, and now I find that my Display Variable macro isn't working because it moves on before the Insert Text by Typing action has finished. Does anyone know of a way to ensure that the next action doesn't interrupt typing? I can set a pause of course, but it would be nice to know if there's a way that doesn't rely on set times.

Hi @noisneil - looks like the original version that you have at the link above inserts the text by pasting rather than typing and you do have a pause after it.

1 Like

Ah yeah. Good catch. Think I changed it so I could avoid having to clean the clipboard. This is something I've come across before though so if you do know of a way to wait until typing is done, so let me know. :+1:t3:

My humble contribution. Pasting is faster than typing but you have to clean up the clipboard, so I made a "subroutine" to do it all. (Started out before subroutines were truly supported, so this is kind of a hybrid)

1 Like

I've modified Insert⇨Actions to Display a Macro Variable to Version 2.0. See above for details.

These are great suggestions and tips for newbies like myself. Thanks for sharing these. To share my own process, I like to utilize the log action liberally as I develop my macros. This has the added benefit of being able to follow along with the progress as it is running for long tasks. I put together a start debug macro that I call at the top of my more complex macros that opens the KM engine log file in the Mac console app and then clears the console display.

Macro Screenshot

Keyboard Maestro - Start Debug.kmmacros (7.4 KB)

1 Like