Howdy folks, I'm writing this tutorial to help new(er) users understand the advantages/disadvantages to using the Keyboard Maestro native Stream Deck plugin versus the KMLink Plugin (now available directly in the Stream Deck app).
The KMLink is very handy when you do not need to update the title or icon via a Keyboard Maestro action. It is very simple to setup and is not dependent on button location, meaning it can be moved around with zero consequences.
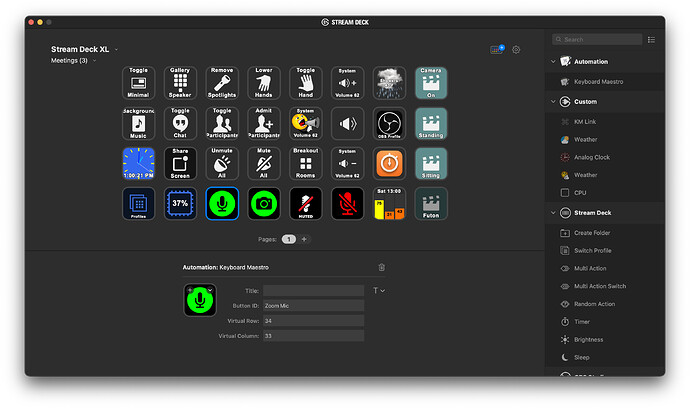
The Keyboard Maestro native plugin requires a little more setup (typically assigning a virtual column and row, as well as a button ID), but has the unique advantage of allowing KM to communicate back to the button, thus being able to change it's icon and/or title.
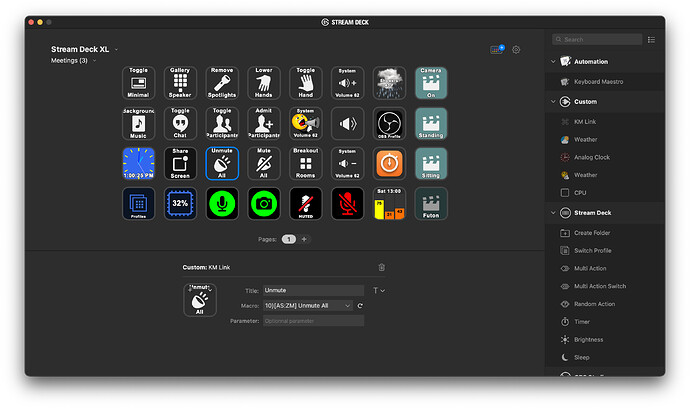
To give you an example of how I use both plugins, consider these screenshots of my Zoom profile (or page).
The first screenshot (KM native plugin), shows how I have assigned a Button ID, Virtual Row and Virtual Column to the button. This particular button is for Zoom's microphone. The Button ID allows KM to update the icon as well as the title from within an action. I have it set up to change the color to red when the mic is off, and green when it is on (as in the screenshot). The virtual row and column is used so KM can identify which button is being pressed. Each button should have a unique one to avoid conflict palettes. My naming convention consists of giving a unique number to each page (Zoom page being 3), and then combining that number with the button's position on the SD's layout to come up with row 34, column 33. Again, 3 for my Zoom page, 4 because it's the 4th row down, 3 because it's the 3rd column over. This means that no matter how many pages (or profiles) I have, I will never run out of virtual row/column numbers, and it makes it easy to keep track of them. This is just my method; it doesn’t have to be yours, as long as you assign each button that makes use of the KM native plugin some sort of unique number.
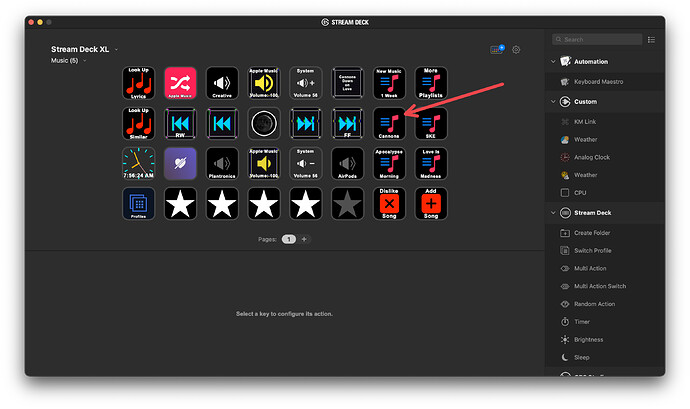
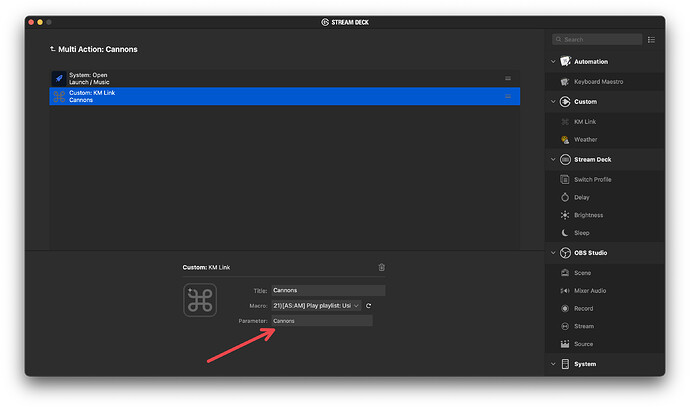
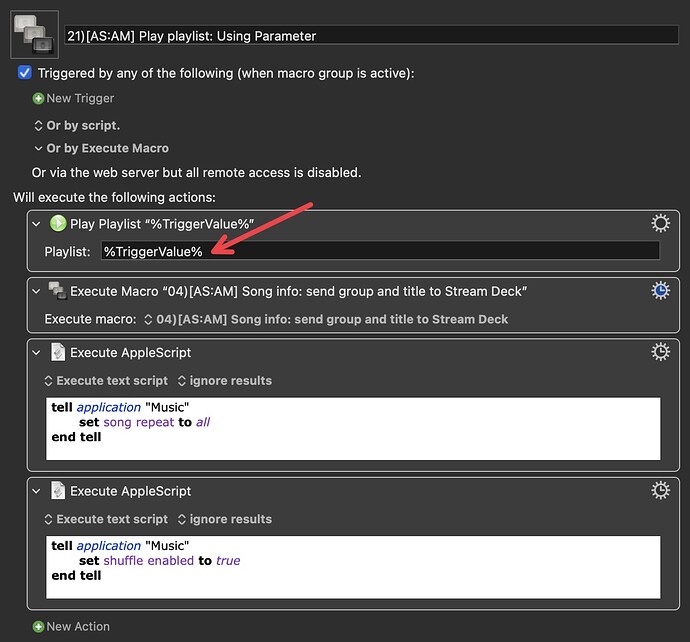
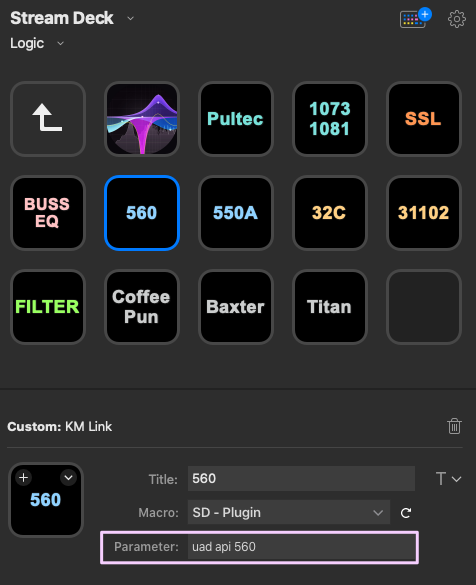
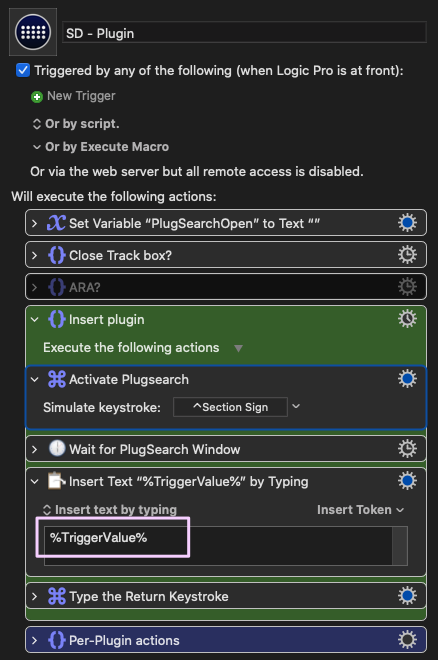
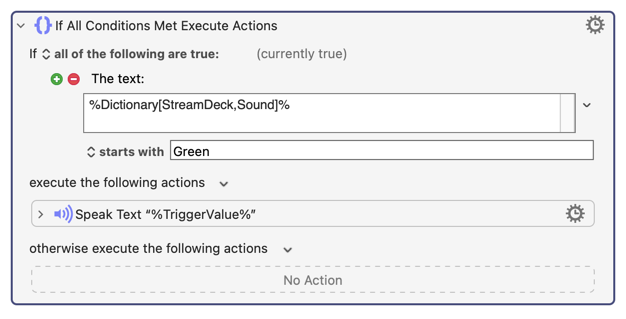
In the second screenshot (KMLink plugin), you can see that I have my 10)[AS:ZM] Unmute All macro selected. This can be selected/changed via the dropdown menu, which makes it very easy to change. Since it does not require a virtual row/column nor a button ID, it also does not matter where you place the button; it will always work. The disadvantage is that this method does not allow KM to communicate back to the button, therefore making it impossible to change it's icon/title. For simple macros, and where you do not need any kind of visual feedback on the SD itself, this probably does not matter. Another advantage to the KMLink plugin is the ability to pass a parameter to the KM macro, much like we can do from within KM. This allows you to execute different actions using a single macro all by changing the parameter. For an example see how I use these buttons on my Apple Music profile to play a specific playlist just by changing the parameter in the SD software.
For another example, see @noisneil's post here for some Logic Pro buttons.
So what does this all mean? TL;DR time... if you want a simple button and do not need visual feedback on the SD itself, or you want to pass a parameter to the macro, use KMLink. If you want a button that allows KM to change it's icon and/or title (and don't need to pass a parameter), use the KM native plugin.
One more note on the KM native plugin... if you want to change the icon/title via KM... you CANNOT manually set either of those items from the SD software. They must be left blank (title) and default (icon), otherwise the KM action will not update them. Keep this in mind if you ever set them manually and then later on decide to change them via KM action(s).
Hopefully this quick tutorial helps, and if anybody has any questions on using Stream Deck with Keyboard Maestro, feel free to reach out to me or (hopefully he won't mind me tagging him here haha) @noisneil who also works quite a bit with SD and is knowledgeable about it and whom I have spoken with a number of times about it.
-Chris
